Initial Window Installation…

Well, the windows are in… sorta.

While it is technically possible to install door handles with the windows installed, it is much easier to do so with them out of the car so I had been waiting to install my door glass until Project Door Handles concluded.

With that fiasco out of the way, there was no more excuses to be had and it was time to install some glass.

I began by reviewing the definitive guide video on the subject from West Coast Classic Cougar:


After watching the video a couple of times, I was ready to begin. I started by laying out all the hardware bits and bobbles that needed to be installed:
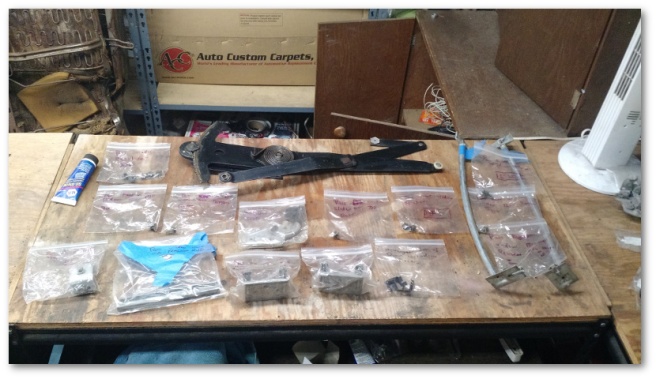
window pieces and parts

I then proceeded to experiment with a number of different installation steps on the passenger side window to find out what made the most sense to me. Once I was finished with the passenger side, I installed the driver’s side in exactly the steps outlined below.

NOTE: To avoid repeating myself, I’m going to omit the parts of the process where I lubricate everything I install. Just insert that step yourself mentally after everything you see below and you’ll have an accurate step-by-step accounting of what I did.

I started by installing sound deadening material:
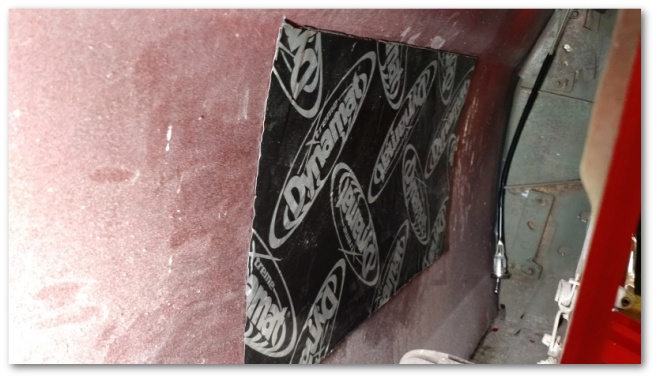
dynamat installed on outer door skin

My initial instinct was to do this last and cover the entire door, but after further research I’ve come to the understanding that would be overkill. Instead, I just cut out a reasonable section and installed it onto the outer door skin as shown above.

I then installed the window runs:
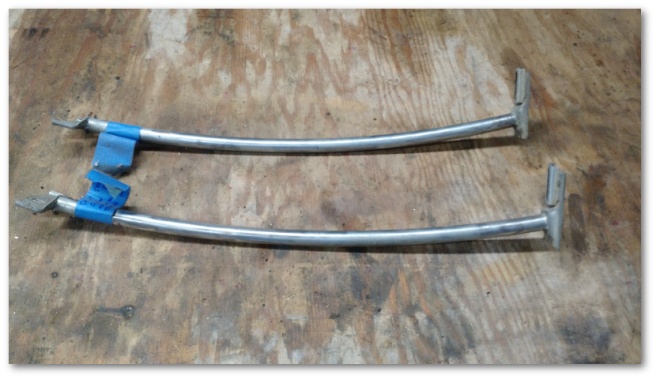
window runs

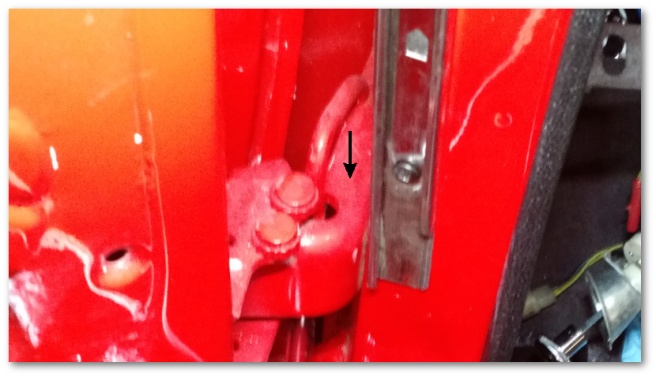
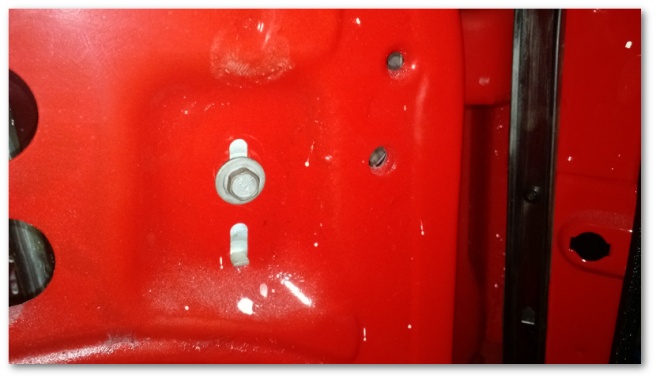
Rather unsurprisingly I immediately ran into a hiccup in that I could not figure out how they attached at the top of the door. I had a bolt and pictures showing that bolt fastening the runs to the door skin, but I couldn’t see how it was supposed to work with the mounting points I had where the runs attached:
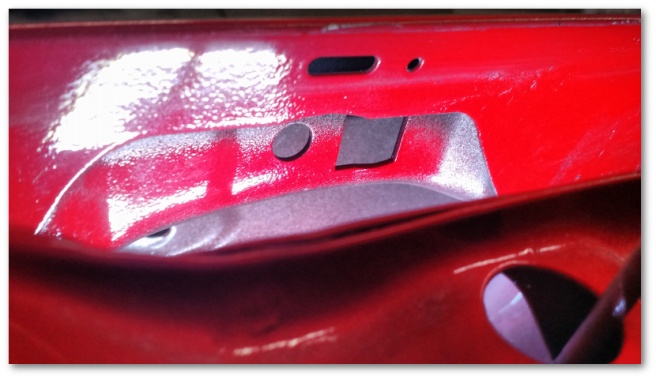
missing uclip for window guide

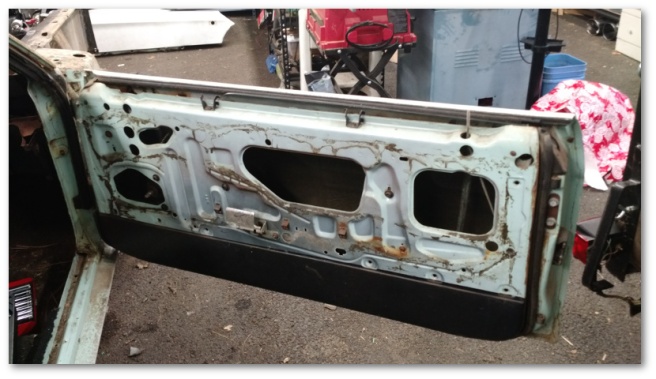
I spent upwards of 30 minutes searching on the web with little success before the solution dawned on me. If you recall, the only major rust area in the Mustang was in the doors:
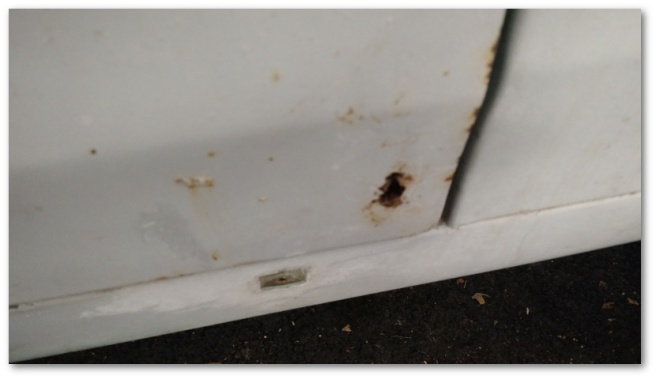
rust in drivers door skin

The rust in both doors required me to get new door skins installed during the painting process:

new-door-skins-on-doors

One of the unwritten rules about purchasing car parts is that you should never expect parts to come with the fasteners needed to attach them. In this case, the new door skins didn’t come with the U-Clips needed to attach the window runs. After that epiphany and a quick trip to the hardware store, the proper environment was available for the window runs to be installed:
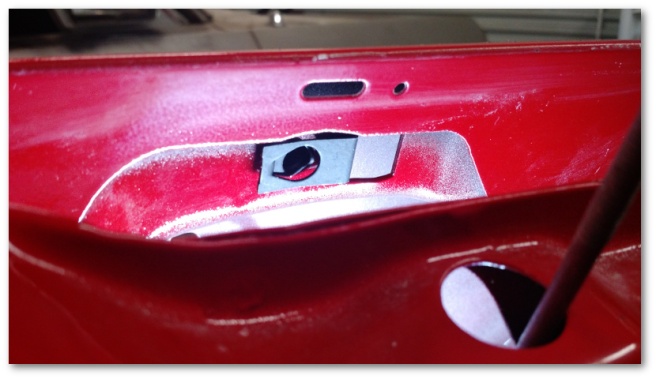
installed uclips for window guidewindow run installed

With the window runs installed, I then proceeded to what might be a controversial step – installing the outer belt line felt:

outer door glass beltline

This felt goes on the inner structure of the door skin outside of the window:

outer door glass beltline installed

This step might be controversial because it does make installing the window itself more difficult. However, after trying to install the belt line felt with the window installed on the passenger side I came to believe that it was easier dealing with the window installation difficulties than dealing with the tiny clearances available to install the felt once the window was installed.

The next step was also learned the hard way from my experiences on the passenger side. In order for the window to install once the belt line felt is installed, you need to lubricate this \___/ shaped opening in the door frame:
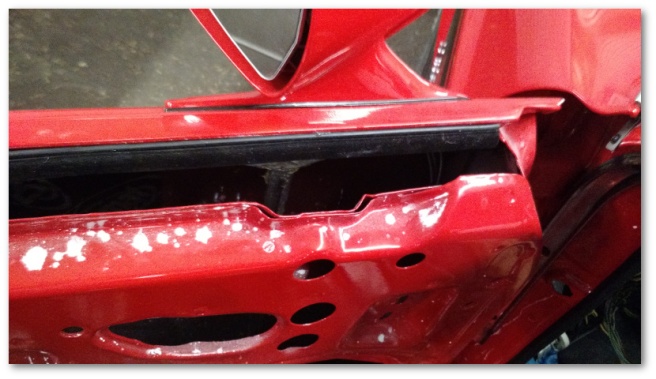
window insertion point

As you’ll see in a minute, that opening plays a critical role in the installation of the window.

For lubrication, I used the same product I used everywhere else in the window glass installation – a product from NAPA called Sil-Glyde:

sil-glide tube

With everything ready to go on the door, I got the window out and cleaned almost two years of dust off of it:
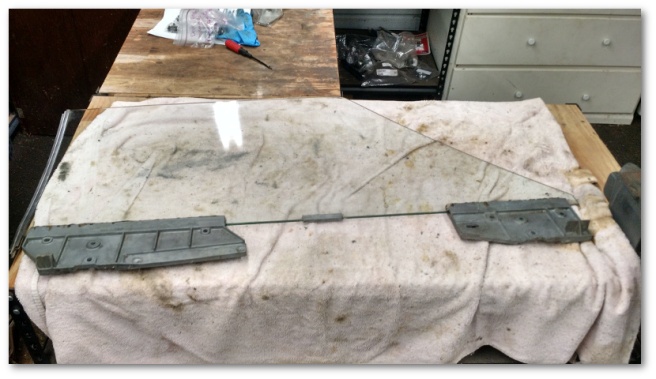
door glass ready for installation

If you’re following along at home, don’t bother to do a show-quality clean up job on the window at this time. You’ll be man-handling it during the installation process (much of the time with lubricant on your hands) and will end up gumming it all up again.

I decided to install the window weatherstripping at this time:

door glass weatherstrip

This weatherstrip attaches to the stainless steel channel at the back of the door window and seals the space between it and the quarter window. You may recall me procuring this strip from Craigslist almost two years ago for my passenger window. In the two years since I made my desperation Craigslist purchase, this part has been reproduced. However, the price of the reproduction part makes my Craigslist purchase seem like a bargain so I’m still glad I went that route.

With the window clean…ish and the weatherstripping installed, it was time to put it in the car. The video from West Coast Classic Cougar is great in every respect save for this part. The gentleman in the video has all sorts of problems installing the window due to the window brackets that are glued on, can’t be removed and are larger than the slot the window goes in.

As it turns out, there are a couple of alternative methods to installing the windows that work much better. The first is to install the window from the back of the door forward as shown in the following video:


I tried this technique, but quickly found that with the belt line felt installed there wasn’t nearly enough clearance to make it work. I then tried the following method described in this video:

I found that after lubricating the opening in the door frame that he slides the window brackets through I was able to fairly easily install the glass into the car.

With the window installed, I needed a way to support it while I attached everything to it. For that purpose, I turned to a very specialized tool of the trade called a scrap two by four:
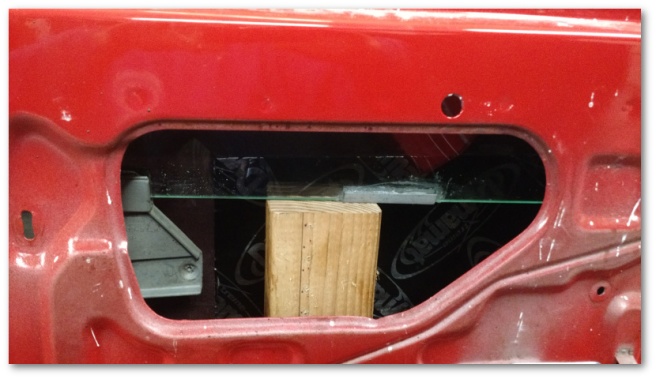
window being held up with piece of wood

I was rather surprised at how well the window balanced on the wood. It balanced so well in fact that I only needed one to support the entire window in a stable fashion.

The reason I needed to support the window was to expose these bolt holes in the window brackets:
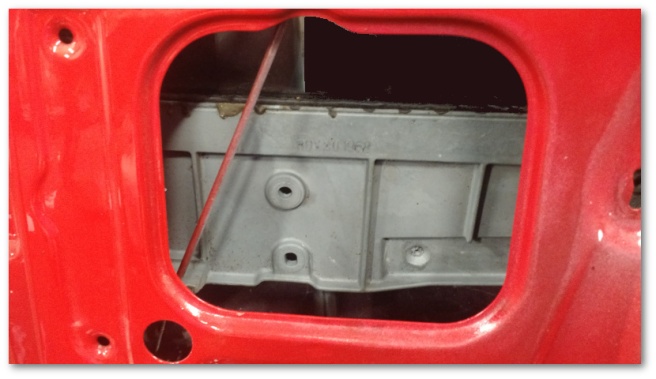
holes for window guides

These bolt holes are used to attach the window guides:
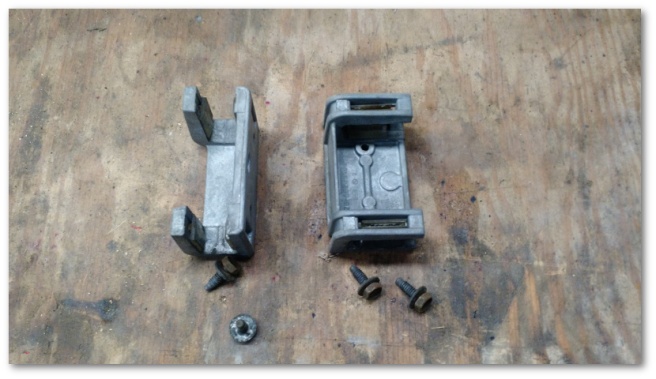
window guide

The window guides clamp over the window run and attach to the window bracket allowing the window to stay in place while rolling up and down. The open ends of the window guides face the rear of the car.

With the window guides in place, it was time to install the window drive arm bracket:
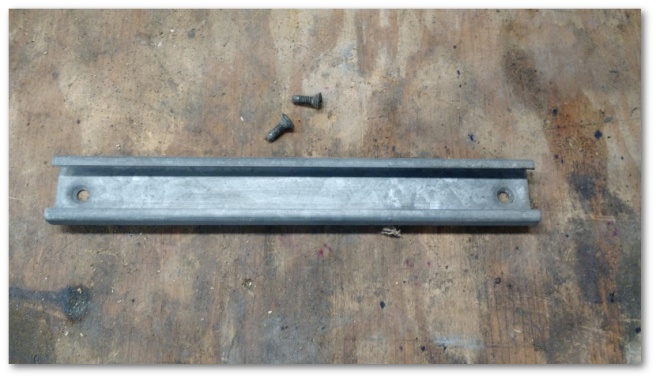
window drive arm bracket

The drive arm bracket installs on the window bracket closest to the rear of the car in the following slot:
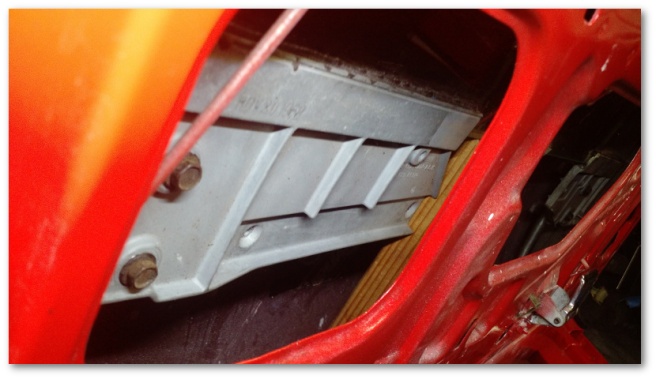
drive arm bracket attachment point

If you asked why this wasn’t installed outside of the car, you’d be asking a good question. The reason why this is installed inside the door is because the screws used to attach the drive arm bracket stick through the window bracket on the opposite side of the window stop catch:

drive arm bracket why installed inside car

Since these screws stick out on the opposite side of the window stop catch, they make the window bracket even wider and more difficult to install through the already tight passage in the door frame. It ends up being much easier to install these once the window is already in the door.

At that point, it was time to install the window regulator:
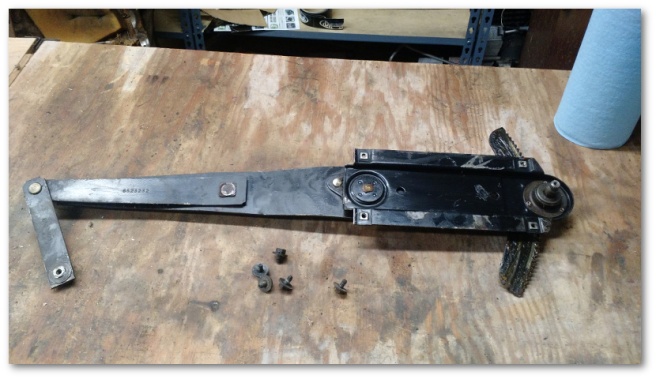
window regulator

This ended up being much easier than expected. I fished the window-crank end of the regulator through the big hole to the left of the door handle and pushed it all the way forward. This allowed me to get both ends inside the door. I then slid the regulator drive arm (the arm with the plastic wheel) into the drive arm bracket:

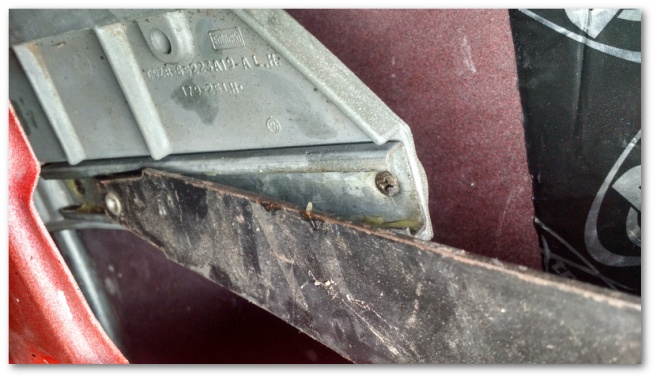
drive arm installed into bracket 1drive arm installed into bracket 2

After that, I attached the five regulator bolts to the door frame as shown below:
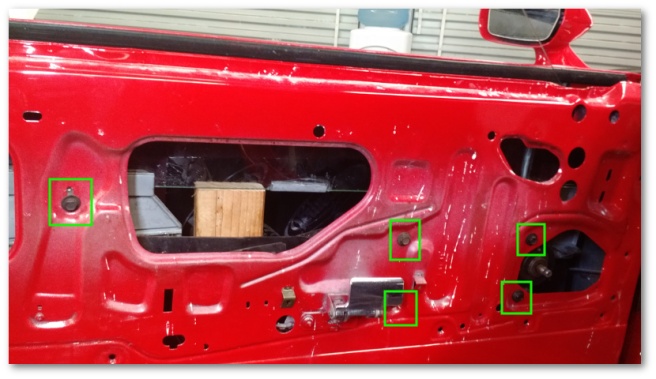
window regulator installed

I found that while attaching the bolts, it was sometimes advantageous to crank the window regulator a bit. This applied a torque to the regulator and helped line up a couple of bolt holes.

At this point, the regulator was almost fully attached. The only piece not attached was the arm that affixes to the front window bracket:
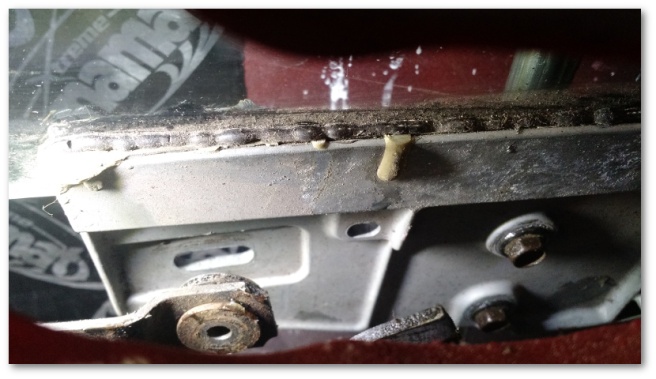
window bracket to regulator pivot mounting point

This arm attaches to the window bracket with what’s called a window bracket to regulator pivot fastener:
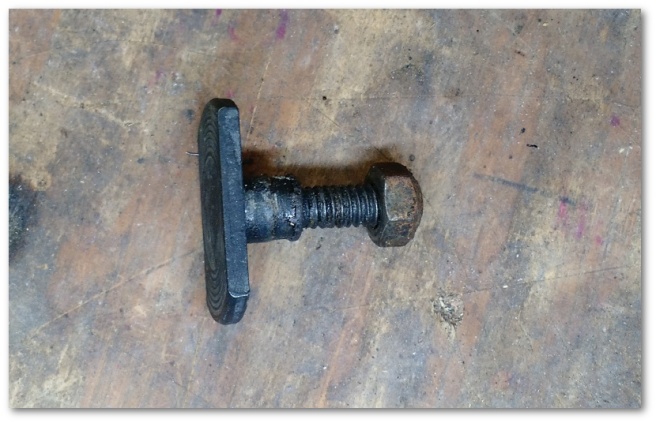
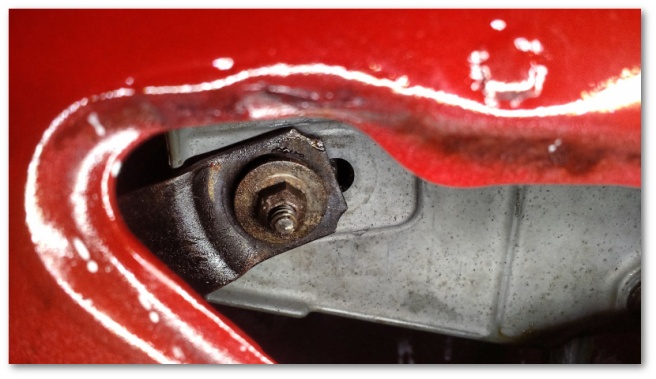
window bracket to regulator pivot

window bracket to regulator pivot installed

Note the rounded part of the nut faces out.

At this point, the window was able to roll up and down successfully. So I gave it a go and immediately found out how terribly (and unsurprisingly) aligned the window really was:
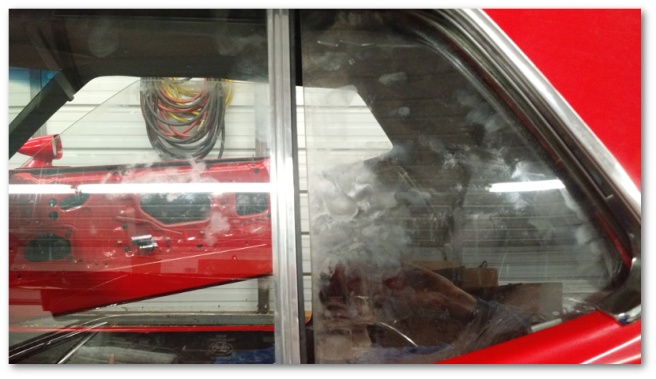
window glass mis-aligned

It was time to play with the window alignment to properly introduce the two glass pieces.

To begin with, I was able to grab the door window brackets and give them a heave backwards. To my satisfaction, the window moved back maybe a quarter of an inch and made a nice “thunk” sound as the window guides seated into the runs. Apparently, I had moved the window forward during my installation of the brackets and it needed a solid push backwards to get back into position.

This push back didn’t entirely solve the alignment problem though. To fully fix the issue, I needed to move the rear window forward to meet the door glass. This was fairly easy to do and the end result was rather nice for an initial fitment:
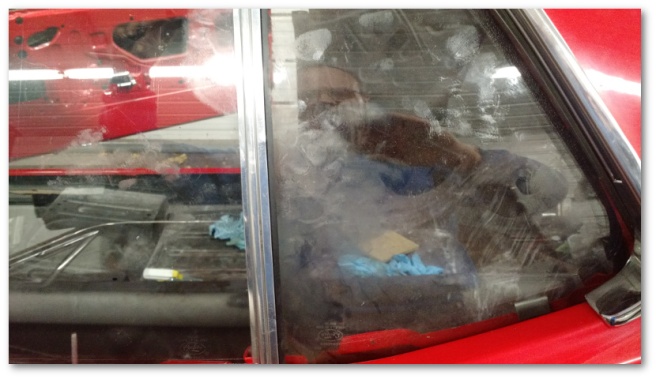
window glass alignment fixed

At that point, I was still rolling the window up and stopping manually at the top. The last part of the window installation was to install the window stops.

I started with the stop at the rear of the door:

rear window stop mounting point

The stop installs with the rubberized end pointing towards the front of the car like so:rear window stoprear window stop installed

The last window stop I installed was at the front of the door:
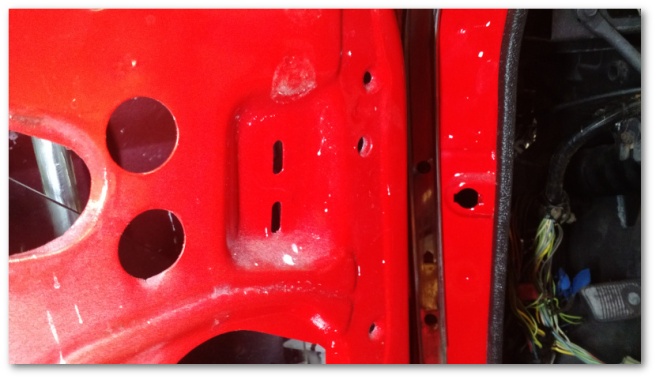
front window stop mounting pointfront window stop

This stop installs with the bolt in the top slot and the slider in the bottom.  front window stop installed
At that point, I thought I was done until I was cleaning up all the bags that had held the fasteners and ran into these little guys:
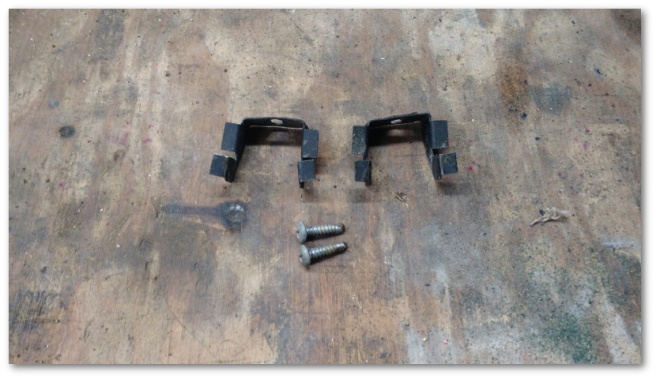
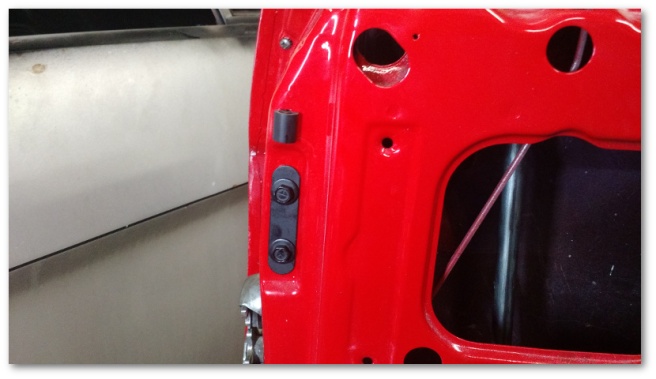
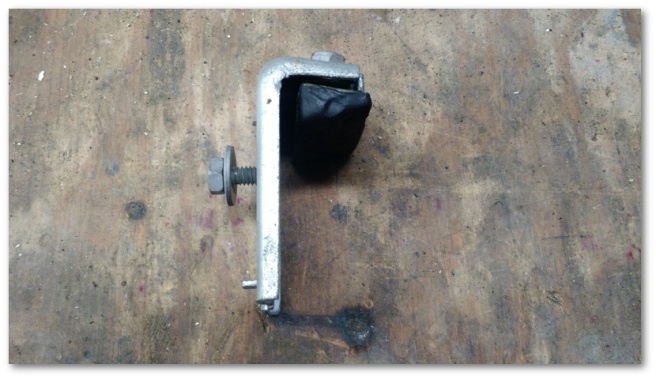
upper door trim support brackets

Honestly, I don’t know what they’re called or their exact purpose but after a consultation with the historical image archives it seems they install along the top of the inner door frame like this (with the flat parts facing the window and door frame) and play a role in supporting the upper door trim.mounting point for upper door trim support brackets
After all that, things are still not completely well in window land just yet. While the driver’s side window works great, the passenger window doesn’t roll up evenly. The back of the window starts first and seems to drag the front of the window along with it. Once the back is all the way rolled up, an uncomfortably large twist of the handle is required to finally get the front of the window to fully roll up.

I’ve swapped out everything I can with pieces from the driver’s side and haven’t been able to fix the problem. As of now, I believe the problem is a loose bushing in the window regulator. You can see that there’s a lot of slop in the video below:

The driver’s side has no such movement. I’m not a big fan of ordering parts that I’m not 100% sure I need, but in this case I felt my only option was to order a replacement window regulator in the hopes that it fixes the problem. It’ll be here sometime next week and we’ll see if that takes care of it.

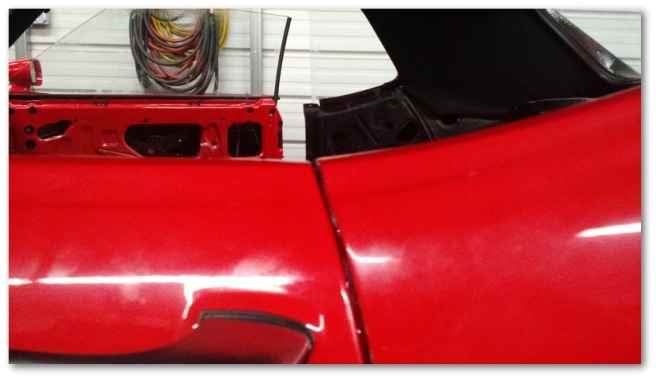
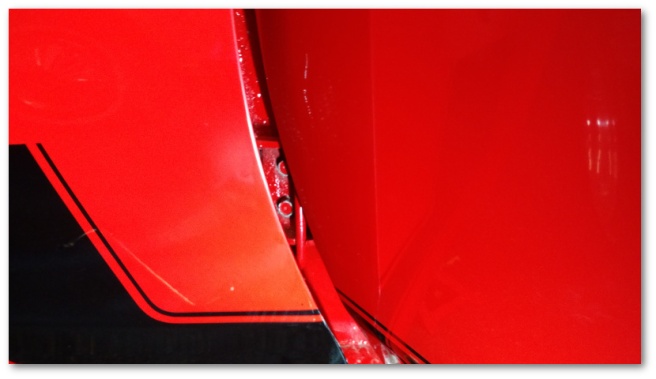
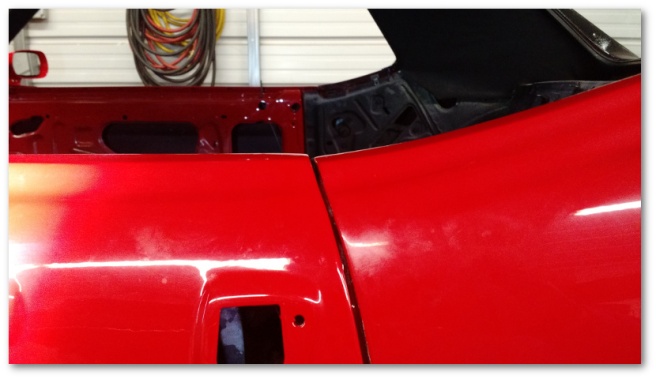
And finally, remember a while back when I aligned my door just a weee bit higher than my quarter panel with the theory that the weight of the window and its entourage would push it down slightly to make a perfect alignment?
adjusted driver door

Theory confirmed:

door alignment after window installation

The windows still need to be aligned for real, but that will require the weatherstripping to be installed first. I’m going to wait on doing that for a while until the weather warms up a bit and the rubber is a bit more malleable.

As for my next steps, I’m somewhat at a crossroads. On one hand, I would like to work on my shop to better organize my storage area. On the other hand, I don’t really *need* to do that right now and perhaps it would be a better idea to get the lower dash installed. On the other, other hand it’s still going to be cold next week and maybe staying inside by the fire will win the day.

Stay tuned to find out which hand wins…


And Now The Conclusion Of Project Door Handles…

As an engineer, I naturally like to categorize things. With the Mustang, I’ve taken to labeling tasks that take up significant amounts of time as “projects” such as Project Upholstery and Project Electrical System. When I went to replace my door handles, I never thought that process would qualify it for “project” status, but after spending well over a month attempting to get the right parts I suppose if the classification fits I might as well use it.

Project Door Handles started when I ordered a Scott Drake Exterior Door Handle Chrome Show Quality Kit for a 1969 Mustang. When I first received the parts, I discovered that something had fouled up somewhere and I couldn’t use either the pivots or the handles. While the parts were marked with the correct part number, they were most definitely not the right part.

I returned that package and was promptly sent door handles for a 65/66 Mustang instead of a 69. After returning those, I was sent another package with the correct 1969 part number but again containing the wrong parts.

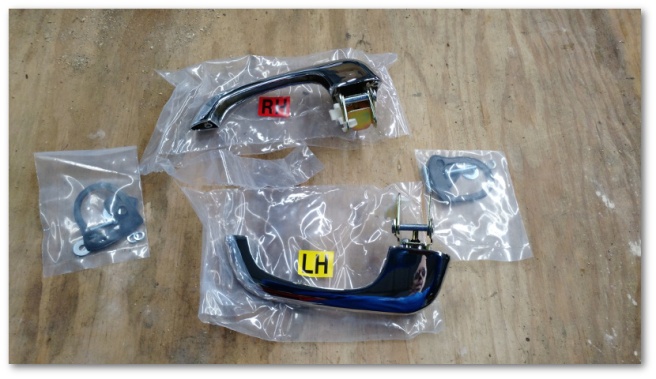
At that point, the customer service agent at CJ Pony Parts promised to “make it right” and sent me a generic brand door handle kit that was also supposed to fit 69 Mustangs at no charge:

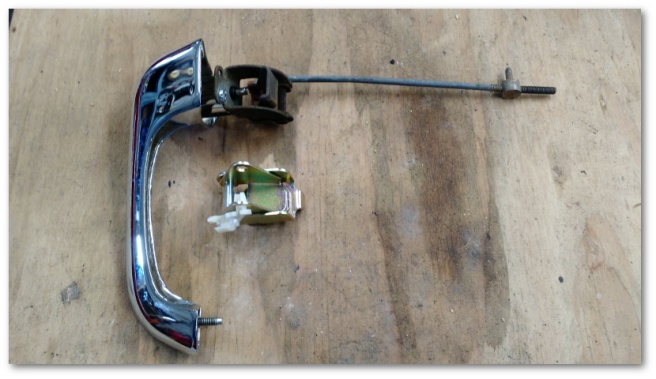
new door handles

You may recall my rather negatively opinionated nature on generic brand parts, but nevertheless I decided to give these handles their fair shake and get them installed.

To start with, the pivots on these door handles are designed for the 65/66 Mustangs. Unlike the door handles sent to me previously though, these door handles have a mounting point for the pivot that’s compatible with 69 Mustangs. Swapping them was as simple as removing a screw and changing them out:

new door handles with old pivots installed

With the pivot attached, I was able to easily install the new door handle on to the car. They looked great!

Then I tried to use it – and promptly took it right back off.

I don’t know who made these handles, but their manufacturing tolerances leave a lot to be desired. While the door handle did function to open the door, the button on the handle was made to fit so poorly that I refused to keep it on my car:

In contrast, here’s how solid the original door handle button is:


So, after seven shipments with four different kits from CJ Pony Parts I ended up with a free door handle kit that I refuse to use. There is one more option I could try, but after a month of dealing with door handles I was sick of it all and decided to just conclude Project Door Handles by installing my old ones and being done with it for the time being.

With Project Door Handles finally resolved, it was time to move on to a couple of over spray issues with my paint job:

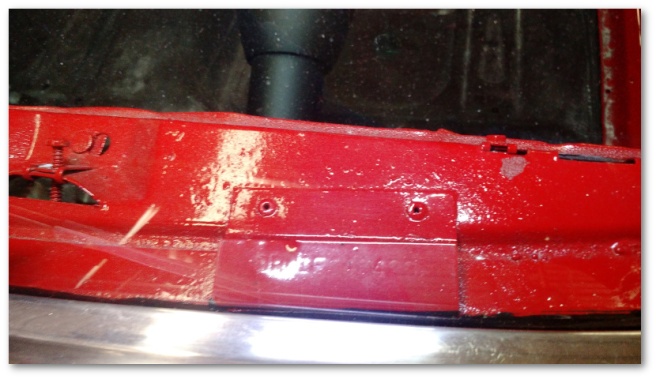
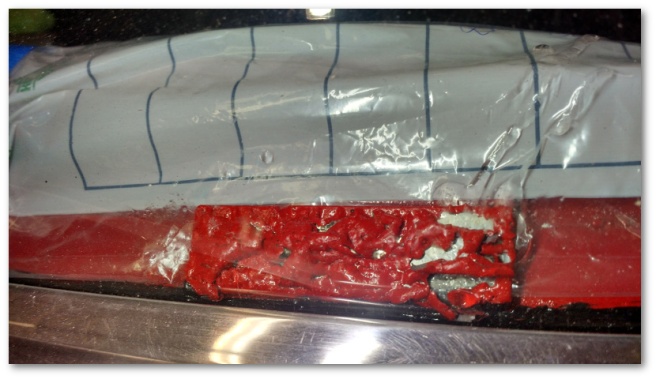
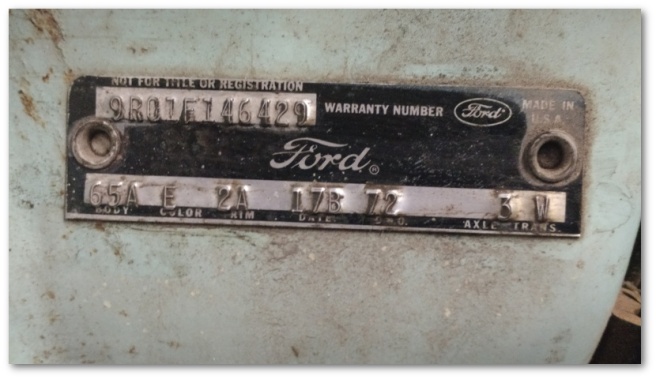
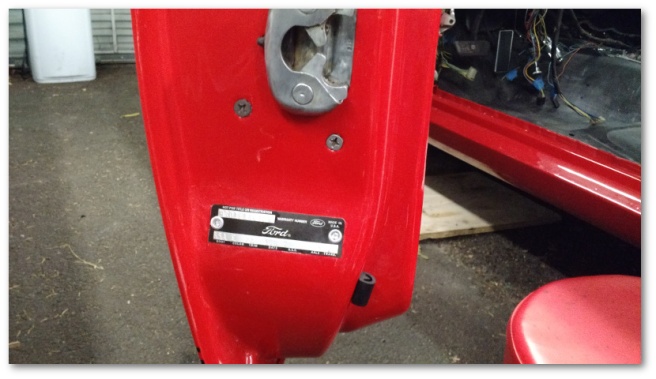
painted over vin tag on dashpainted over door tag

The top image is the official dashboard DMV VIN tag that is used for titling the vehicle. The bottom image is the door data plate used for identifying all sorts of useful information about the car.

The most pressing issue was the dashboard data plate. In the condition it was in, I’m not sure I’d be able to get a DMV title ever again since the VIN was largely invisible. Being directly under the window, there wasn’t a lot of room to get in there with anything that would scrape the paint off so I had to resort to more chemically-oriented measures.

The last time I used paint stripper, it didn’t go as well as I’d hoped. This time however things went much better:

paint remover cleaning up dash vin tag

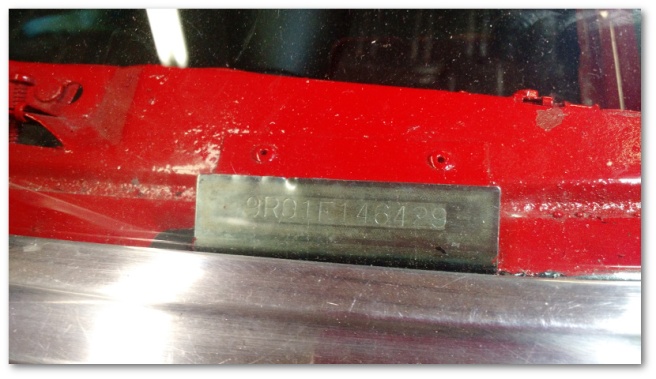
After about 10 minutes, I was able to use a plastic scraper to reveal a perfectly legible VIN tag:

cleaned up dash vin tag

While paint stripper was a viable option on the dashboard VIN tag, it wouldn’t work for the door tag for a couple of reasons:

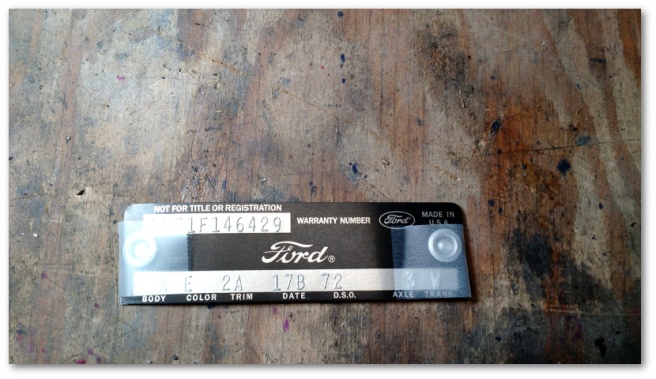
  • The underlying door tag wasn’t in great shape to begin with:
    data plate
  • There would be no way to contain the paint stripper to just the door tag and I’d end up ruining the paint on the door jam
  • The black you see on the original data plate was probably painted on and would also have been removed by the paint stripper

Thankfully (and by this point totally unsurprisingly) you can purchase brand-new door tags from a company called Marti Auto Works:

new door tag

All you have to do is carefully take the old door tag off and rivet on the new one like shown in the following video:

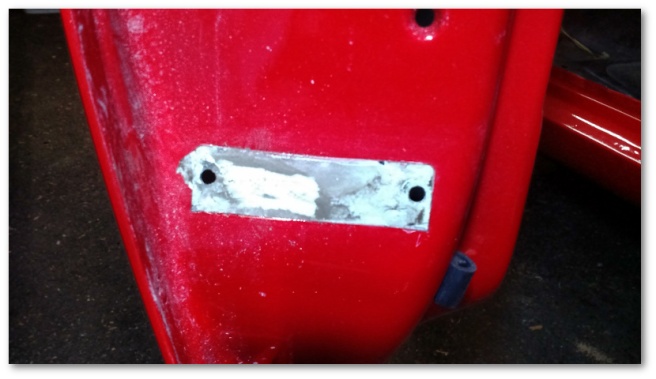
I say “carefully” because I was in a foul mood and as a result I wasn’t careful enough and ended up chipping off some paint outside of the area where the door tag lives:

poorly removed old door tag with paint chip

*)^*&*()&*%^$#$@#$#!!! My mood did not improve.

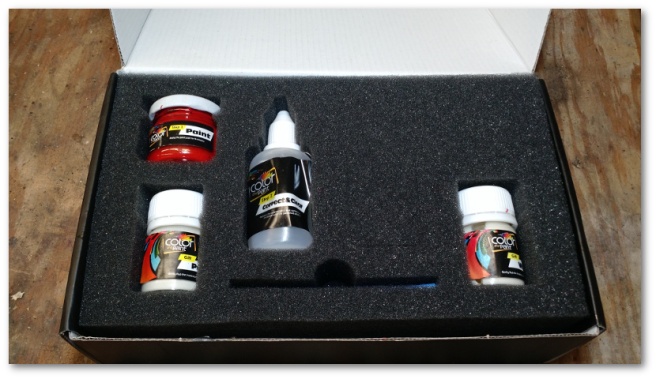
It was time to break out the touch up paint kit I purchased a while ago knowing that I would eventually foul something up and need it:

touch up paint

This paint kit was surprisingly good. After some sanding and a few coats of paint, I think the match is perfectly acceptable for a part of the car few will ever see without close inspection:

new door vin tag with touch up paint installed

With the over spray issues taken care of, it was time to begin working on the windows. I’ll write an entirely separate post for that…


Slight Adjustments…

I am *still* waiting for correct door handles to arrive. At this point, I’ve been shipped (and returned) three door handle kits. The first and third kits were labeled with the correct part number but were very much not the correct part. The second…well…wasn’t even for my year of Mustang. The representative at CJ Pony Parts was very understanding of my frustration last week and promised to make things right. Unfortunately, making things right involves ordering a different door handle kit that’s currently back ordered…./sigh

With no end to our long national nightmare of door handle problems in sight, I made some slight adjustments to the original plan for last weekend. And by “adjustments” I mean adjusting my driver’s side door:

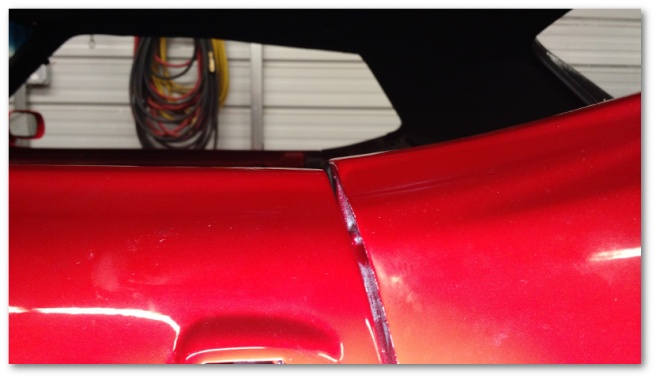
driver door misaligned

That shot shows a fairly minor mis-alignment in my driver’s side door as it meets the quarter panel on the top. It wasn’t horrible, but it was noticeable and my OCD would have triggered every time I got in the car.

Classic Mustang doors have quite a number of adjustments possible for them. Here’s a good video describing the basics:

In the video above, you can see that the gentleman doing the presentation has full access to the bolts holding the door on due to the fact that his fender is off.

Me…well, not so much:

difficult to get to door hinge bolts

With the fender on, you can just baaaarely see two of the three bolts that hold the hinge on. With very careful placement, you might be able to get a swivel socket on those two and get them loose while at the same time risking damage to your paint.

In addition to those paint-damage-risking bolts, there’s a third bolt holding the hinge on. The one you can’t see in the image above is located right about here:

difficult to get to door hinge bolts II

Needless to say, adjusting doors with the fenders on is rather a challenge. Unless you have the right tool for the job (tm) :

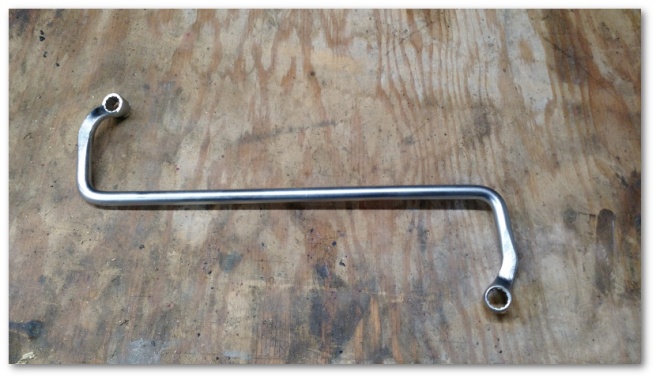
snap-on door hinge wrench half inch S9608B

That very oddly shaped tool is a Snap-On S9608-B door hinge wrench. Like my other esoteric tools of the trade, it was built for a very specific purpose – adjusting doors of classic cars while the fenders were still attached.

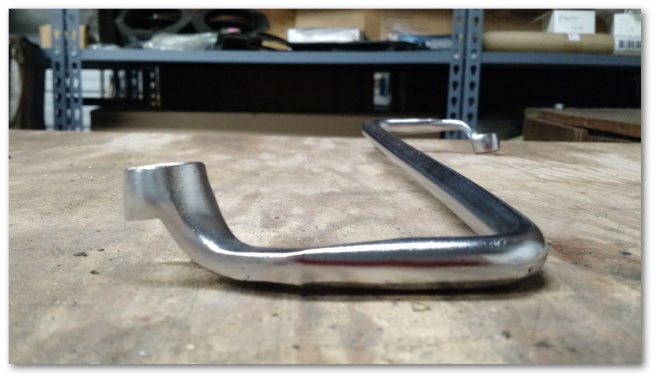
In addition to it’s weird shape, this tool also has a very deep well that allows it to seat against the door hinge bolts even though they’re buried inside the door hinge itself:

snap-on door hinge wrench half inch S9608B side view

What on earth does this tool look like when it’s in use? I’m glad you asked…

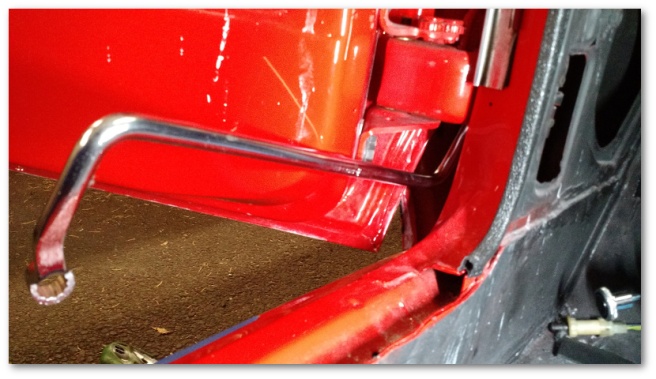
door hinge wrench in action

You can see that the shape of the tool allows it to go *under* the hinge, loop back into the valley where the bolt lies and then dive down and seat on the bolt – all while still giving the tool holder the leverage needed to tighten or loosen the bolt. Brilliant!

Sadly, they don’t make these wrenches any more so I had to resort to eBay to get mine. For the record, I think the fifty dollars I spent was well worth it since I was able to achieve the following in about 20 minutes of fiddling:

adjusted driver door

You’ll note that the door is now just a little high. That was done on purpose. I still need to install the window, window frame, regulator and other door goodies. Once this hardware is installed, I expect their combined weight to cause the door to drop slightly and result in a nice door/quarter alignment. If it doesn’t, well… I still have the wrench.

The rest of the day was spent under the car finishing up the installation of the speedometer cable and fixing the parking brake return spring.

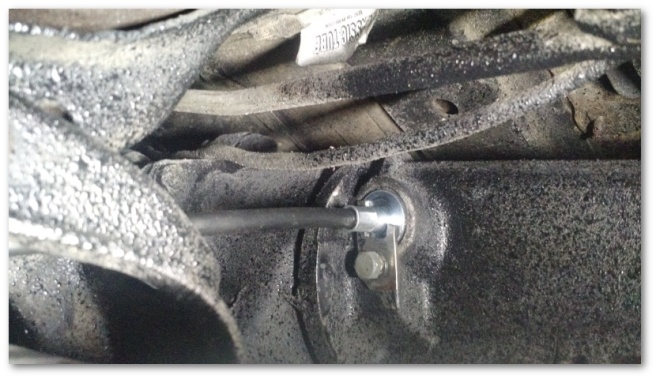
When last we left the speedometer cable, it was attached to the transmission with what I thought at the time was a broken retainer:

broken speedometer cable clip

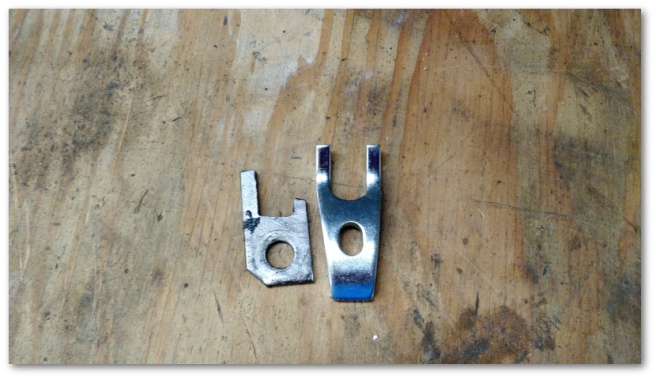
Upon receiving a new retainer and comparing it to my old one, I decided to update my opinion of the old part to “home made, broken retainer”:

old vs new speedometer cable retainer

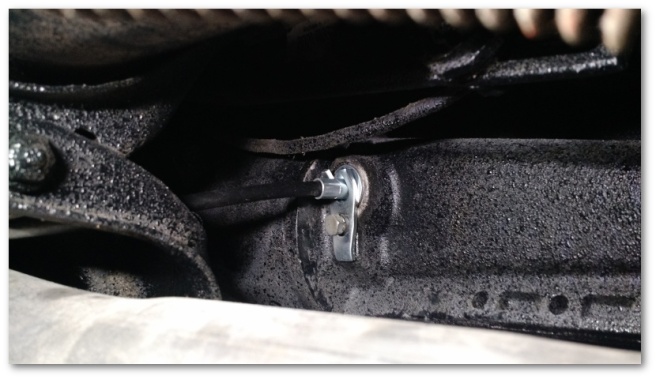
Home made or not, the old retainer is now in my excess parts bin and the new one is happily installed in its place:

speedometer cable retainer installed

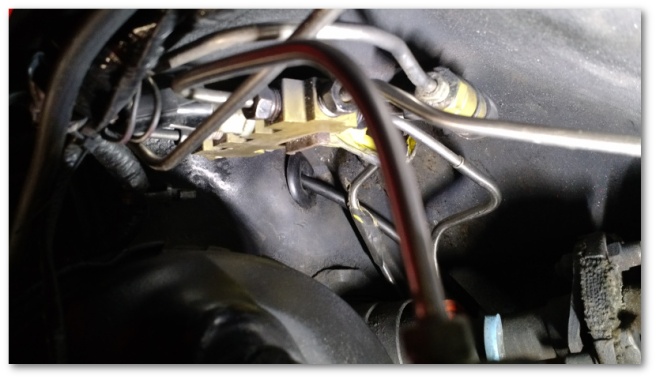
With the retainer in place, I felt safe in installing the firewall grommet for the speedometer cable as well:

speedometer cable grommet installed

With the installation of that grommet, the entire front of the car from the firewall forward is done done as far as I know. WooHoo!

The last item I worked on was the parking brake return spring. You may recall that it was in more than a few pieces and needed a little help:

old broken parking brake cable return spring

Naturally, new springs:

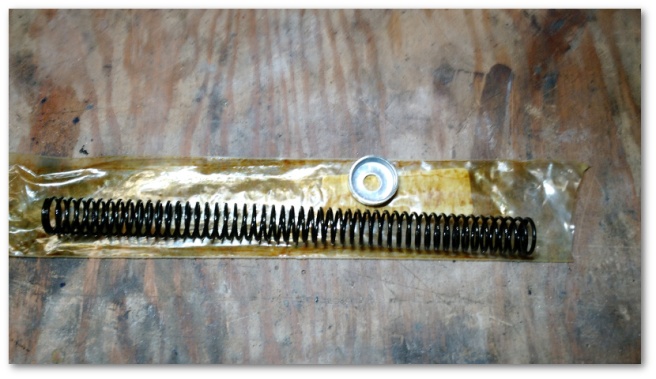
new parking brake cable return spring

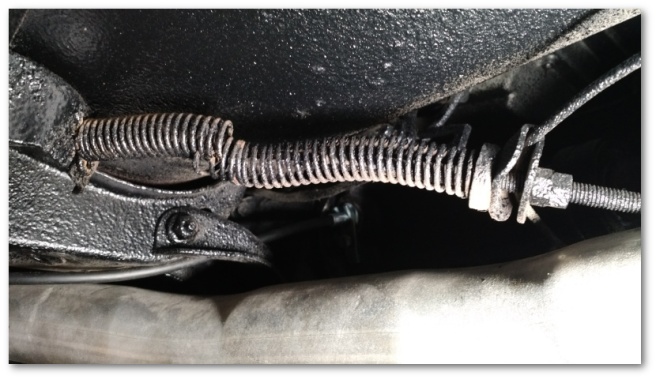
are only a few clicks (and 20 dollars or so) away. Installation was difficult only in the fact that the two adjusting nuts probably hadn’t moved in 50 years and I had to overcome rust and heaven knows how many layers of undercoating in order to get them off the cable.

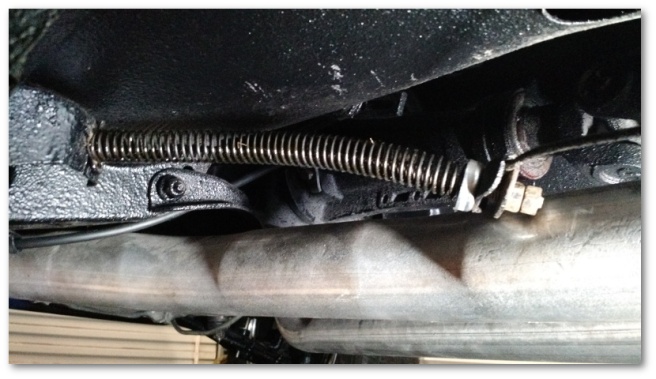
Eventually though, stubbornness won the day and the new spring was installed:

parking brake return spring installed but left loose

I deliberately left it un-tightened as a gift to future me when he installs the parking brake pedal assembly. Once the pedal is installed, I will adjust the cable on the bottom of the car by tightening the nuts down the same number of threads as they were originally. In theory, that should return my parking brake to working and adjusted order.

That was it for this week. Next week’s plan is to install the driver’s side door latch and lock as well as the door glass on both sides. I’m going to do this with or without new door handles as I need to get the door glass off of some shelving I’m planning on moving over my Christmas vacation as part of Shop 5.0.


Playing Doctor…

It’s amazing how similar cars work in comparison to human anatomy. Humans have hearts, brains and central nervous systems. Cars in comparison have similarly purposed engines, computers and wiring. In both instances, things can sometimes go a little wrong and require a little surgery to make right:

Last weekend, my Brother-in-Law and I played the role of doctors with Mystique as our patient. Mystique’s engine/heart wasn’t working and we needed to find out why and see if we could fix it.

If you recall, we tried playing doctor earlier in the year, without much success:

We also were unable to detect any evidence of spark being generated by the coil. If we would have had compression, I may have been willing to go get a new coil and/or debug further. However, with no spark and no compression time of death was called late Sunday afternoon.

One thing had been nagging me since we started my 69 Mustang for the first time after paint. During the process of getting the Mustang started, we were unable to detect any spark to her spark plugs until I realized we hadn’t attached the wiring harness that powers the coil. Without power to the coil, there can be no power to the spark plugs:

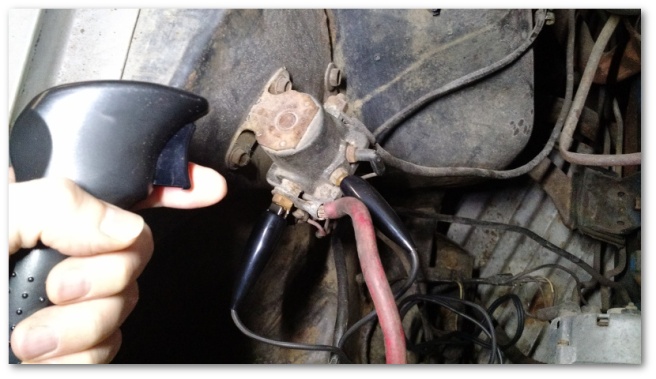
The technique my Brother-in-Law and I used last January was to hook up a switch to the starter solenoid:

starter solenoid bypass switch

When activated, this switch bypasses the keyed ignition switch and activates the starter. What I didn’t realize at the time was that while this technique provides power to the starter, it does not by itself provide power to the coil. Without power to the coil, there was no hope of Mystique ever starting.

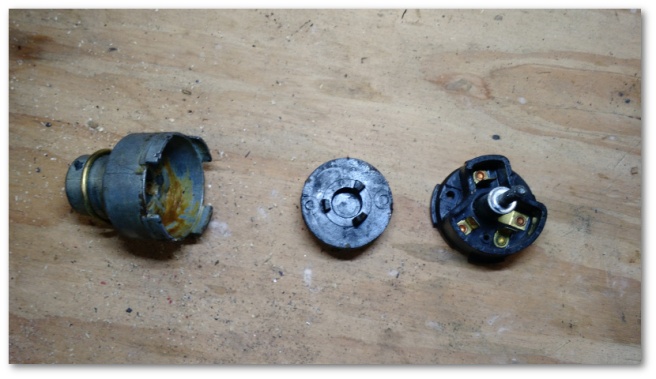
Why were we using a starter solenoid bypass switch in the first place instead of just using the key? Well, it turns out that Mystique’s ignition switch was rather spectacularly broken:

old ignition switch in pieces

At the time, I thought it would be easier to simply use a solenoid switch than replace the ignition switch since I didn’t know the condition of Mystique’s wiring and wanted to cut out as many variables as possible. It turns out that in doing so I cut a few too many variables out. Oh well…

As it turns out, replacing an ignition switch on a 1966 Mustang is pretty easy. The switch was available at my local AutoZone for less than 15 dollars. The installation was pretty easy as well as shown in the following video:

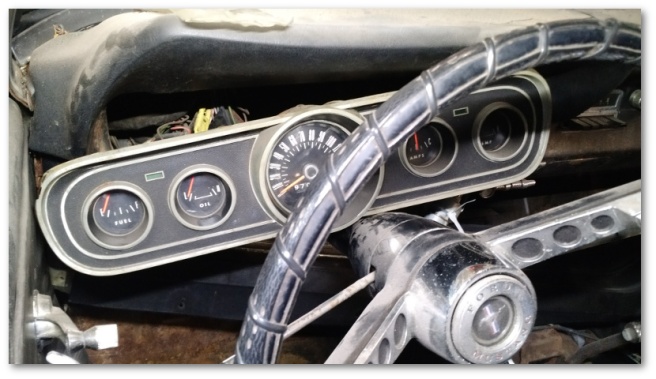
I did make one small change to the steps outlined in the video above. Rather than reach up under the dash, I decided to take the instrument cluster off. It was just a few screws and gave me much easier access to the switch:

instrument cluster removed

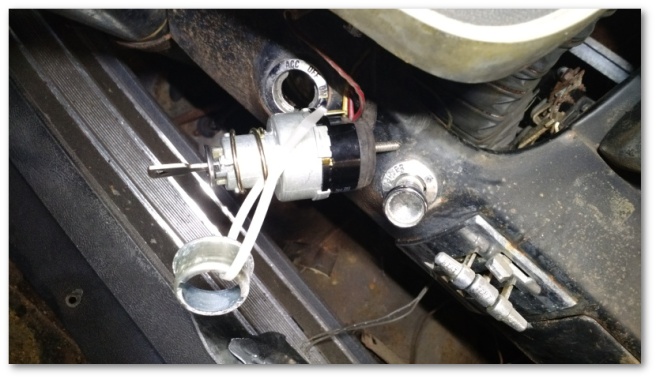
With the instrument cluster off, I pulled the remnants of the old switch out and plugged in the new one. I didn’t completely seat the new switch since I know I’ll be removing it again in the future. Instead I just zip tied the spacer to the spring and let it hang:

new ignition switch hooked up but not installed

With this in place, I turned the key to see what would happen. Rather to my surprise, a large portion of Mystique’s electronics responded:

As you can see, I have working (….sorta) turn signals, wipers and transmission gear indicator lights. I also had the ability to turn the engine over using the key.

Sadly, even though I could turn the engine over, we were still not detecting any spark. However, we could confirm that we were getting power to the coil so that narrowed down the problem to all of the electrical components from the coil onward.

These components were also available at my local AutoZone. We ended up purchasing a new coil, distributor cap, rotor, plug wires, condenser and set of points – essentially all the pieces required to give Mystique a tune up. After a couple of fits and starts, our surgery resulted in the detection of a heartbeat when Mystique’s engine was cranked:

Encouraged, we sprayed a little starting fluid into the carburetor just to see what would happen:

Holy Crap! That’s an engine that might actually start!

In the off chance that the engine actually did start, we pushed Mystique out of the shop to avoid killing ourselves with her exhaust and whatever else came out of her engine. We then hooked up her fuel pump to a gas can, turned the ignition switch to the ON position (which provides power to the coil), sprayed some more starter fluid into the carburetor and tried starting her again.

Have you ever noticed that sometimes when people wake up, they’re not in the best of moods? Sometimes cars have that same problem:

So yeah, Mystique got up on the wrong side of the bed and attacked my cameraman Brother-in-Law with a few projectiles thrown from her engine compartment before going back to bed.

But she got up!

For our next attempt, my Brother-in-Law decided to stand on the other side of the car (away from the direction of the radiator-fan-launched projectiles) and have me start the car using the key in the ON position (which provides power to the coil) and the solenoid switch.

At long last, our patient woke up – and stayed up:

A careful inspection of the video above will demonstrate a couple of interesting things:

  1. Mystique did indeed start and run for an extended period of time.
  2. It appears as though her carburetor is mal-adjusted and she runs at full throttle.
  3. I quickly realize that I hadn’t thought through what to do if she actually did start. The dark shadow you see across the frame is me running to shut her off using the key.
  4. My Brother-in-Law, still wounded from the previous start attempt, starts backing away from the engine on the off chance I don’t get to the key in time and it decides to explode.

Thankfully, Mystique’s engine didn’t explode. So naturally, we tried starting her again. This time without the assistance of starting fluid and using the ignition key:

Woohoo! Mystique is ALIVE! Surgery successful!

Of course, with all patients in conditions as critical as Mystique’s, additional surgeries will be required before full recovery is possible. In Mystique’s case, one such surgery will be to replace her core plugs which seem to not be able to do their job of holding in coolant:

We also discovered that Mystique has the wrong distributor. She’s a California car and is currently equipped with what’s called a Thermactor Emissions System. These systems required a different distributor than the ones used by Mustangs without the emissions system. The different distributors also require different rotors. Even though Mystique has the emissions equipment, her distributor required the non-Thermactor rotor.

Being able to start Mystique doesn’t really change any plans for her restoration. However, it’s a huge emotional hot damn inspiration that we were able to take something that had been declared dead and make it live again.