A long time ago, a certain Dark Lord expressed his enthusiasm regarding the events of the day:
Though Vader’s memorable day wasn’t quite memorable for the reasons he thought it would be, I have high hopes last Saturday will be remembered as the day I successfully welded my first piece of sheet metal on to Mystique.
Sure, I’ve done some welding on Mystique before.
I “fixed” the driver’s side wheel house not long after I got my welder:
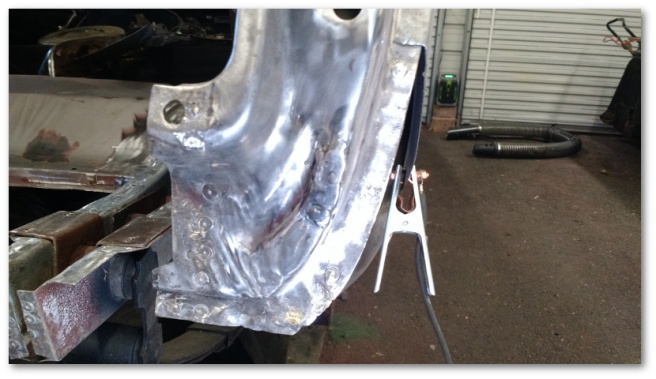
I also welded on a trunk floor drop off on the passenger side:
The latter work was eventually thrown out in favor of replacing the entire piece of sheet metal but it was good practice for when I need to weld the quarter panels on.
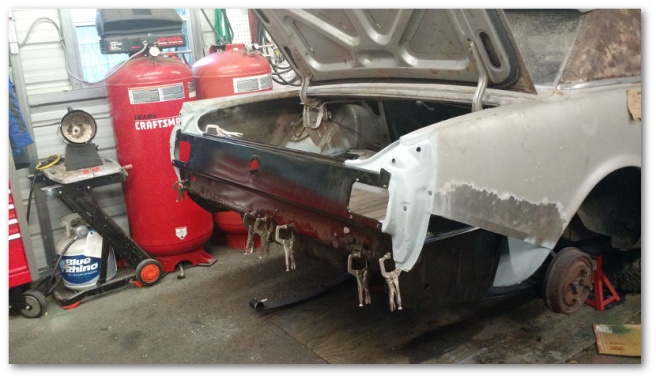
All of that work though was in places hidden from view and non-structural. Last weekend was different. Last weekend I welded in my driver’s side trunk floor.
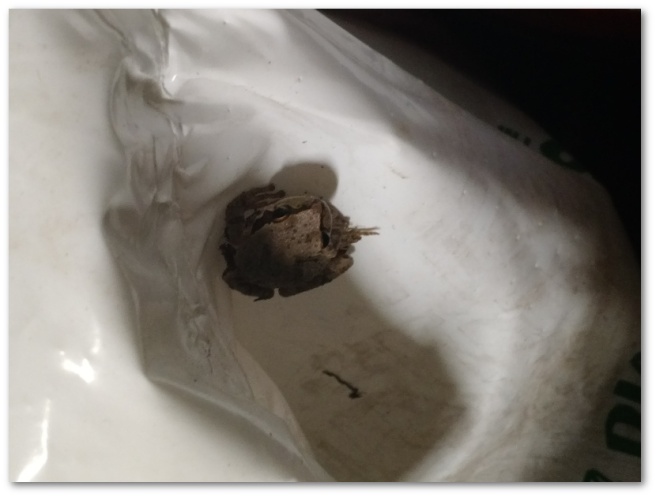
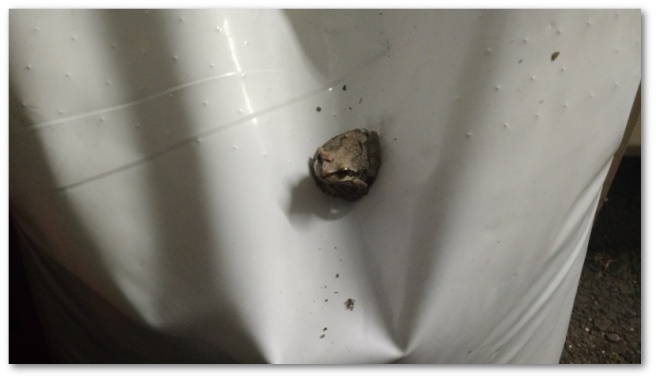
Of course, Shop Frog had a front row seat:
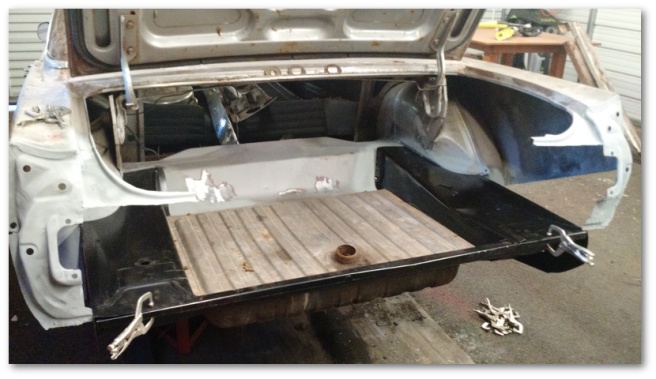
I started the day by replacing my old, smelly and scary gas tank with my shiny new one. The new one bolted in for the most part with little issue:
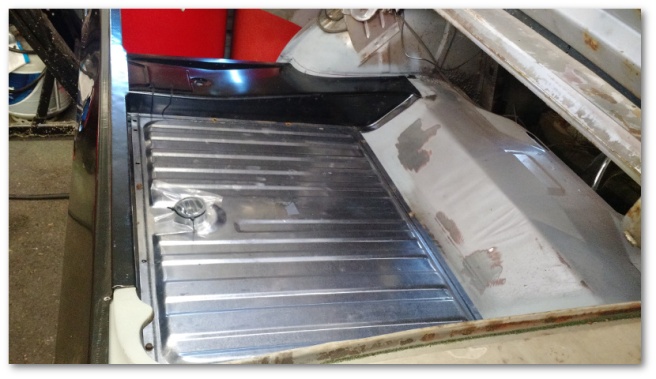
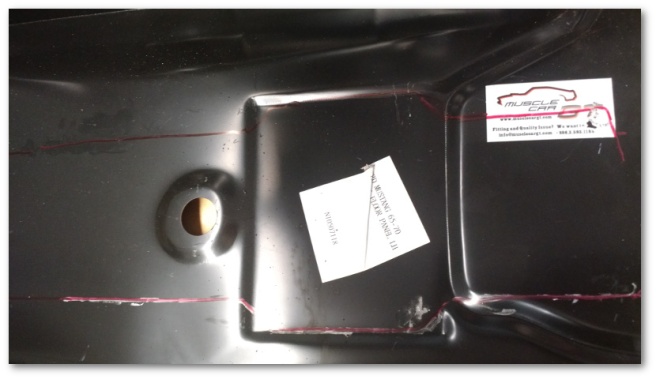
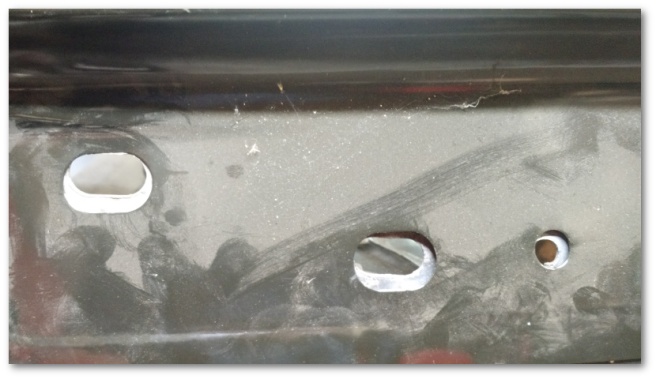
There’s one hole on the off-brand passenger trunk floor that doesn’t line up well, but with enough cajoling it can be made to work. Once I knew everything was lined up and fit into where it needed to be, I dropped under the car and traced out the frame rails on the driver’s trunk floor:
With the tracing complete, I started drilling holes. To explain why, a little manufacturing history is in order…
Originally, the trunk floor was welded to the frame rails using a process called spot welding. Spot welding uses two electrodes placed close to one another between two or more sheets of metal. When a current is passed between the two electrodes, it heats up the metal between them – welding them together. You can see an example of what this process looks like on a DIY scale in the video below:
Spot welding is great at the factory when you have specialized welders designed to weld specific panels. It wouldn’t have worked well in my case even if I had owned the welder above due to the tight confines of the frame rails and the frame rail length compared to the leads on the unit.
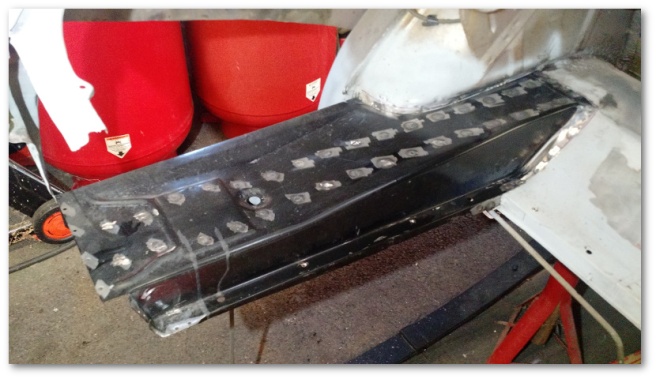
In the alternative, I used plug welds. Plug welds are where you expose the base metal through a hole in the top metal and “fill in” the hole with weld to bond the panels together.
The process looks like this:
In order to do plug welds, many many holes need to be made. In the end, my panel looked like Swiss Cheese:
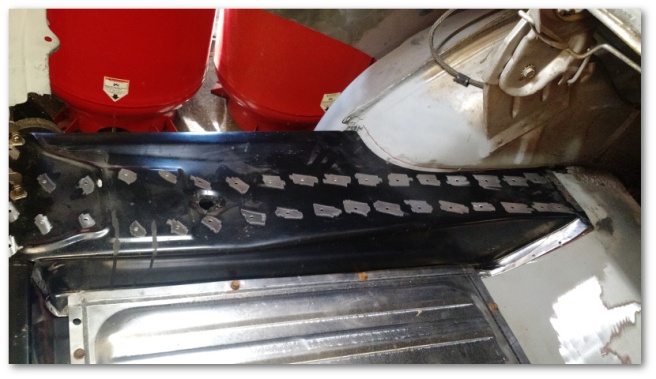
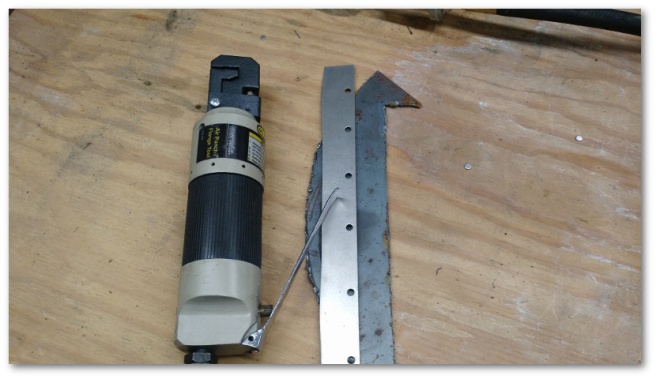
Most of those holes were made with a drill with a 3/16th drill bit. In the few areas I could, I used my pneumatic punch.
I also used my pneumatic punch on my practice metal:
One of the questions I had was what setting to configure my welder to. I was going to be welding thin sheet metal to the much thicker frame rails. I wasn’t actually sure if I was supposed to use the setting for the thin metal or crank the welder up to the setting for the thick metal. The metal above served as my configuration test-bed to find out.
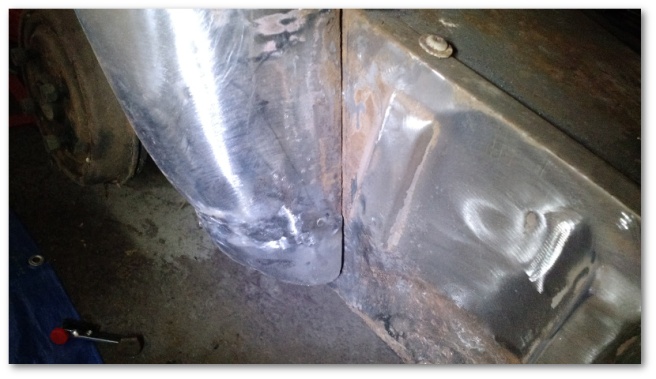
You can really see the difference in the settings in the resulting welds:
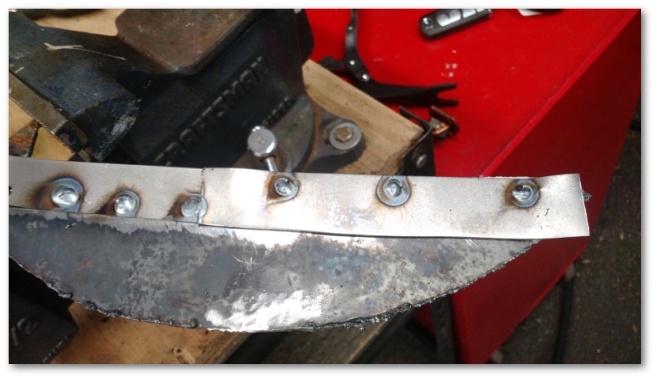
The first welds I did were on the right at the “thin sheet metal” setting on the welder. You can see that the weld is proud and just built up on the surface of the thick base metal. In fact, there was so little penetration into the tick metal that I could break the weld with a small screw driver.
The second set of welds (starting from the left) were me increasing the power of the welder. The two on the far left are still proud/tall, but there was significant penetration into the base metal and the weld was much stronger. The weld third from the left was my last weld with the welder set to the thickness of the base metal. You can see that this weld was able to bond the metal together without building up on top of the base metal and was structurally very strong.
So note to self: when plug welding dis-similar sizes of metal where the thick metal is on the bottom, use the settings on your welder for the thick base metal.
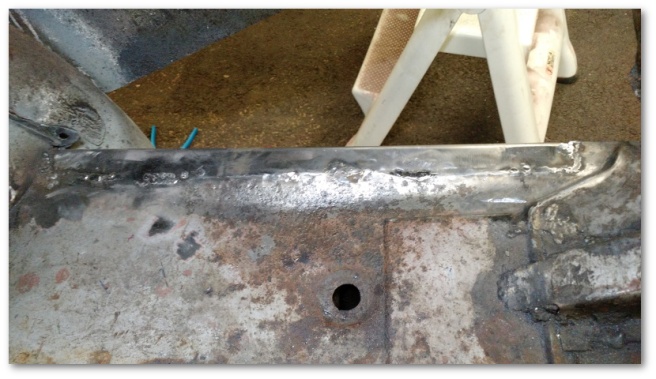
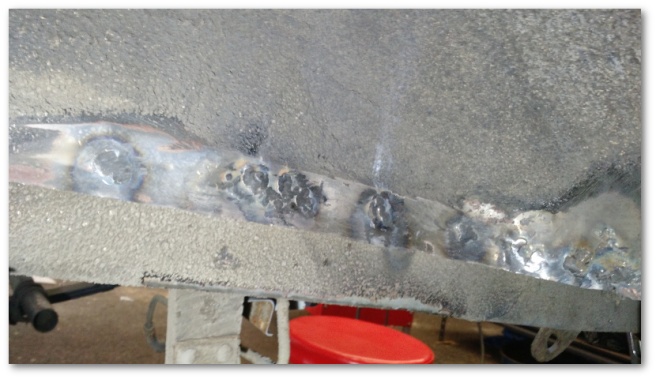
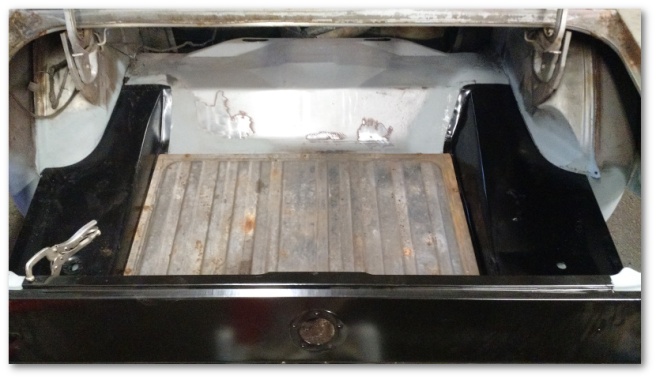
With that information gleaned, there was no more excuses to delay. It was time to weld. The first couple of welds were a little timid, but as I gained confidence the rest went really really well. When all was said and done, there wasn’t much grinding that needed to happen to make the welds flush with the panel:
Woohoo!
I also welded the trunk floor to the wheel house. As expected, these welds were difficult due to the thin metal on the wheel house in many areas and the large holes I was trying to fill at the same time:
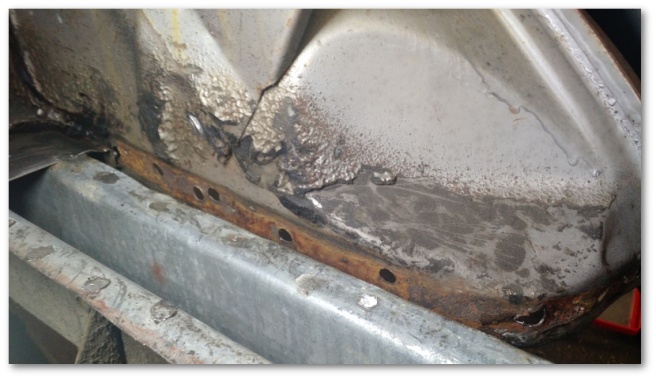
In the end, all of the welds found good metal (I think at least) and are structurally sound. The ugliness will be covered by undercoating so that won’t be a problem. What I didn’t like was trying to fill in the big holes created when the spot welds were broken. I think when I do the passenger side, I’ll fill in the old spot weld holes and just create new (small) plug weld holes to use for welding.
When I was done, I very anxiously re-fitted my other sheet metal to see if things still lined up. If they hadn’t, I would have had to take it all off and re-weld the floor again.
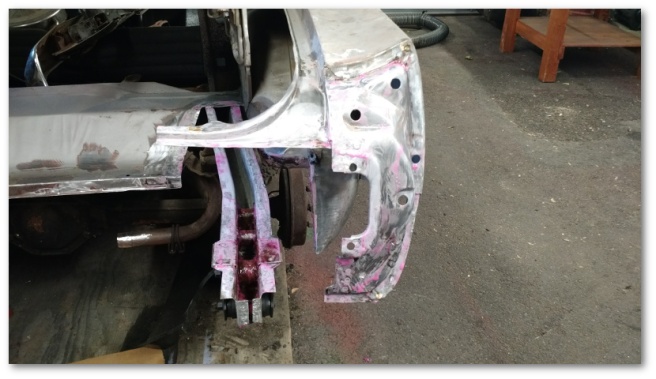
I’m deeply relieved to report that things still look good. Even the bumper bracket holes line up well with the tail panel:
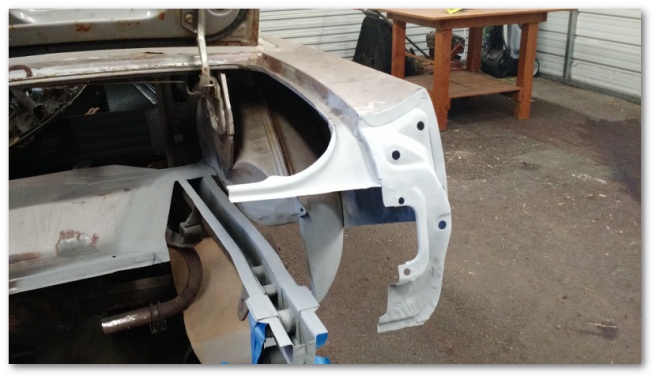
My lovely wife also helped me dry fit the quarter panel. Since the quarter panel isn’t cut yet, we could only do a rudimentary check, but from what we can tell that’ll work too.
There’s still a long way to go before Mystique’s sheet metal is back in place, but the process has now officially started and looks to be successful so far.
I’ve wanted to be able to do welding like this for most of my adult life and I’m honestly a little choked up that I actually did it.
Last Saturday will truly be a day long remembered.
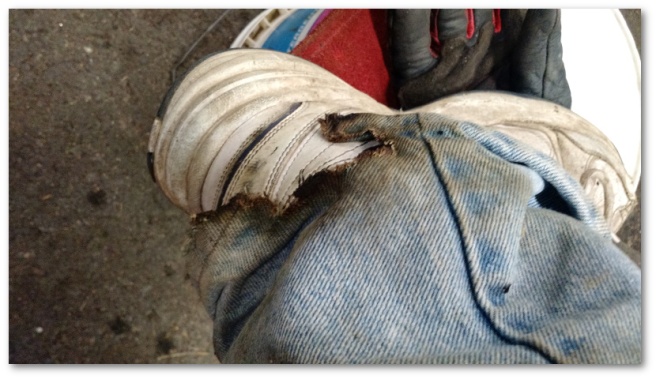

 Instead, I rather calmly (I of course say this now) patted myself down with my fire proof gloves and put the fire out.
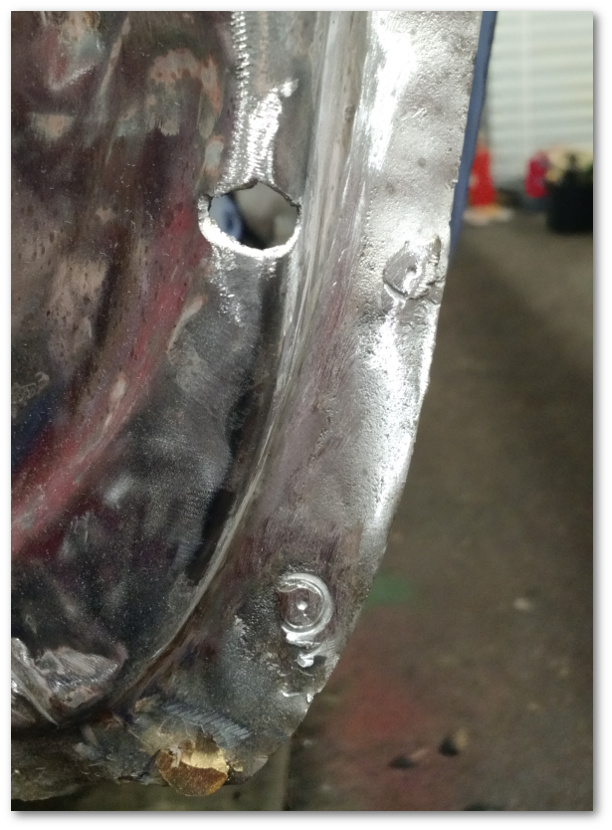


 I didn’t test fit the quarter panels yet. I figured I’d get everything the quarter panels attach to welded into place and then cut and fit the quarters to that.