Replacement was trivial for the shackle bushings – they just slide out:
However, the front of the leaf spring has what’s called an “eye bushing” and it is a press fit – meaning it’s held in place by friction after being pressed into the slightly-smaller-than-the-bushing hole it goes into in the spring:
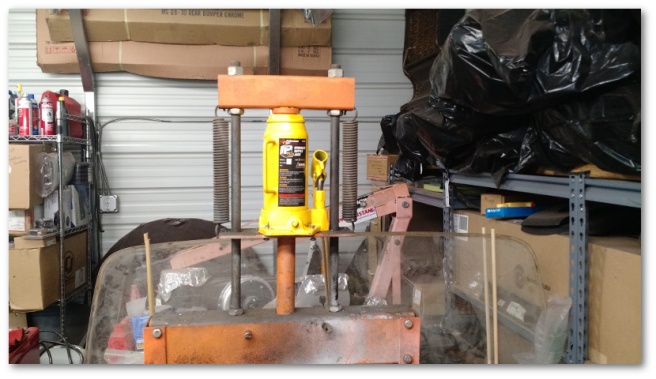
Without a means to apply enough pressure to push the bushing out, removing said bushing would have taken hours and countless four letter words.
Thankfully, with the means to apply enough pressure to push the bushing out (thanks shop press!), removing said bushing took all of a minute:
Truthfully, it took longer than a minute due to the original hydraulic jack on the press not being any good. I had to run to a local hardware store to pick up a replacement before any of the shop press magic could happen:
Once the new jack was installed, the bushings didn’t stand a chance and out they came:
Since I don’t like putting rusty parts back on my cars, I took the leaf spring hardware that I removed:
…and cleaned it up:
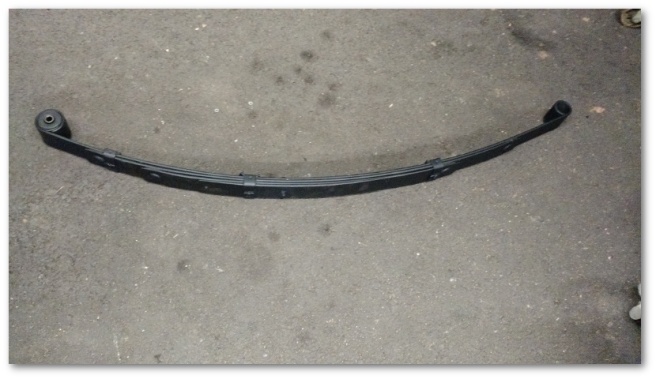
I cleaned up and painted the leaf spring as well after using the shop press to install the new eye bushing:
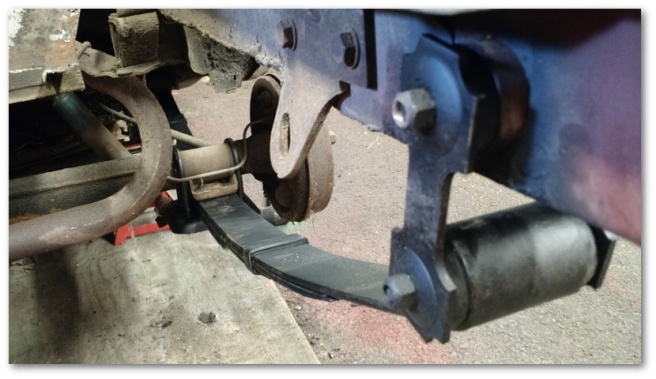
With all the pieces prettied up, it was time to bolt everything to the car. I’m happy to report that the install went fairly smoothly and the passenger side leaf spring is now happily returned to its place of origin:
You’ll notice that the nuts aren’t on very tight in the shackles in the image above. I did this on purpose to avoid putting the bushings in a bind. Once the car’s suspension is bearing the full weight of the car, I’ll torque everything down as it should be.
And with that, half of Project Bushing was completed. I started on the other half today by removing the driver’s side leaf spring. Thankfully, it came out just as easily as the passenger side one did:
Hopefully, I’ll have enough time this week to clean up the hardware and the spring so I can re-install everything next weekend.
Bonus Content:
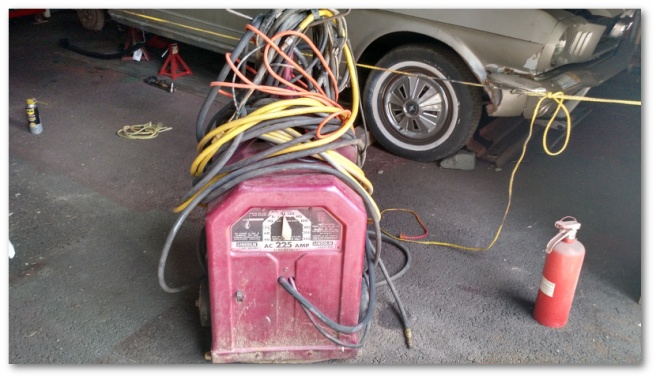
The shop had a new addition this week:
That’s a Lincoln Electric 220 Volt AC stick welder that I picked up at a yard sale this weekend for all of 18 dollars. Included in the price was a shop light and two compressed air hoses all tangled up with the welder’s cabling.
The welder’s leads are shot and will need to be replaced before the unit can be safely used, but for 18 dollars it’s hard to go wrong – especially if the air hoses alone were worth the price. I don’t know how to stick weld, but now I have an opportunity to learn sometime in the future.
Over the last couple of weeks, I’ve done a lot of work to continue this pattern of never being happy with the temperature.
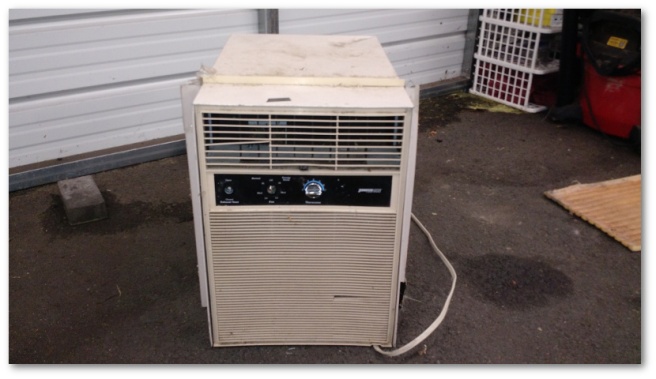
The air conditioner is now installed in the shop with a mocked up cardboard housing:
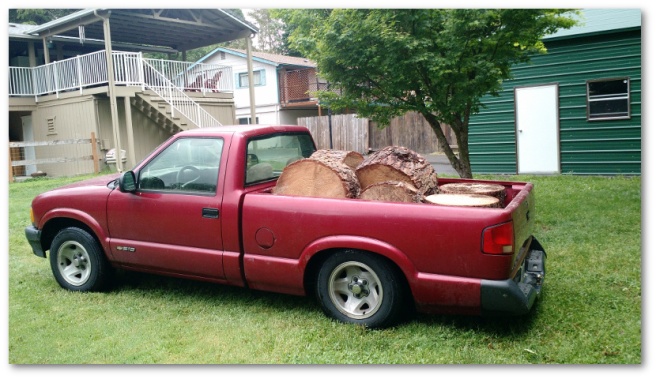
I’ve also made my poor truck’s rear suspension earn its keep with multiple trips (with more to come) to a nice gentleman offering free firewood rounds:
I’m delighted to report that the air conditioner appears to work quite well and should keep the small corner of the shop where I have my work area cooler-ish this summer. If it works well enough to justify keeping the unit installed, I’ll come back next year with a more permanent housing.
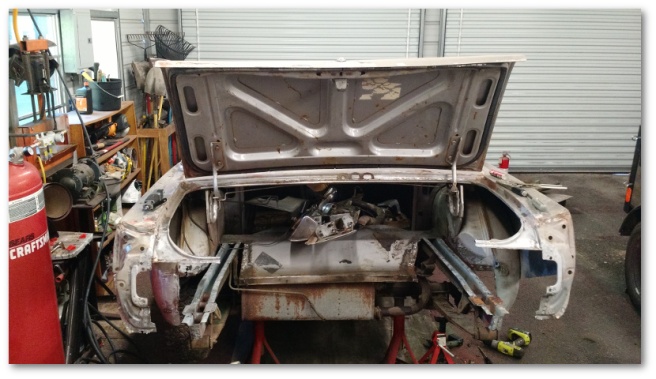
All this work has meant that work on Mystique has been slow. That’s not to say however that nothing has been done. In fact, I’ve ventured even further down the rabbit hole than I ever thought I would.
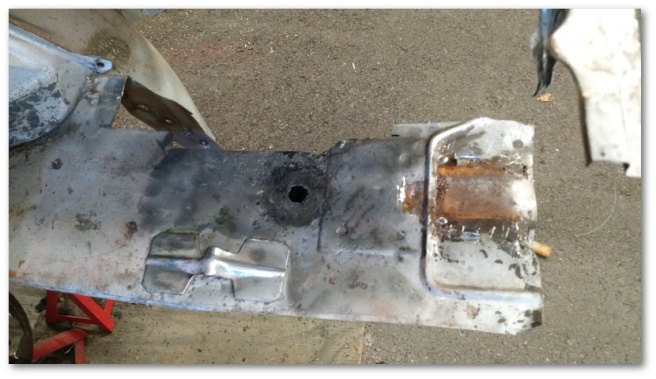
If you recall, I stopped trying to repair the passenger side trunk floor after I discovered way too many holes and damaged metal than was worth repairing. That meant a new trunk floor needed to be ordered and the old one taken off.
The first step in taking the trunk floor off was to remove the bumper bracket:
When I removed the bumper bracket on the driver’s side, all the other sheet metal was still attached and it took an entire evening. With all the subsequent sheet metal removal I’ve done, the access to the spot welds for this bracket was significantly improved and the entire process took less than an hour:
While removing the bracket, I kept hitting my hands and head on the exhaust pipe. This was the same exhaust pipe that was annoyingly in the way while trying to weld the repaired trunk drop off to the wheel house:
After hitting my head on the pipe for the last time I took a quick look at the muffler and realized that the pipe wasn’t actually welded to the exhaust system, but rather simply held on with a u-bolt:
Some penetrating oil and a few very satisfying whacks with a rubber mallet removed the offending pipe from the muffler and got it out of my way for the long term:
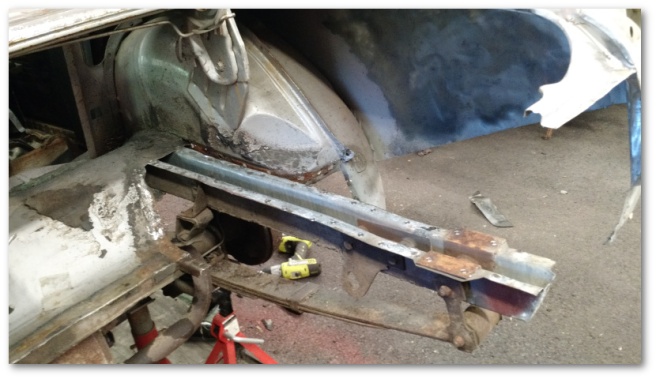
With the exhaust pipe and bumper bracket out of the way, it was time a few days later for the main event of removing the trunk floor. Remembering how much easier the driver’s side trunk floor was to remove after I’d cut the floor to expose the frame rails, I started the process this time with a cut off wheel and a pneumatic saw:
After that, it was simply a long process of cutting all the spot welds and removing the piece:
Mystique’s rear end is now barely recognizable as a car:
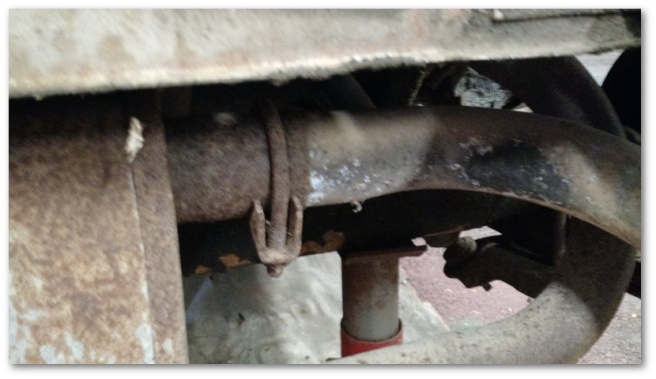
It was at the precise moment I finished cleaning the surface rust off the leaf spring shackle mount that this blog post got its title. As I was admiring my efforts, I noticed that the leaf spring shackle bushings looked a little…worn:
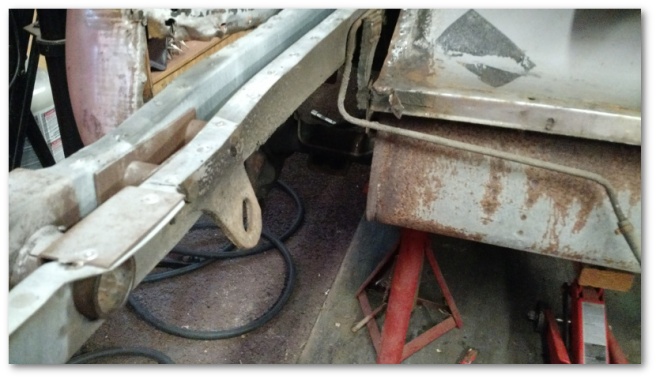
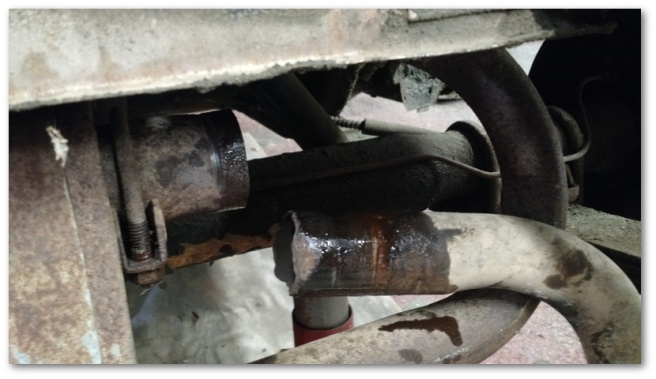
These bushings sit between the leaf spring shackle (highlighted in red below)
and the frame rail and help dampen vibrations from the suspension’s leaf springs. Damaged bushings don’t work very well and can also lead to significant suspension issues if they fall out.
Realizing that I would never have better access to the leaf springs and their bushings than I do right now (there’s literally nothing in the way at this point) I figured since I was in there I would figure out how to replace the bushings. Doing this would involve taking the entire leaf spring off since there’s an eye bushing in the front of the leaf spring as well that should be replaced.
There are a number of videos on the web about how to remove and install the leaf springs, but the one I found was best was this one from CJ Pony Parts:
If you watch the video, you’ll see a section that has a common refrain among nearly all of the videos I saw regarding the removal of the leaf springs: be prepared to cut them out.
According to the videos, the bolt that attaches the front of the leaf springs to the frame rails has a tendency to rust and bond with the metal sleeve of the eye bushing. This rust basically welds the two together and prevents the bolt from moving.
I was prepared for the worst.
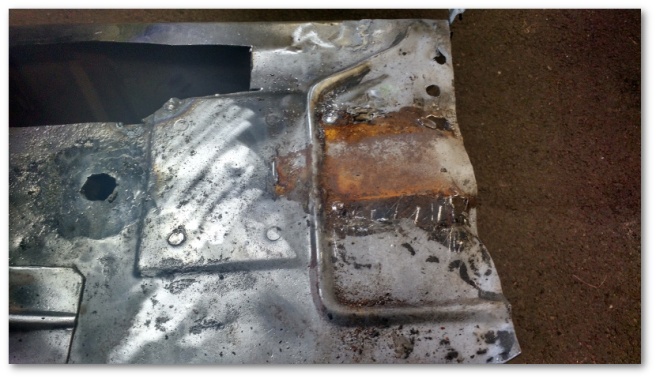
Have I mentioned that Mystique has good bones and that everything structurally looks to be in great shape? The one bolt I removed took less than 5 minutes to take out and looks almost good-as-new:
After using a breaker bar to start the nut moving, I did everything else (including removing the bolt from the eye bushing) by hand. The bolt on the spring I haven’t yet removed seems just as good. Mystique is a car that wants to be fixed.
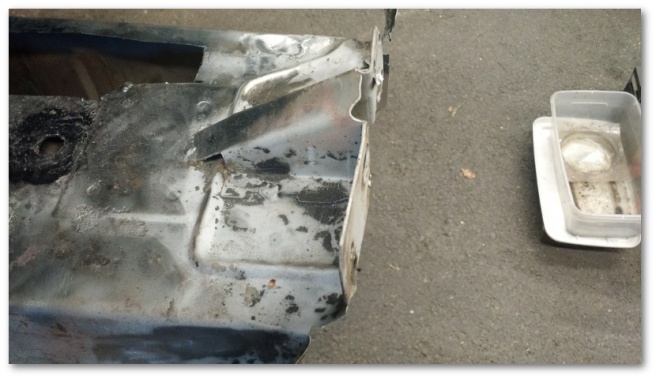
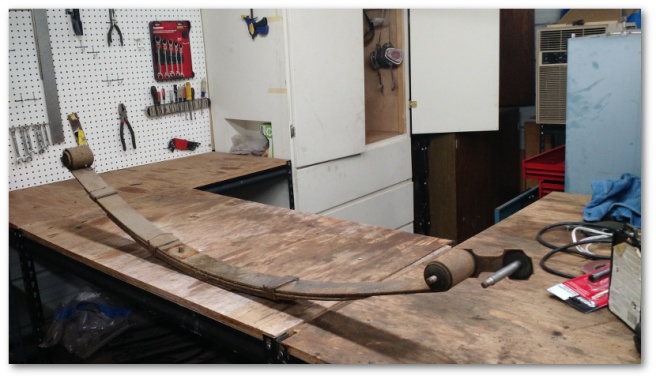
After all was said and done, I had a leaf spring sitting on my work bench:
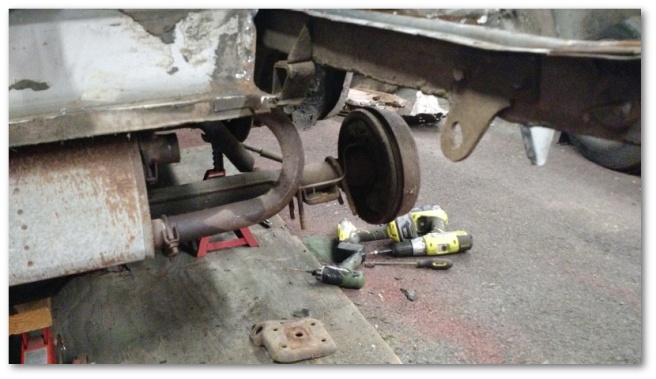
…and an even bigger hole in the back of my car:
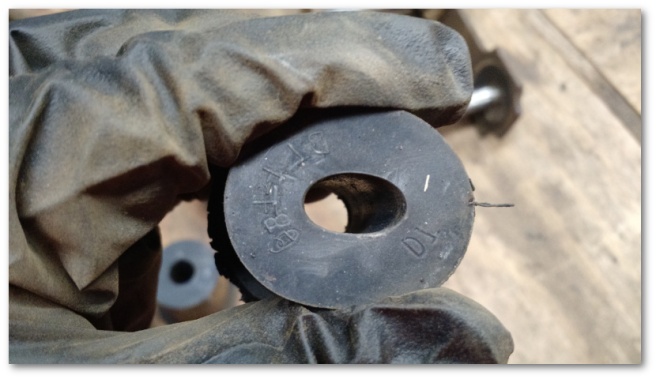
Surprisingly, the business ends of the bushings I removed actually look and feel fine. I can take the bushing in its resting state:
…and compress it fairly easily:
…which means the rubber is still pliable. I guess I could re-use them if I wanted, but I spent the time to get them off and they’re two dollars each so they’re getting replaced – regardless of how good they look.
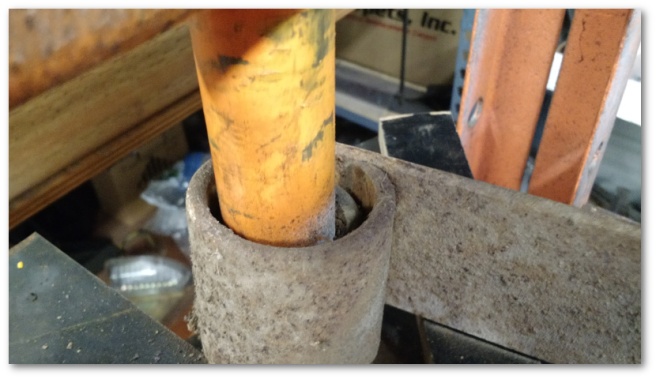
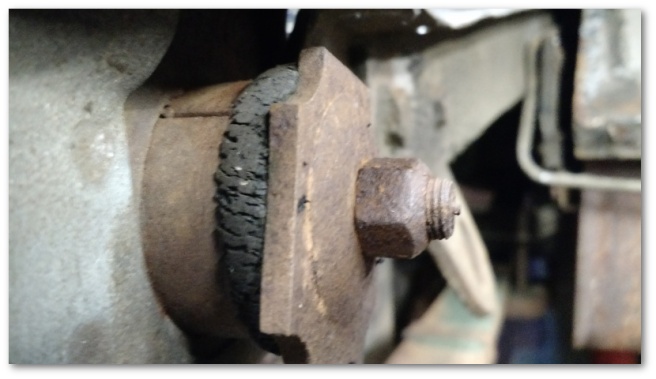
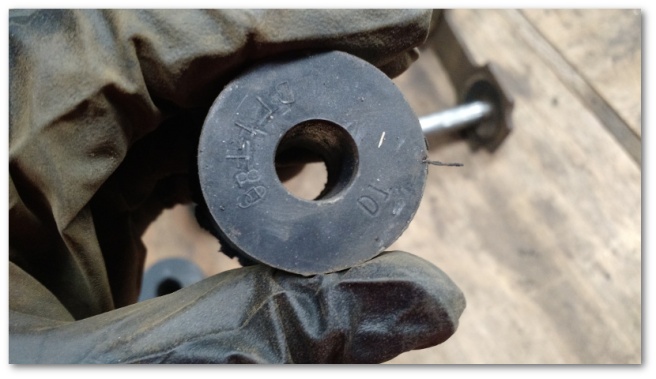
I also have identified the first use for my new shop press. The eye bushing at the front of the spring:
…is apparently a compression fit and installations are made much easier when shop presses are used. Spiffy! My auction purchase no longer needs made-up justifications.
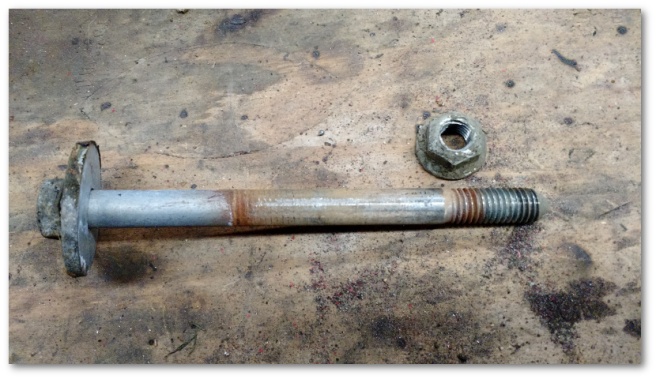
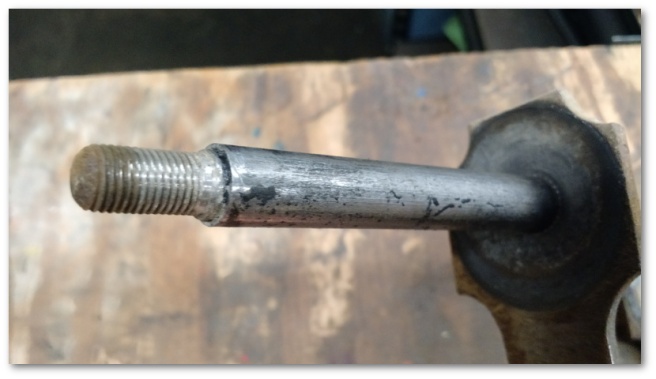
Ordering the correct set of new bushings was actually a challenge at first. Mustangs came with two different shackle types in the early years – one with bushings having a 1/2 inch bore and another type that used bushings having a 9/16ths bore. Until I removed the leaf spring, I was very confused as to which bushing I needed because the shackle bolts that go through the bore appeared to be neither of those sizes.
As it turns out, the bolts are bigger in the middle where they go through the bushing:
In my case, the shackle bolts used a 9/16ths nut attached to threads 3/8th of an inch in diameter. Only after the threads end did the bolt flare out to be a 1/2 inch. As I understand it, 1/2 inch shackle bolts are by far the most common in early Mustangs.
All of the bushings are now on order. I won’t be able to do much (if anything) on the cars this weekend since it’s Mother’s day and I’m getting ready to head out of town but I hope to get the leaf spring bushings installed next weekend and get back to metal work.