
I was scared when I cut out a small section of Mystique’s rear quarter panel:
The last couple of weeks upped the terror level to ten as I started to cut away the trunk floor in anticipation of replacing it.
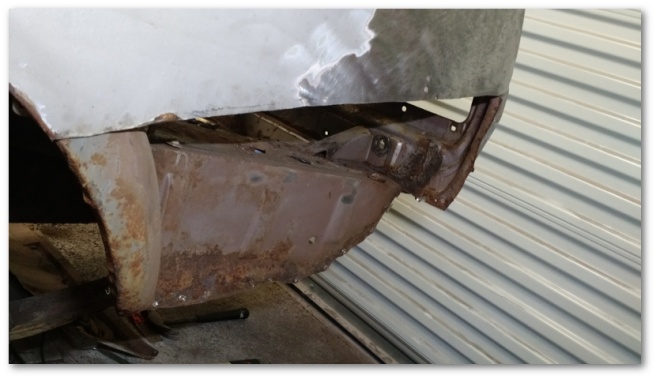
To begin with, my Brother-in-Law cut away the spot welds holding the trunk floor to the wheelhouse while I removed the horrifically-smelling gas tank:
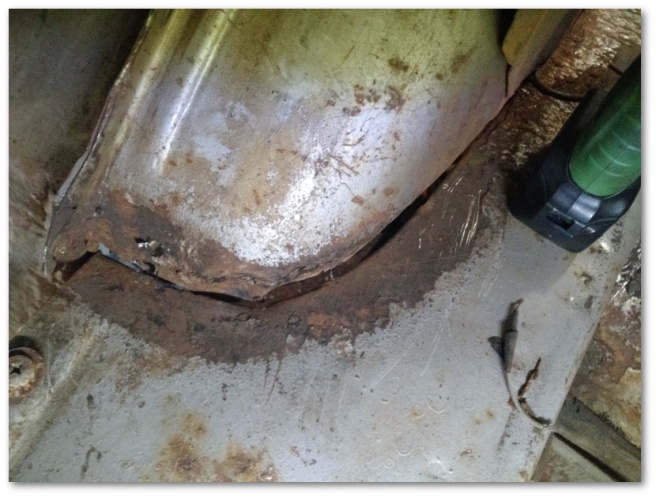
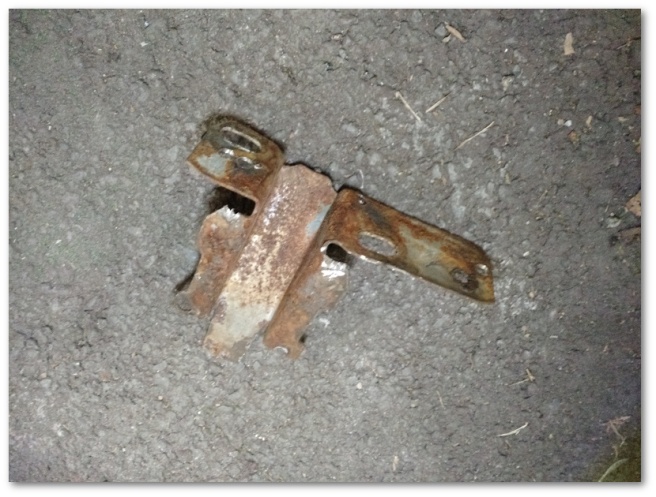
With that job out of the way, I decided to try and clean up the rusty rear trunk brace and gas tank support:
That piece didn’t clean up terribly well. The surface rust came off, but there was significant pitting and damage even after I wire brushed it for a while:
Thankfully, these trunk braces are dirt cheap at only $25.99 and one is now on order. I even had a $10 coupon to lower the price further.
In order to install the brace, I’m going to need to break free a metric ton of spot welds on the tail panel. After looking at the sad condition of that panel though, I’m beginning to contemplate whether it would be better to replace the tail panel at the same time I replace the brace. If I did that, I’d avoid having to deal with removing all of the trunk brace spot welds in addition to avoiding having to straighten the badly bent tail panel later. Right now, the current plan is to keep the tail panel I have and try to fix it but the more I think about it the more that plan is subject to change.
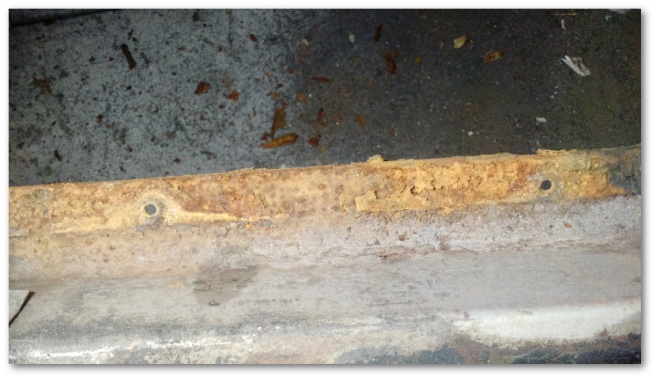
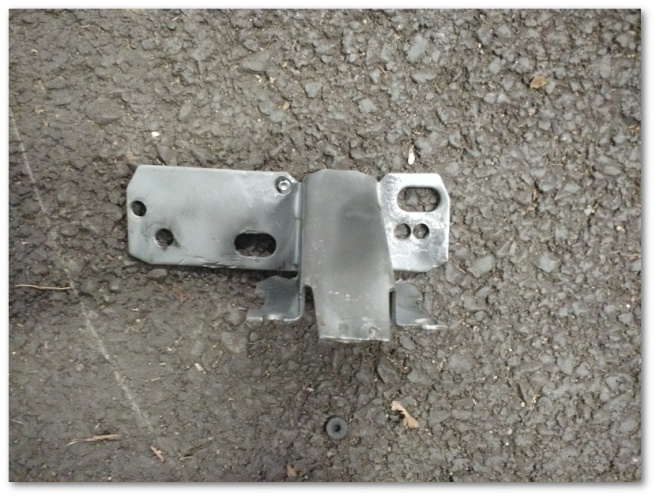
With the trunk brace half-cleaned, the next item to be removed was the bumper bracket. This bracket sits on top of the trunk floor and is welded both to the floor and the frame rail beneath it:

Technically, I didn’t have to fully remove the bracket as I could have just broken it free from the floor and frame and left it attached to the tail panel. However, doing so would have just left it in the way of my work and would have made the bracket much harder to clean. So completely off it came:
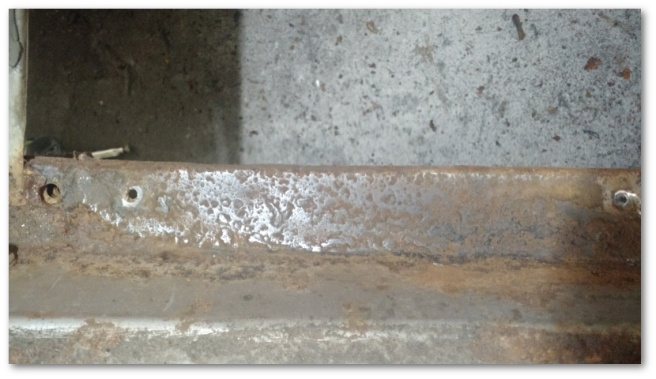
After clean up, I decided the part was in good enough condition to re-use in the distant future when I am done with all this metal work and am ready to put everything back together:
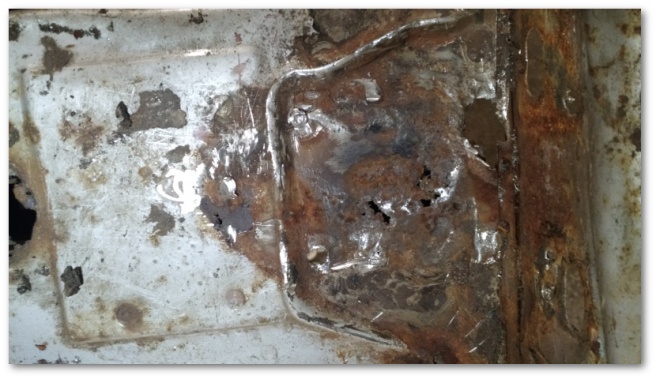
Removing the bracket also yielded further justification for replacing this trunk floor as I found more rust holes hidden between the bracket and the floor:
With the bracket finally off, the only thing left to do was take a deep breath and start attacking the floor spot welds themselves. I needed to be very careful here as the trunk floor attaches to a structural frame rail that I did not want to damage.
At first, going was slow. The frame rails are in the middle of the floor pan making it difficult to get any kind of leverage between them and the trunk floor to break the spot welds loose.
At first, I tried getting under the car and prying the floor up from the frame rails. This worked about as well as you might think it did so I rapidly progressed to bending the remains of the trunk floor up to gain access:

This worked…better… but was still unsatisfying.
Finally, it dawned on me that I had no plans to save this piece of metal for anything and as such there was no reason to be nice to it at all.
I also realized I had a pneumatic saw.
Five minutes later I had all the access to the frame rails I wanted:

These cuts mean there’s no turning back now. I can’t re-install the gas tank until the trunk floor is replaced. Without a gas tank, the car won’t be terribly exciting to drive. That obviously won’t do, so I suppose I’m going to have to learn how to put all this back together.
Cutting up the trunk floor was the last thing I did today, so I still have quite a few spot welds to break free before I can take it completely out. Once it is out, I’ll be replacing it with this piece:
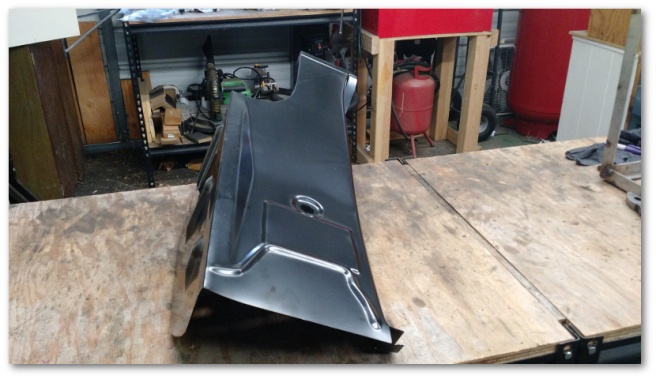
This replacement panel is nice, pretty and most importantly rust-free.
I’m quite sure it’ll be at least few weeks before I’m ready to install it though. I’m still figuring out how to use all these new tools and the going is slow. It will also be easier to install the trunk brace if the trunk floor is out so I’ll be doing that first. Depending on what I decide to do with the tail panel, I may have work there to do as well.
With all this talk of Mystique, you would be forgiven if you were to forget that this blog is actually about the restoration of my 69 Mustang. To jog your memory, here’s a picture of it’s current state in the painting process:
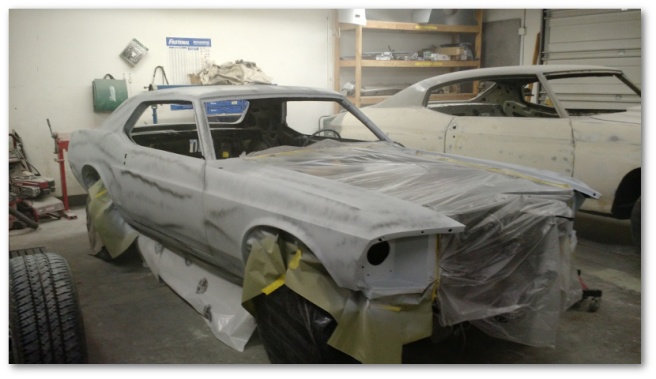
At this point, all the body work is done and the first coat of primer has been applied. The actual paint process has begun! Woo hoo!!!
