
The process to finish the Mustang’s window restoration has taken a bit longer than anticipated. While the process of gluing the windows to their brackets went surprisingly well, the rest of the project has thrown up some roadblocks that have required additional time. There were two roadblocks this week. One caused by nature and one self inflicted.
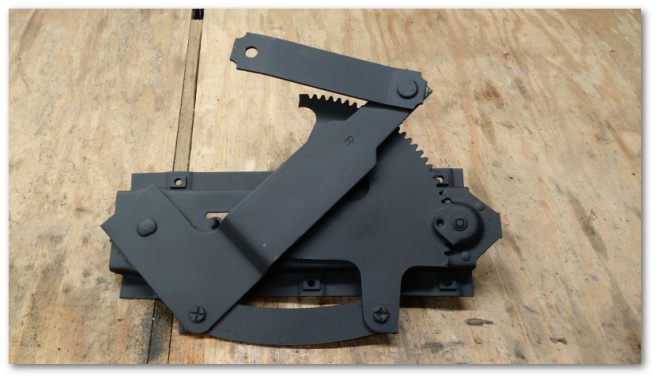
I started the week by working on the window regulators. The Mustang has obviously been in a driver’s side collision in the past as evidenced by the dented door, replacement glass glue and a bent driver’s side window regulator arm as shown on the bottom of this picture:

Taking advantage of a particularly bad day at work last week, I decided to both relieve stress and fix the bent arm by whacking it repeatedly with a hammer.
Unsurprisingly, my stress level and the trueness of the arm were improved after a few minutes of percussive therapy and I ended up with a much more stock-looking regulator arm:

I then moved on to my first roadblock of the week – my own stupidity. While cleaning up the first quarter window regulator, I ended up stripping some of the paint from its surface. Not wanting to have a rusty regulator in the future, I decided I would strip off all of the remaining paint. Since I have a media blasting cabinet and am not afraid to use it, I mindlessly threw the regulator in there and blasted away.
The paint came off easily. And then I realized I’d also managed to also gum up the internal gears of the regulator with blasting media.
30+ minutes of water, high-pressure air and cleaning followed as I tried to bring the regulator back to life. Eventually, I had it back to a workable condition and I was satisfied that I wasn’t going to break the thing by rolling down the window.
The second quarter window regulator also needed to be stripped and repainted. This process was done with a wire brush. In the end, both quarter regulators turned out quite nicely:
The only reason I painted the quarter window regulators is that I stripped the paint while I was cleaning them. I cleaned the door regulators in the same way, but didn’t strip any paint there. I’m not sure why the two different types of regulators would clean differently, but they did.
With the window regulators taken care of, I started working on what I thought would be the last pieces of Project Window: the remaining bits and bobbles in the bags on my rolling cart:

Most of the items cleaned up easily:


But I ran into the second of my roadblocks when I started cleaning up one of the window stops:

On the surface, it looked like that stop had a little surface rust that the media blaster would easily take care of. However, upon closer inspection I found that the rust extended below the rubber and was actually rather severe:

That meant that the rubber needed to come completely off in order to properly repair the part. After spending some quality (maybe an hour?) with my wire wheel and sandblaster, the part looked much better:

At that point, I decided that since I’d totally stripped one of the window stops down, I might as well do the other to restore them both equally. The second stop went much faster than the first since I knew what would work and what wouldn’t in order to get the old rubber and felt off.
In the end, I was left with two nicely stripped window stops:

and the question of how I was going to put them back to factory condition. After some research, I decided that I would use a product called Plasti Dip for the rubber covering of the brackets. Plasti Dip is usually used for covering the handles of tools as shown in the video below but I think it will also work for my purposes here:
For the felt, I went with an automotive felt strip that uses wool and an adhesive rated up to 180 degrees Fahrenheit.
Both the Plasti Dip and the felt strips are on order and will be here later this week. Hopefully, this little roadblock will be quickly bypassed once they arrive and Project Window can come to a conclusion.
BONUS MATERIAL:
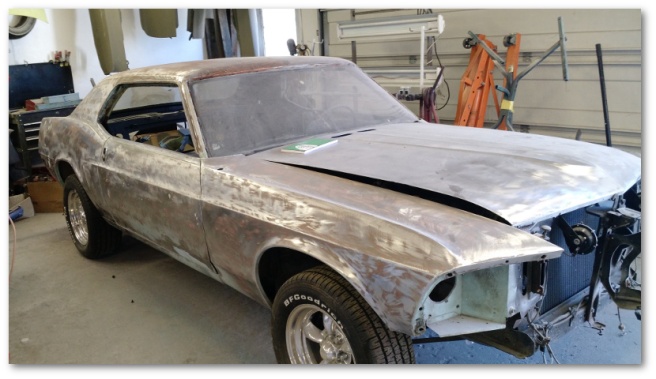
The body shop has upped their game on the Mustang and most of the exterior paint has been removed:

One thought on “Window Finishings…”