Ding Dong The Wretched Whale Is Dead…

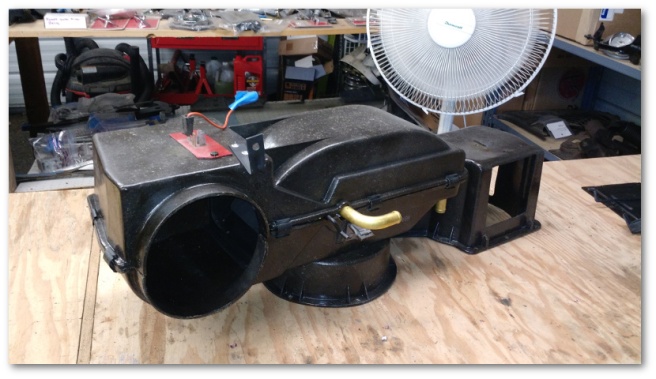
We are gathered here today to acknowledge with insipid grief the death of the whale.

dead whale

Lest we forget all the joy the whale brought to our lives, we remember now all the memorable times it gave us in the five short years it was with us:

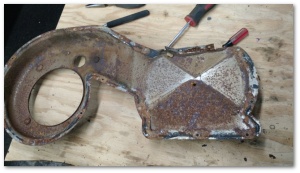
  • The very first day it was home it puked up a quart of oil on the garage floor
  • The power sliding door broke
  • One of the upper control arms needed to be replaced
  • One of the tie rods needed to be replaced
  • One of the wheel bearings needed to be replaced
  • The light on the lift gate didn’t work unless you knocked on it first
  • The third brake light stopped working
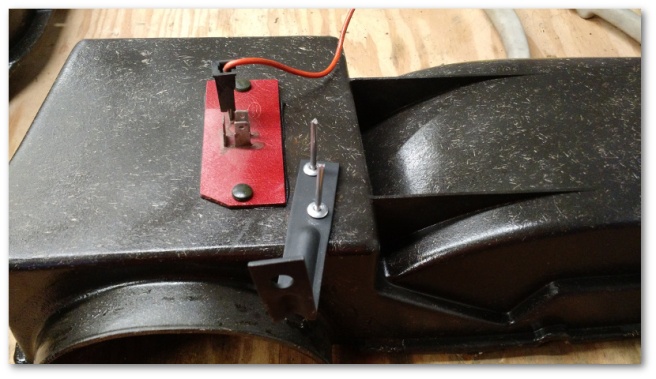
  • The tire pressure sensors stopped working
  • The high-pressure power steering hose leaked
  • The intake manifold leaked
  • The driver’s side power seat ran over its own power line and broke
  • The driver’s power door lock broke
  • It needed a recall for its ignition key slot
  • The front brake rotors warped themselves to replacement
  • It needed a recall for its airbags
  • The battery died
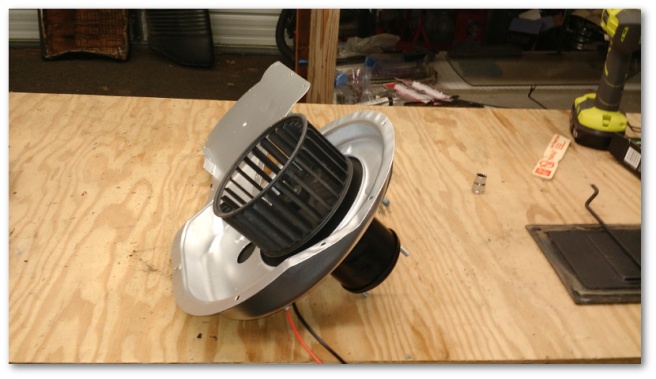
  • The heater hose assembly broke
  • The exhaust gas recirculation valve broke

What? Hmmm… Sorry, I’m being told to move along. As we all know, there were more “memorable times” the whale brought to our lives but we shall reminisce individually upon those later.

Two weeks ago, the whale was faced with what would be the biggest challenge of its, uh… “memorable” life:


Yes, our beloved whale had the beginnings of a transmission failure at the early age of 112,000 miles. Now I ask you all. Do you think our whale took this failure lying down? Do you think our hero would let a simple transmission failure take him out of the game? Do you think this was anything more than another memorable speed bump in the life of our beloved whale? Do you?

No? Uncle Eddie, go home – you’re drunk.

The failure of the transmission was the final straw. The problem got worse and worse to the point where the whale would barely reverse at all. A remanufactured transmission was $4,000 to obtain and install – and was apparently back ordered for up to a month.

Now there are those that might ask why a transmission would fail at 112,000 miles or its replacement be back ordered for so long. I say question not! It is obviously a coincidence that a perfectly well designed and manufactured transmission such as the one in our beloved and reliable whale would be back ordered. Pay no attention to the service history behind the curtain!

Finally, it should be noted that in the midst of our sorrow, this death takes place in the shadow of new life, the sunrise of a new car; an ownership that our beloved whale gave his $500 trade in to protect and nourish:

new to us buick enclave

In closing, I would like to acknowledge that I do not possess adequate vocabulary to express the sadness and grief in our hearts. In searching for solace, I uncovered a video of one of one of our nation’s leading philosophers expressing an emotion similar to that which we all today face. His message moved me. His feelings ring true. I leave you with his words:

Jimmy, roll tape:

The whale is dead. Let us each mourn in our own way. The open bar is down the hall to the right.

A Potpourri Of Quick Projects…

Since I’ve grown weary of multi-month projects, I decided this week to take on a potpourri of quick projects to feed my inner desire for a quick feeling of accomplishment.

I started with my parking brake assembly. When I took the parking brake assembly off back in March, I noted that the assembly was in need of some love:

Prior to removal, the parking brake would happily engage, but take considerable effort to disengage. A dose of oil in the moving parts fixed that right up. I still need to sand blast and paint the assembly but it’s good to know when I do I’ll work good as new.

There as one other problem with the assembly I didn’t call out at the time – the fact that the brake release handle was completely missing:

removed parking brake assembly

At the time, I noted the AWOL part and sometime between now and then I ordered a shiny new billet aluminum handle to install:

billet aluminum brake release handle

All would have been well with the world save for one thing. The shiny new billet aluminum handle didn’t attach to the brake release lever.

The problem was that the brake release level had a swedge attachment with little “fins” to keep any handle on:

brake release lever with swedges

The handle itself expected to have the brake release handle thread into it like a nut and bolt would thread together.

The first order of business to fix this was (of course) a trip to the parts store to get a tap and die set:

tap and die set

Taps are used to create threads in otherwise threadless holes allowing bolts to be screwed into them. Dies are used for the opposite – creating threads on round cylinders of metal allowing the metal to bolt into something else.

In this case, I needed to use a die and a die wrench on my brake release lever. The process is fairly easy, you find the die size you need (which I did by figuring out what size and thread of bolt fit into my handle), apply oil to the metal to be cut and then attach the die inside its wrench to the metal and start turning:

using die wrench on parking break release

As you turn, the die cuts into the metal and creates the threads that you need. After about 20 minutes of carefully cutting into the metal a bit, backing the tool out to clean it, adding more oil and repeating the process, I ended up with a threaded brake release lever:

new threading on brake release handle

The threading was done so that when I screwed the handle on and tightened it, the handle would be level with the dashboard with the writing right-side-up. I’m pretty happy with how it turned out.

Then it was on to the next small project of the week. Cleaning and painting the parking brake assembly and the floor pan plugs.

Neither were in very presentable condition:

grungy parking brake assemblygrungy floor pan plugs

However, with a dash of media blasting and a few coats of primer and paint both came out looking like new:

cleaned and painted parking brake assemblycleaned and painted floor pan plugs

Aaand that was it for the week. It was a nice, self-contained potpourri of accomplished small projects.


Heater Core Box Reassembly…

Cue 80’s-era TV Voice:

Previously, on Heater Core Box Disassembly…

heater core box all taken apart

Truth be told, I actually started disassembling the heater core box not long after the Mustang left for the body shop way back in very early June. Since that time, I’ve been…sidetracked by a number of projects – not all of which involved shop time.

I’m delighted to report however, that things are back on track and the heater core box is now in a much better state.

Many of the projects I was sidetracked by were actually done to help facilitate the restoration of the heater core box. When you start with components that look like this:

It really helps to have a media blaster and a compressor to drive it in order to turn those components into this:

media blasted metal backing to heater core boxmedia blasted component of heater core box

Once the media blasting was done, it was time for paint:

heat core box and components being painted

And then (finally) reassembly.

I started with replacing the air seal pads that had all but disintegrated:

decomposed heater box seals

Believe it or not, you can buy new heater box seals for these 50-year-old cars:

new heater core seal kit

Installing the seals was a straightforward, though very messy process involving weatherstrip adhesive, trimming, altogether far too many latex gloves and no small amount of swearing. In the end though, the new seals were installed and ready to… well… seal:

new seal pads on heater core components

The only problem with the new seals was that they made the reassembly fairly difficult. The added width and height of the seals made the individual components of the heater box very tight fits:

heater core box bottom with heater core installed

I had to use a silicone lubricant on the fiberglass box in order to press the air diversion unit into place. Even with the lubricant, I was more than a little concerned that I would crack the box.

Thankfully though, I was able to get everything installed inside the box and the two halves aligned together:

heater core box assembled but not clipped

If you look closely enough, you can see a good quarter-inch gap between the two halves of the box. This gap needed to be closed in order to clip the two pieces together. Essentially, I needed to compress the new seals into place while at the same time clipping the two pieces together with these guys:

heater core box clips

I’m not that talented…

Calling in the calvary that is my beautiful wife, I asked for her to push on both sides of the box to do the compression part while I clipped everything together. I told her “No worries, it’s only a few hundred dollars if it breaks” which elicited an eye roll and a mild glare-of-death.

After ten or fifteen minutes of “press harder”, “I am pressing harder” and “I think I need a bigger screwdriver” were were finally able to get everything clipped together in one piece:

heater core box all clipped together

Huzzah!

Then it was on to the blower motor and its assembly.

Considering that just getting to the blower motor to replace it takes the near-total-disassembly of the interior of the car, twenty dollars for a new motor was totally worth it. There didn’t seem to be anything specifically wrong with the old motor, but I know that if 40-some year old me has some creaks and dings, the 47 year old motor likely has the same. I wasn’t going to take chances in an effort to save twenty bucks.

All the blower motor parts were also cleaned up and after everything was reassembled, the assembly looked really sharp:

new heater core fan connected up to squirrel cage and backing

And then it was time for the riskiest part of the reassembly. When I drilled out the rivets holding everything together, I knew that I’d have to re-rivet everything together – putting a lot of stress on my old and brittle fiberglass box. On top of that, the old holes for the rivets were an odd size: bigger than 1/4 inch but smaller than 3/8 inch. I needed to drill out the holes to make them big enough to handle a 3/8 inch rivet – further weakening the material.

With no small degree of trepidation, I put the first two rivets in place:

first rivets being put back into heater core box

To my delight, the box held and I had a secure bracket about 30 seconds later:

first heater core rivets in place

After that, it was just a matter of riveting everything else up.

I present to you: a restored heater core box:

assembled heater core box back

assembled heater core box front

Woohoo!!!

This completes the first of the “big three” restoration projects I needed to do while the Mustang is at the body shop. The remaining “big projects” are reupholstering the seats and gluing my windows back into their brackets. I’ll get to those in due time, but I think I’m going to go for a couple quick projects next just to spice things up.

The Belts Are Back In Town…

Waaaay back in late February, I sent a box of crusty old moldy seat belts to Texas to get them restored:

seat belts boxed and ready to go

They, uh… weren’t in the prettiest of shape:ugly looking seat belt

They were also kinda blah looking with the all-black standard interior package on the buckles:

standard belt buckle look and feel

And lastly, the set of belts was missing one of the shoulder harnesses for some reason.

Late this week, a long-awaited package arrived via FedEx:

box of restored seat belts

The box contained a full set of pretty pretty re-webbed seat belts with all of the metal polished:

pretty pretty rewebbed seat belt

The belt buckles were also upgraded to the deluxe version with the shiny chrome accents:

new seat belt buckle with chrome accent

And lastly, the box came back with a complete set – I’m no longer missing my passenger side shoulder harness.

I used a company called Python Restorations to do the restoration. I learned of Python via West Coast Classic Cougar’s All About Seat Belts video:


All in all, I’m happy with the results of the restoration. My only complaint is that it’s sometimes hard to get in touch with the folks at Python and it took quite a bit longer than they originally stated it would.

Not much else happened Mustang-wise this week. I took a week’s vacation and spent it “restoring” my front lawn to a more presentable state. Thankfully, that project is all but done and I should be back to working on the car in the next couple of days.