
Hallelujah! My two-and-a-half month part of Project Paint is finally in its end-game! The Mustang is very, very close to being ready to send out to the body shop.
I overcame a big fear yesterday and did something myself that I was originally planning on paying someone else to do. It turned out great and I’m fairly proud of myself. But before I get to that, let me share the story of fixing my big foul-up from last week.
I also found out today that in some areas I applied way too much of the sealer causing areas to still not be totally dry two days later.
The sealer never did dry properly – even after waiting two more days. It was clear I would have to do something about it.
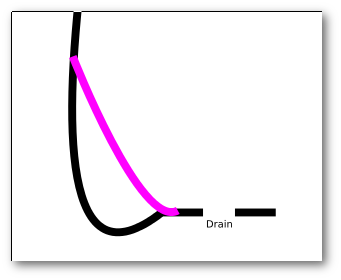
But why did I add so much sealer in the first place to these areas? Well, I was trying to compensate for what I consider to be a poor design for the quarter window drain. When Ford designed my Mustang, they made the area under the rear windows very susceptible to rust. Here’s a cross section of what it looks like inside:

It is very easy for the water to pool in the small lip on the left hand side and be unable to drain – causing rust to develop. To work around that, Ford put some form of (I’m guessing) silicone sealer over the lip like this:
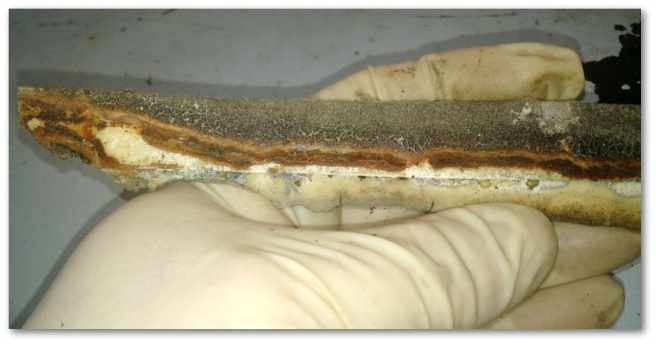
The problem with the old sealant is that over time it had dried and pulled away from the sheet metal – allowing rust to form beneath it:
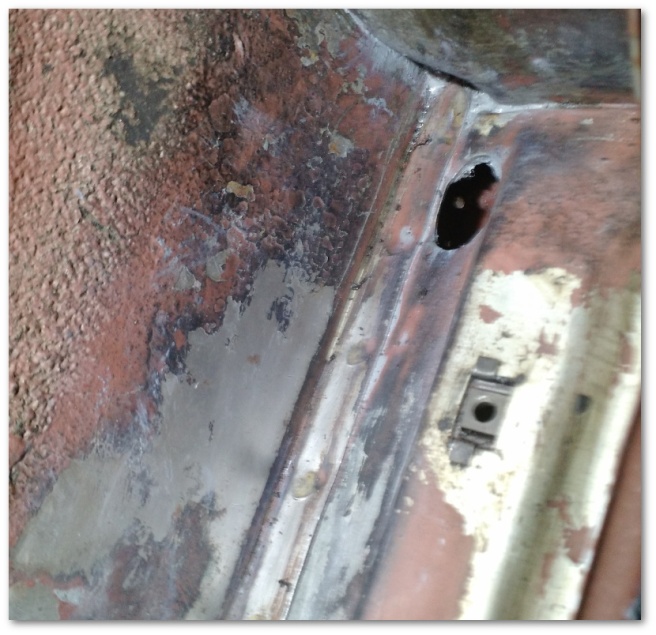
Last week, I tried to create a similar solution using way too much sealer at once. What I ended up with was a ginormous mess that never dried properly. That meant I had to take it out and re-do it. Holy Shop Rags Bat-Man, that was a big messy job. The following shot was taken after I spent about an hour on each side digging into the sealer with my fingers and various tools trying to get it out:

Once the “big stuff” was out, I ended up going and buying some 3M adhesive remover to help get the rest of the goop out. That took another couple of hours each:
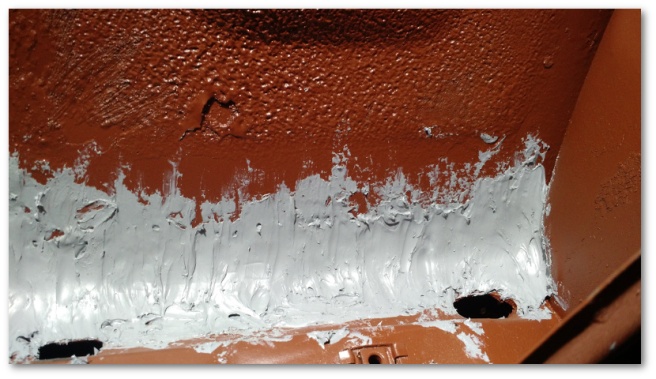
Finally, I was able to prime the area and try again. This time, I used much smaller applications of the sealer and let each application dry before I applied another. It still doesn’t look great, but I think it will do the job just fine:
And with that, I was finally ready to paint.
As a reminder, this is what the floor pans looked like a couple of months ago:

This is what they look like now:
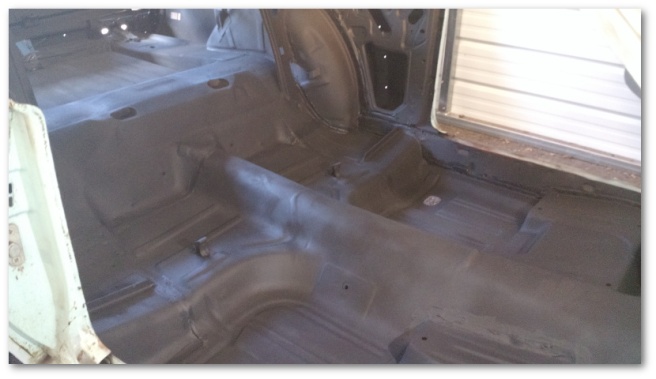
Everything on the interior received at least three coats of the flat black paint, including the ceiling, sail panels and trunk. It looks really nice and I’m happy with how it turned out.
While the paint drying between coats, I decided to “go big or go home” on Project Paint and get my hood ready for paint – but drilling and cutting into it so my hood scoop would fit.
Initially, I had planned on having the body shop do all this for me since I was afraid I’d screw something up and have to either pay to have my screw up fixed or buy a new hood. You may understand my hesitation here when you learn that the cheap version of a new hood at cjponyparts.com is over 300 dollars. Gulp!
As I thought more about this though, I was reminded about one of the reasons I’m doing this project in the first place – to learn how to do new things. Since I wasn’t going to learn much by paying someone else to do work for me I decided to suck it up and do it myself.
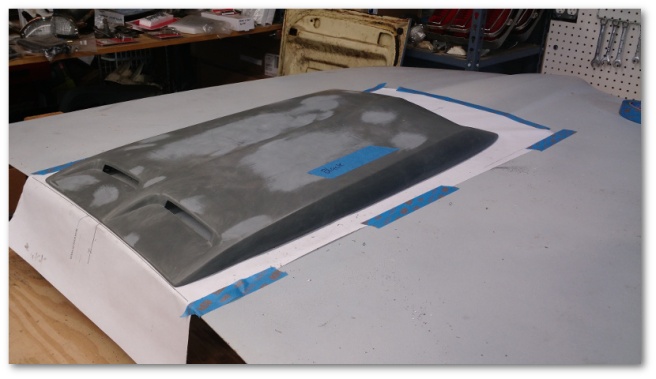
I started with buying a pattern off of Ebay for the cuts I would have to make. This pattern fits on your hood and tells you exactly where you have to cut and drill to make an original equipment hood scoop fit:

The two big holes in the template you see in the image above are areas I needed to cut out in order to be able to fit the turn signal fixtures in the hood scoop through the hood and into the engine bay.
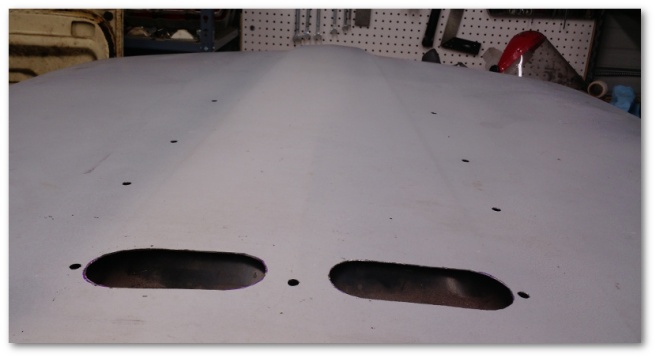
Not taking any chances, I bought the best brand-new drill bit set I could find. Drilling was a three-step process. I started with a small pilot hole to set the center. I followed that up with a larger drill bit to make the hole larger. Lastly, I used one final bit of the size I needed to fit the hood scoop’s fastening studs.
After a couple of hours worth of very very careful work, I was rewarded with this:
Then it was time for the really scary part – cutting into the hood’s sheet metal to open up space for the scoop’s light fixtures.
I wasn’t originally sure how I was going to do this. I tried at first to use a small hacksaw but that didn’t work very well. I then moved to using a jig saw, but the blade was too long and caught on the frame of the hood under the sheet metal. The throw of my jig saw was large enough that I wasn’t able to shorten the blade enough to avoid the lower frame without also having the blade totally exit the metal it was cutting. This made cutting in a straight line impossible.
Plan C was to use a cut-off wheel on my rotary tool. In the end, this worked well enough for me to successfully cut away both holes. Cutting the corners took forever since cut off wheels can only cut in a straight line. I had to cut what seemed like a billion teeny tiny little straight lines in order to get the curve that I needed. When I was done, I took a file to the edges to clean them up.
In the end though, I have to say it almost looks like I knew what I was doing:
Here’s a shot of the fully-equipped hood scoop mounted to the hood after all the work was done:
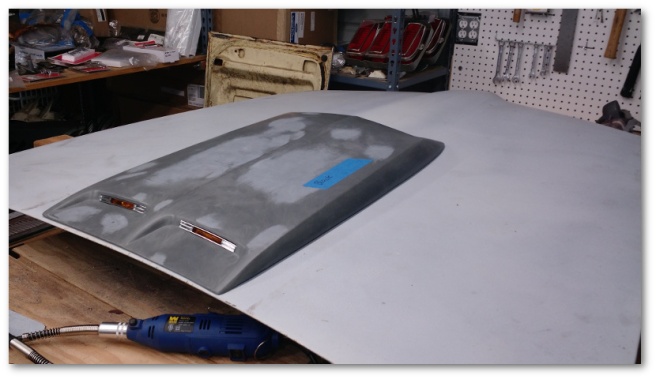
Huzzah!
It turned out that the hardest part of the day wasn’t doing the cutting, it was dealing with the poor quality of the scoop itself.
If you recall, I purchased a fiberglass reproduction hood scoop instead of spending the non-insignificant extra money on a used original Ford part. I’ve also mentioned before that contrary to most of the reproduction parts I’ve purchased, the hood scoop was of disappointing quality. I came away similarly unimpressed yesterday.
To start with, the studs for the fiberglass scoop were close but not exactly where they should have been. A couple were actually at a slight angle instead of pointing straight down. That meant that my template wasn’t as useful as it could have been.
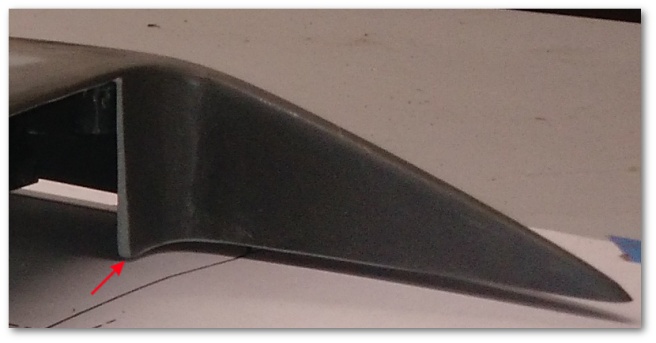
Second of all, the air dam in the scoop was altogether far too tall and prevented the scoop from sitting flush on the hood:
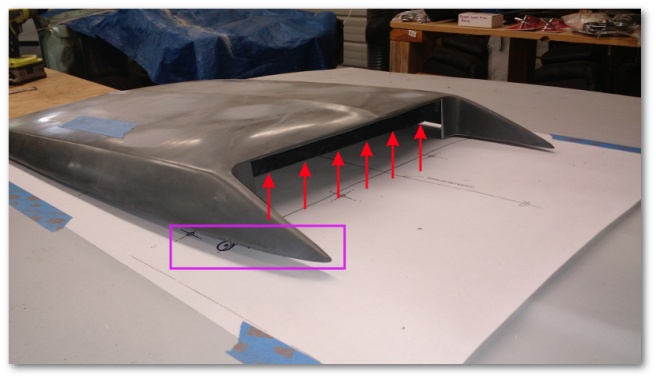
Lastly, the inner scoop support was also not contoured to the hood properly. It overlapped the “arrow” in the hood and stuck down too far – again preventing the scoop from sitting flush with the hood:
All of these problems were solvable, but for the price I paid for the scoop I would have expected far better. Note to self, if I ever do this again spring for a real hood scoop on Ebay.
So what’s left? Not much…
- There’s a couple of touch up spots on the interior that need to be taken care of
- The trunk needs to have the rest of its old weather stripping removed
- The trunk also needs to be treated with some of the Eastwood Internal Frame Coating (which is on order)
- The fender skirts next to the engine should be painted
- I’m thinking of installing the roof sound deadener (not sure yet if I’m going to though)
- I need to do a double check that I have everything ready to take to the body shop
I should be able to get all of this finished by next weekend and be ready to deliver the Mustang to the body shop in a little over a week…

3 thoughts on “Go Big Or Go Home…”