
I have a confession to make. I am truly and honestly sick of screwing around with the floor pans. I detest paint and paint prep at this scale and am very ready for this part of the project to be done with.
That being said, this part of the Mustang’s restoration is thankfully coming to a close.
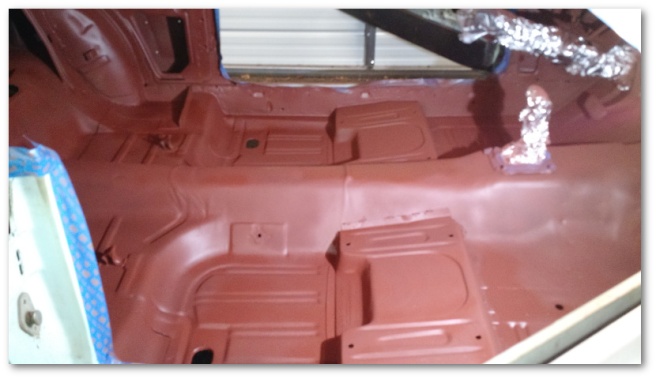
At the end of last week, I had the first coat of primer on the floor pans:

The first order of business this week was to go to the store and buy more primer. I always underestimate how much I’m going to need. However, once I had replenished my stock the remaining coats of primer only took a couple of days:
With the floor pans finally primed, I turned my attention to the last of the rust problem areas of the Mustang – the cowl.
The cowl is the part of the car right in front of the windshield. Here’s a quick video tour of what a cowl looks like and why it’s susceptible to rust:
My Mustang was really lucky. It had all the detritus that traps water and creates prime conditions for rust…
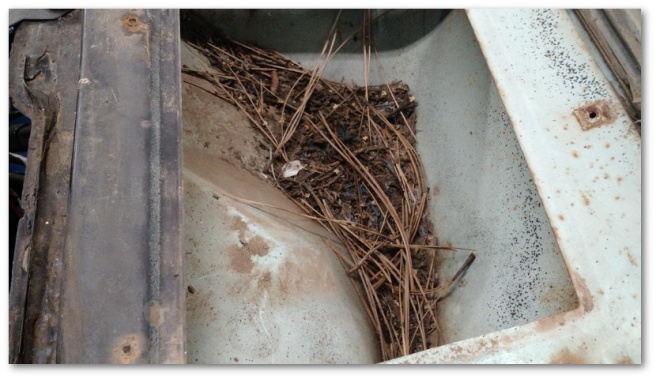
…but being a California car it hadn’t seen enough water to really do a lot of damage. There was a small amount of surface rust, but that was about it.
Since I want to give my Mustang every advantage to avoid rust in the future, I needed to find a way to take care of the surface rust and then protect the metal to avoid future rust.
However, the cowl area isn’t the easiest place to get to.
There’s not a lot of access under the cowl roof:
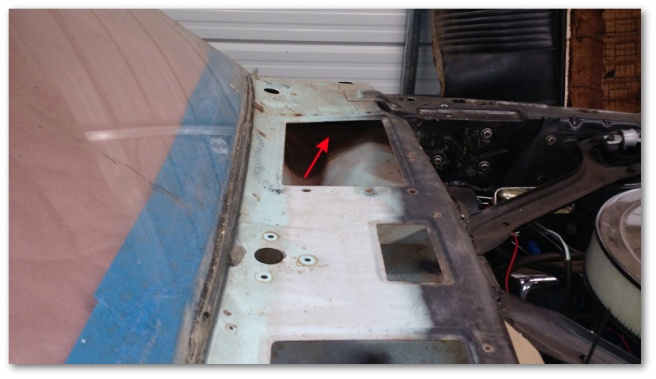
And virtually no access at all to the nooks and crannies inside the side of the cowl:

Making manners worst, the majority of the surface rust was on the side of the cowl. The following picture was taken through the hole in the upper middle of the image above:
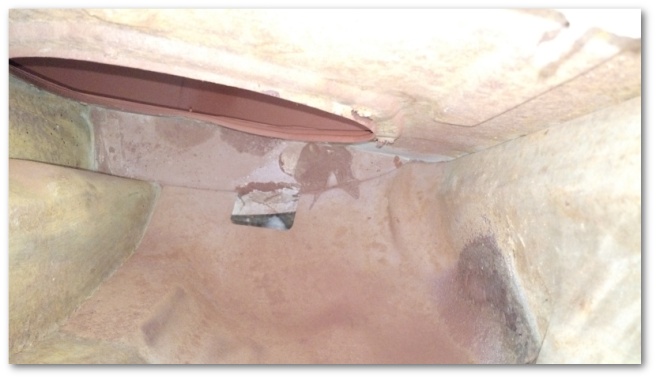
What you see there is the hole for the fresh air vent. The scale is a little misleading in that it looks like there might be room to get a paint can in there and do some work. Trust me when I say “nope, not gunna happen”.
So, what do to? How do you paint and prevent rust under and inside the cowl of an old Mustang?
You buy special paint with an applicator specifically designed to take care of rust in hard to reach places:

Eastwood’s internal frame coating paint isn’t exactly designed for cowls, but the flexible tube applicator that sprays the rust-preventing coating over a large 180 degree area works great for the purpose.
Basically, all I had to do was insert the tube deep into the areas I couldn’t get to and start spraying. The nozzle at the end of the tube diffuses the paint over a large area and does a shockingly good job of covering areas there was no hope of me reaching with an ordinary spray can.
With very little effort, the inner cowl areas of the Mustang are now well protected against rust going forward:
The cowl floor is similarly protected:
I also coated the Mustang’s frame rails which have no access whatsoever to their internals with the coating. I’m very happy with how it turned out.
I also wanted to coat the inside of the seat pan as well. The seat pans sit on top of the floor pans and provide the foundation for the seat rails. The only access to paint under the seat pans are through the bolt holes – making this a prime opportunity to use the internal frame coating.
Naturally, I ran out before I could get them painted.
I was faced with a choice of either doing nothing and risking rust, buying more (and waiting a week for it to show up) or hacking something up and using primer instead.
Yeah, that wasn’t much of a choice:
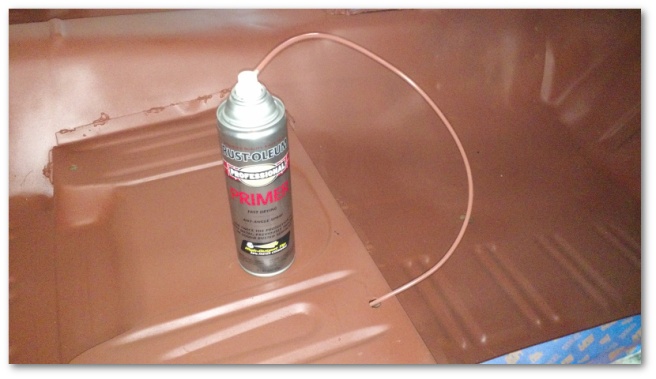
The hack was pretty simple:
- Pry the applicator tube off the special nozzle it came with from Eastwood
- Drill into the primer nozzle to expose a hole large enough to insert the applicator
- Paint!
With this set up, I was able to get at the internals of the seat pans with the primer giving me warm fuzzy feeling that even that part of the Mustang is protected from rust. The hack worked great!
Until it didn’t:
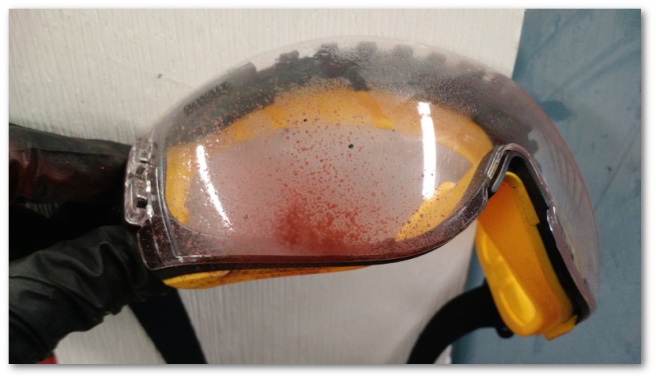
The applicator hose decided to spectacularly remove itself from the hacked up nozzle and explode primer everywhere. Thankfully, I was smart and had my safety gear on. Thank you safety glasses. You are the best ten dollars I’ve ever spent.
Naturally, I re-attached the applicator hose and finished the job later.
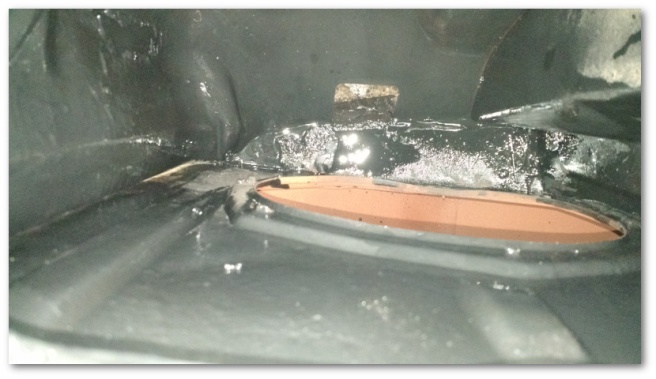
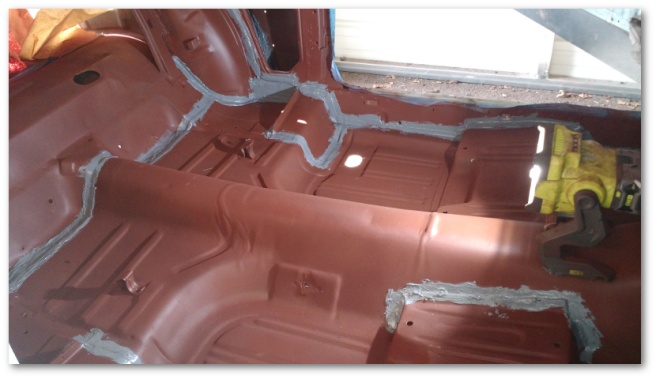
Last on the list of things to do before the top coat of paint went on was the application of new seam sealer. I decided this time to try a type that could be brushed on:

I was hoping it would be easier to apply than the type I had to apply with the caulk gun last time. In many ways it was easier, but the cost of easy is apparently mess. I went through countless sets of latex gloves putting this stuff on. It’s gooey and sticky and just all around unpleasant to apply. I also found out today that in some areas I applied way too much of the sealer causing areas to still not be totally dry two days later.
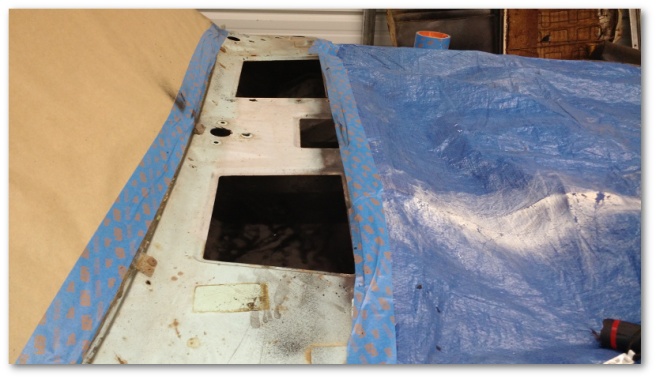
Nevertheless, behold floor pans (in most places) ready for top coat paint:
This week’s plan is to turn that brownish red floor back to a flat black and be DONE with painting the interior.

2 thoughts on “Sealed Up And Ready For Top Coat…”