
When I work on the Mustang, I generally like to have a “theme of the day” that directs what I work on and keeps me from wandering off into never-never land of trying to fix everything and ending up fixing nothing.
Today was not like those days. Today, I ended up in full-throttle Attention Deficit Disorder mode.
Attention Deficit Disorder, as described by Merriam-Webster is:
a condition in which someone (such as a child) has problems with learning and behavior because of being unable to think about or pay attention to things for very long
This description was an accurate description of my shop time today. I intended to start with the radio wiring to understand where I was with that. I ordered a radio for the Mustang yesterday and wanted to be ready to install it later this week or next.
Instead, I ended up working all over the car – mostly on unrelated items who’s only commonality was their being electrical in nature.
I started by putting some parts away that had arrived late in the week. When I did, I noticed the new driving light assemblies in their boxes. “That’ll be quick and easy,” I thought so I decided to postpone the radio wiring and install the driving light assemblies first.
Unfortunately, these assemblies ended up not being as close a reproduction to the originals as I have come to expect:

On the plus side, they shipped with mounting hardware – which is almost unheard of in the Mustang restoration parts business.
On the down side, the bolts shipped with the assemblies didn’t actually thread into the bolt holes. For the life of me, I cannot figure out how this got past QA at whoever made these.
Thankfully, I have a large cache of spare nuts and bolts and it didn’t take long to find a set that would thread into the assemblies. I promptly mounted them and was again disappointed in the reproduction. Since the upper bracket is so much longer than the originals, the lights are recessed further into the valance than I would prefer:
It’s not bad, it’s just not quite the way I want it to be. I decided to leave it be for now and fix it later when I’m putting the car back together after it gets painted.
I then set out to get back to work on the radio wiring, but ended up getting distracted by the instrument cluster as I was putting my tools away. “There will be plenty of time,” I thought, so I dis-assembled the the instrument cluster I purchased at the salvage yard for practice. I wanted to make sure I knew what I was doing before I broke something on mine.
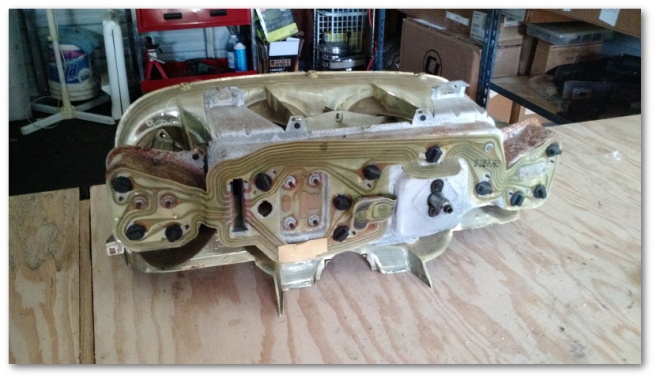
As it turns out, these things aren’t that difficult to take apart. You basically start with the instrument cluster out of the car:
Unscrew four or five screws and it basically splits in half:
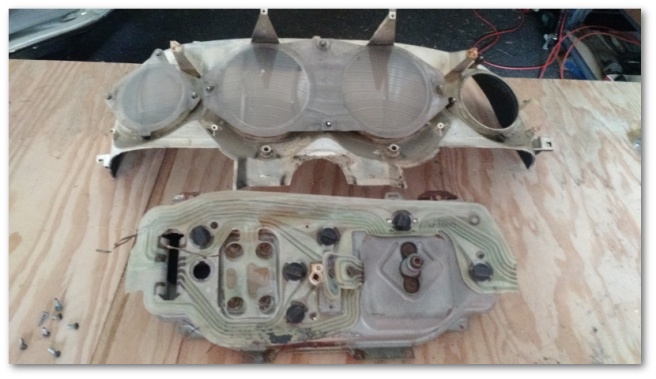
The circuit board comes off after you remove the black brackets that hold the lights and unscrew the gauges.
If you’re lucky, you don’t ruin one of your gauges like I did. When I was removing the gas gauge, the nut decided it was stuck and wouldn’t move. Considering there was no other option other than to tug harder on the socket wrench, that’s what I did.
Sadly, the result was a broken gas gauge:

That gauge may have worked before, but it certainly isn’t going to now. On the plus side, the salvage yard gas gauge got an instant promotion. I really hope my 10 dollar backup gauges come through.
After taking the cluster completely apart, I then set about to clean things up a bit. I started with the rusted metal sections:
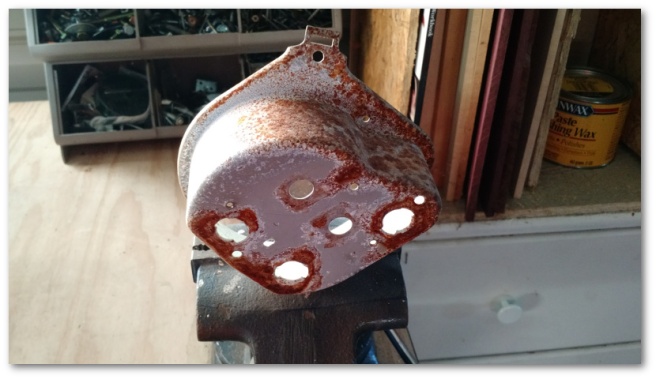
I wire brushed that piece and all of his friends to end up with a nice collection of mostly-not-rusty components:

It was then I realized that I still hadn’t got to the radio wiring, so I got into the car to start looking at that.
…and got distracted by the heater control lighting and wiring. I knew there was a light in that unit somewhere and I wanted it to be an LED. And since I was in that area already…
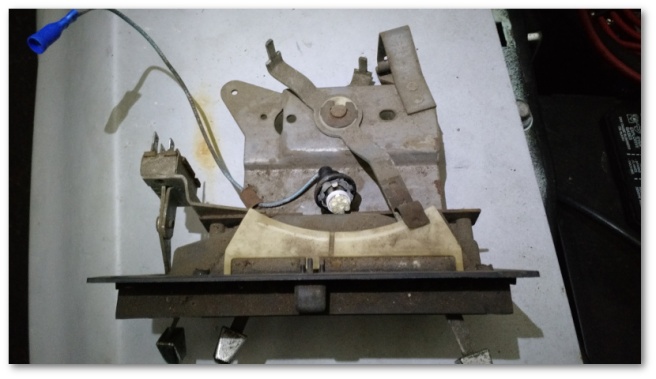
In the end, I took the entire heater control assembly out of the car just to get at the light. I learned later I didn’t really have to do this, but it seemed like a good idea at the time.
By this time, I had decided most of the day was done and I had better get around to what I had come down to the shop to do.
I had previously looked at my wiring diagram and determined the color of the two wires that feed into the radio. I was looking for a black wire with a yellow stripe and a blue wire with a red stripe.
Well, it didn’t take long to find them – pre-stripped and just hanging there due to some ill-conceived surgery done by Mr. Previous Owner:

I tested the wires, and thankfully they were no worse for wear after having been unnecessarily exposed to the elements.
These two wires give me radio power when the car is on and provide an indication to the unit when the lights are illuminated. That’s two out of the three wires I need. The last wire I need is a constant 12v source to power the clock in the new radio.
This wire I’ll have to provide myself since 1969 radios didn’t have a need for a constant power supply. I plan to splice the wire going into the cigarette lighter (which is provided the constant 12v I need) and use that to feed into the radio.
Speaking of the cigarette lighter, I discovered today that Mr. Previous Owner was apparently a smoker:

…which might explain why the cigarette lighter worked in the car when almost nothing else did.
At that point, I decided I was done for the oh hey! how about we put the steering wheel back on?
I immediately regretted my distraction. The horn assembly had never worked right and even after installing the horn spring Mr. Previous Owner had taken out and not reinstalled the horn still didn’t work.
I’ll save the description of my three-hour debugging session for later and jump right to what the problem was. Mr. Previous Owner had apparently taken the horn assembly apart before and had neglected to replace a screw.
This screw, in particular:
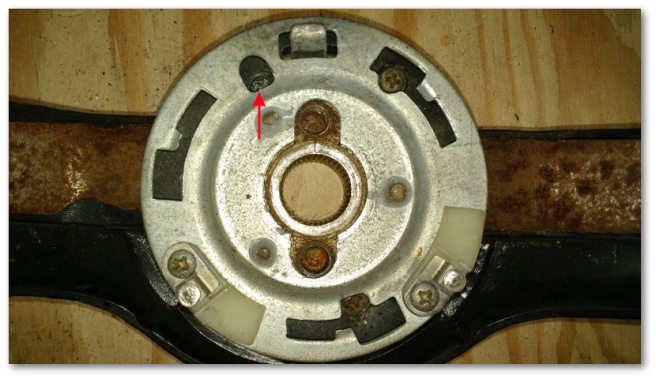
When missing, the metal bar to the right is not pulled up into the horn assembly enough to make electrical contact like it’s supposed to:
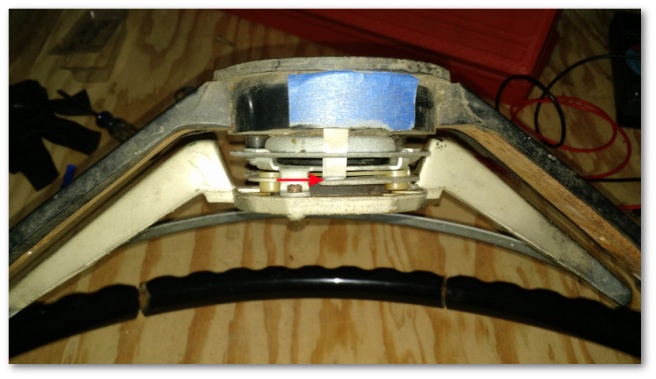
This missing connection forced me to take the whole assembly apart and reverse engineer how it worked. For the longest time, the circuit didn’t make any sense. I could see how it was supposed to work, but couldn’t figure out how the circuit was supposed to be completed. The metal bar was so far away from the assembly it looked like it was supposed to be there and it didn’t occur to me that was the source of the break in the circuit.
Finally, I noticed the missing screw. It immediately dawned on me what would happen if I tightened that part up into the assembly and sure enough when I did the horn worked perfectly.
I then re-attached the steering wheel for testing:
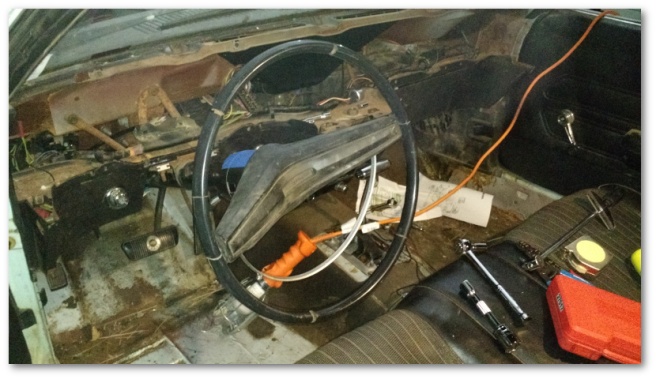
Once I had it all attached and working, I realized my ADD had installed a steering wheel that was totally in the way of working on the radio wiring I’m going to be doing soon.
Thankfully, I was clear-headed enough to not get distracted while I removed the steering wheel before calling it a day.

2 thoughts on “ADD Electrical…”