I learned last week that when you purchase a “new” power steering pump, you get exactly that – a power steering pump. And nothing else. No brackets, bolts or pulleys come in the box.
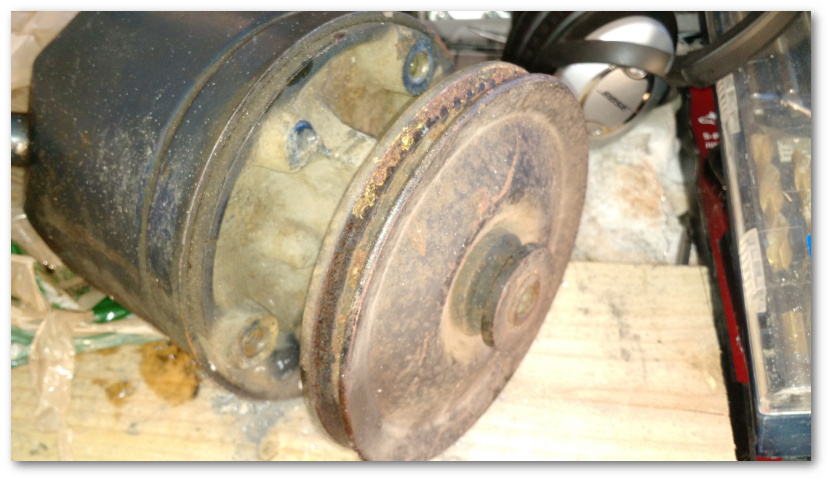
So today I worked on taking the old pulley off the old pump and cleaning it up for proper re-installation in the Mustang.
I started with this:
In researching how to get the pulley off, I learned that most pulleys on cars are not actually bolted on. They’re simply held on by compression forces. That means to get the pulley off, you have to pull it off with a special tool.
Thankfully NAPA had one of those special tools for sale when I picked up the pump last week.
Here’s a quick video of how the tool works:
I didn’t quite have the fancy air impact driver, but my setup worked similarly. I hooked up the tool to the pulley:
And started wrenching on the bolt:
The lack of a fancy impact driver meant I had to whack the end of the socket with a hammer to break the pulley free. Once it was free though, it came right off:
Considering new pulleys cost almost twice what I paid for the pump, I decided I had some cleaning to do:
A little wire brush work and most of the gunk was off:
I then made a little jig so I could hang the pulley and the power steering dipstick and prime them for painting:
I put a couple of light coats of primer on tonight. Tomorrow I’ll sand both and apply the first coat of paint. Time permitting, I’ll also make another jig and start the priming/painting process for the bracket as well.
Sprinkler systems aside, there was some small progress on the Mustang this week.
NAPA auto parts made the mistake of sending me a 20% off coupon right about the time I was looking at getting a new alternator, power steering pump, voltage regulator and starter solenoid. Never one to let a good coupon go to waste, I procured my parts at discount prices!
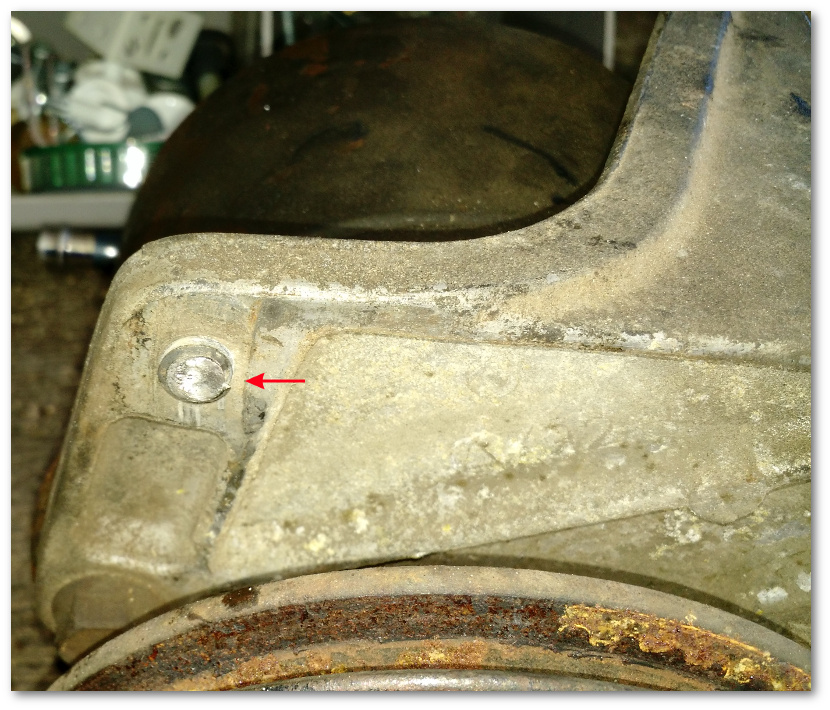
In order to re-install the power steering pump I needed to remove a broken bolt from the pump bracket. This bolt was the only one we broke taking the engine out of the car:
Here’s a closer view:
The bolt was well and truly stuck in there and the only choice I had was to buy a new one or drill it out. Since I was all out of 20% off coupons, I went looking for my drill.
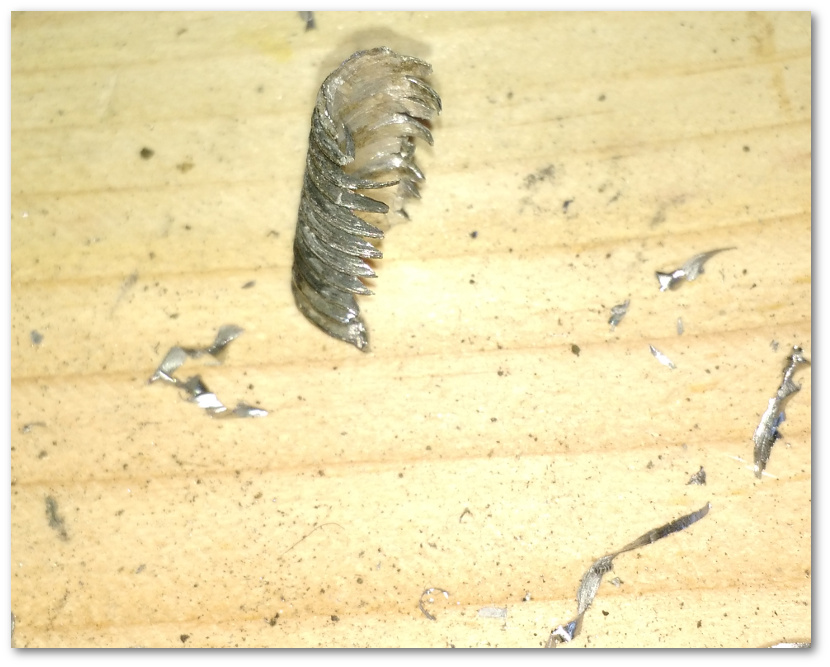
A few minutes of drilling a small pilot hole yielded promising results:
Drilling a slightly bigger hole into the bolt finally made it collapse enough so I could rotate it out:
The hole the bolt was stuck in was threaded. While drilling, I nicked a couple of the threads so I took a grade-8 bolt and threaded it into the slot. With a little persuasion, the bolt threaded in and reset the threads in the bracket nicely.
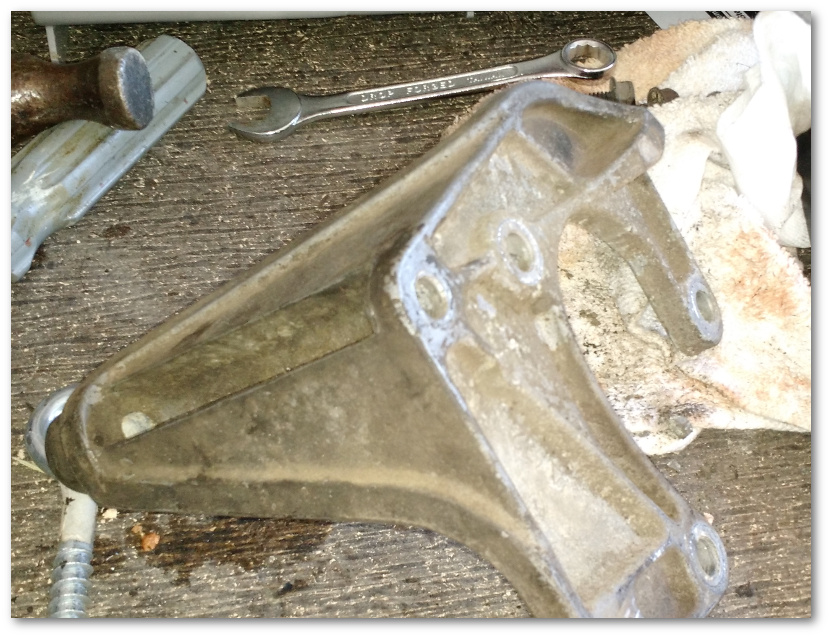
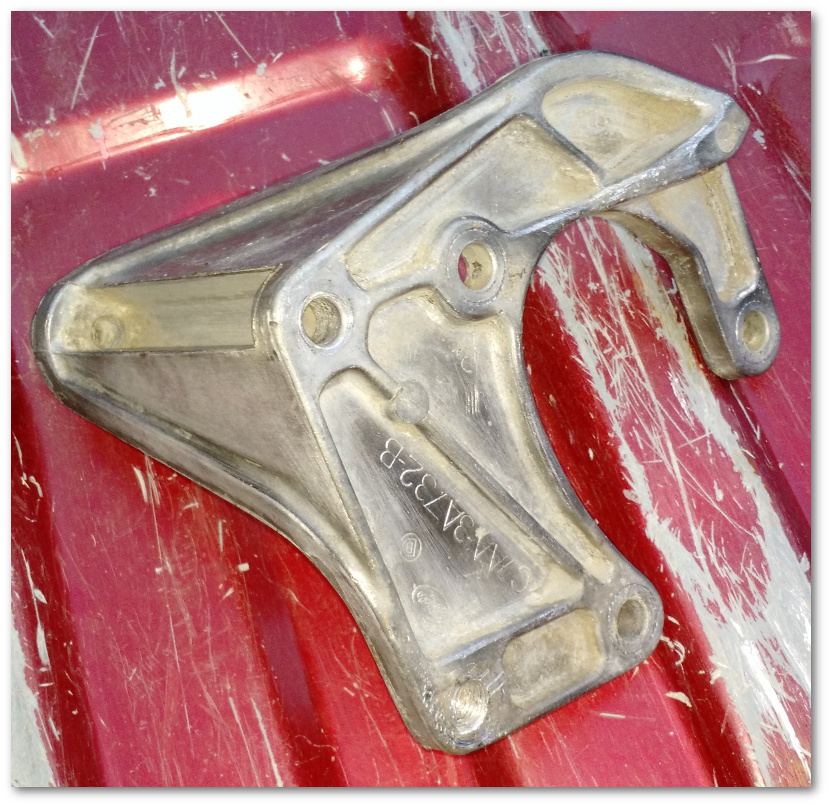
I then turned my attention to the bracket itself:
Like most other things I’m putting back on the Mustang, it needed a little tender loving care. Brake cleaner, a wire brush and some sandpaper cleaned it up quite nicely:
It’s still not perfect and I may eventually paint it – but it’s good enough to be put on the car now and not be embarrassed.
This was supposed to be a big weekend for the Mustang. I had grand plans to get the starter and enough of the electrical system installed to be able to turn the key and have the engine turn over. The plan was for this to happen on Sunday.
However, if you look closely at that picture, you’ll see a small circular area in the middle left that’s out of place. Zooming in a little bit shows a pothole:
And potholes just won’t do in my new shop.
So I faithfully googled how to fix up asphalt, rented the very expensive tool (tm) (a-now-on-my-Christmas-list Makita demolition hammer) and got to work.
And then this:
I’ll point out to those of you unfamiliar with the comparative densities of water and asphalt that asphalt does not float. Cool as it may be, my driveway does not contain a subterranean ocean.
This meant two things:
We had identified running water as the cause of the pot hole
The pothole was now the least of my concerns
The rest of the day didn’t get any better. It turned out the the water coming into the hole was coming from our metered city water system and not the irrigation line. This meant that not only did I have a pot hole, I was paying dearly for the privilege of continually supplying the water that made it. Swell.
Asphalt being asphalt, it wasn’t a straightforward task to identify the cause of the leak. First we tried digging up the asphalt around a spigot close to the leak. The spigot was dry as a bone, but the line to it was so close that it had to be the culprit. Unfortunately, much of the line was under the driveway and we didn’t know where it came from.
Our next step was to dig up a sprinkler in the middle of the lawn hoping it was plumbed in series with the spigot. Nope.
We then dug up a spigot on the other side of the yard hoping it was either plumbed in series or would give a clue as to where the main line was. Nope and nope.
We then ran a chalk line from the driveway spigot to two of what we thought were the most likely points the source line to come in. We then dug an eight inch by 17 inch trench along the driveway hoping to find the line.
We found a line.
It was the wrong one.
I now know how far the water line for zone 1 of my irrigation system goes. It goes right to where the demolition hammer cut it. Have I mentioned I hate plumbing?
Somewhere in that process I called my insurance company thinking we’d have to dig up half the driveway up to find the leak.
Before moving on to how things got worse, here’s a quick diagram of our property for reference:
With light waning, we tried digging one last desperation trench by the spigot on the top right of the map above hoping to find its source line. After about 20 minutes, we had a lead! The spigot’s source line went into a T-junction. This T-junction had another line going off to where we think the main water line to the house is and another going off in the direction of the other spigots!
Woohoo! It’s was only 8:30 and getting dark so what could go wrong? We turned the water off at the street and cut what we thought was the main line.
However, what we thought was the source line was just another line to somewhere else and the line we had hoped ran to the spigots was rapidly filling our desperation trench with the remaining water in the line from the street.
Did you know The Home Depot is open until 10 on Saturday evenings? Neither did I until last night when I found out none of my at least 5 dozen sprinkler parts would cap the line.
Cue dramatic reality show voice-over: Unless they can work underwater to get the lines patched, they’ll be without water until the following day!
To cut this already embarrassingly long blog post short, we were able to cap the line – somewhere in the neighborhood of 10:30 at night.
We went to bed thinking we’d either have to wait for the insurance adjuster or tear up the driveway and/or yard even more on Sunday. I didn’t sleep well.
And then Sunday morning happened.
I woke up in a crummy mood, got the kids ready to go and brooded on the couch for a while. When I was ready to face my driveway I went outside to gather tools and decide which of the bad options I was going to choose to follow that day.
THE WATER WAS GONE
As in…totally not there anymore – and not flowing into the pothole either. More than a few double takes later I couldn’t help myself but to:
After a few minutes of jubilation, I decided to see why the water wasn’t there. Some sleuthing determined that our original guess for how the system was plumbed was slightly off:
The line we capped (thinking it was the source to just the spigots on the left) was actually the source line to all of the spigots. The random water line that headed away from ever.other.spigot.on.the.property was actually the source line that fed the spigot with the leak as well as the spigot at the top left as well.
Unsurprisingly my outlook on life improved. McDonald’s breakfasts for everyone!
Sadly, that still didn’t mean I got to work on the Mustang today. My wife and I spent the entire day cleaning up the mess we made on Saturday.
And yes, we did eventually get around to patching the pothole:
This week’s progress involved taking care of the gaping hole in the front of the engine bay:
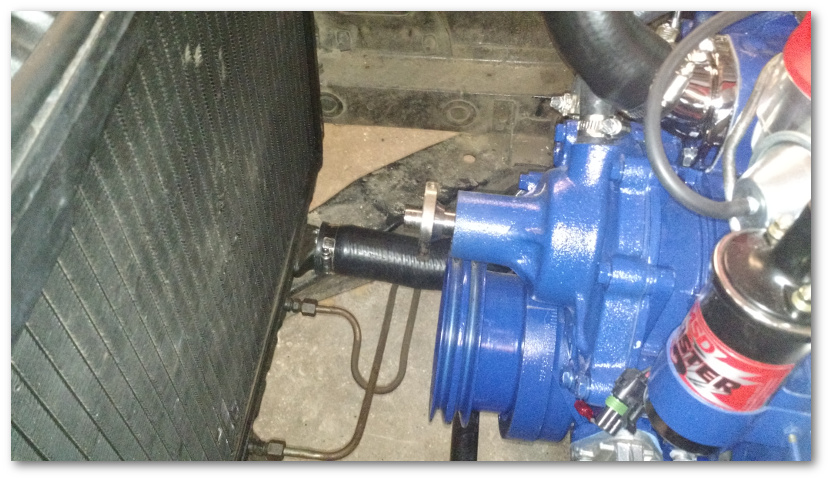
I’ve had the radiator ready since the end of February but until today it was just able to sit and collect dust on the shelf. This was especially sad considering it took all of four bolts and ten minutes to put it back on:
After 14,258 skin-piercing pricks with the wire, I’d almost got the thing installed:
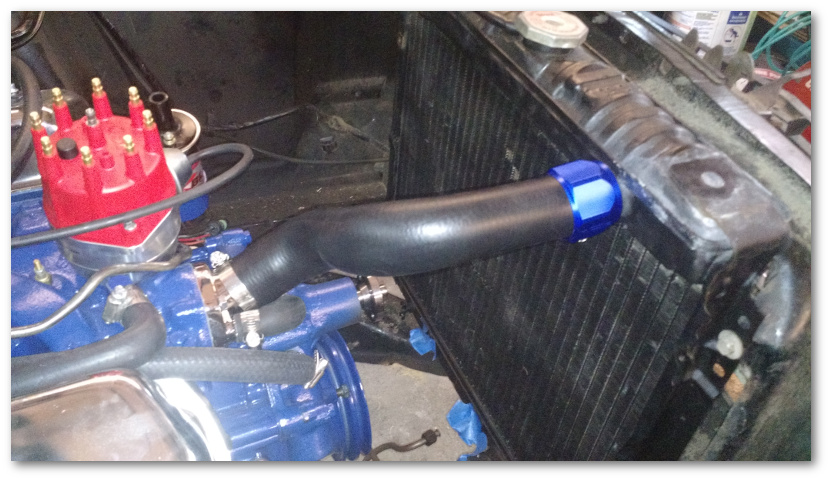
…but the failure point came when I tried to install the blue clamp covers. It must be that this hose was just too big for the design of the braid because the clamps wouldn’t even fit over the radiator intake. Trying to make them fit resulted in a bent and busted cover:
It was at this point I rage quit the installation of the braided radiator hose.
Figuring I’d never get the braid off the hose I had, I got ready to head into town to get a new hose. The cheapskate that I am though wouldn’t let me buy something without at least trying to use the hose I had so I gave it a shot.
It came off in about 15 seconds. The only part of the installation of the braided hoses that worked in any way shape or form was taking it off so as to not use it. I’m taking that as an omen that it was simply not to be.
In the end, I did decide to use the one remaining undamaged hose clamp cover for the time being over just the radiator hose. Without the braiding, the clamp cover fit well enough to go over the clamp without breaking.
I don’t know if I actually like this, but I paid 20 some dollars for the braid kit and this at least lets me feel as though something came of it…
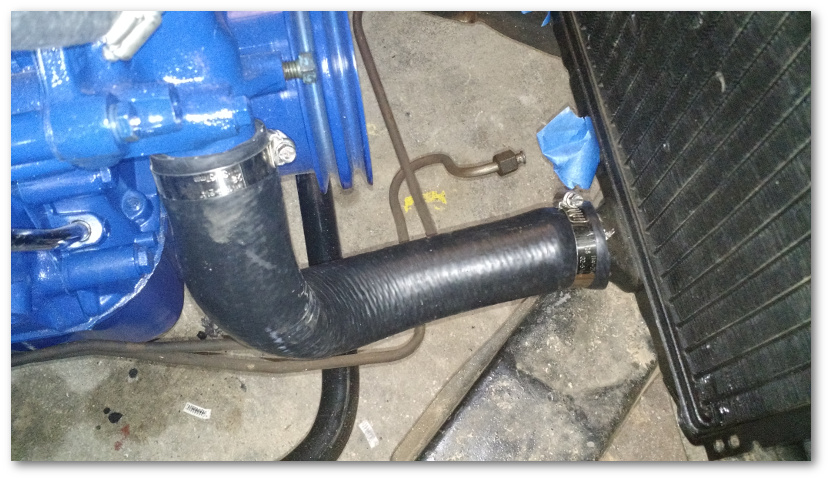
Next on the docket was the installation of the bottom radiator hose:
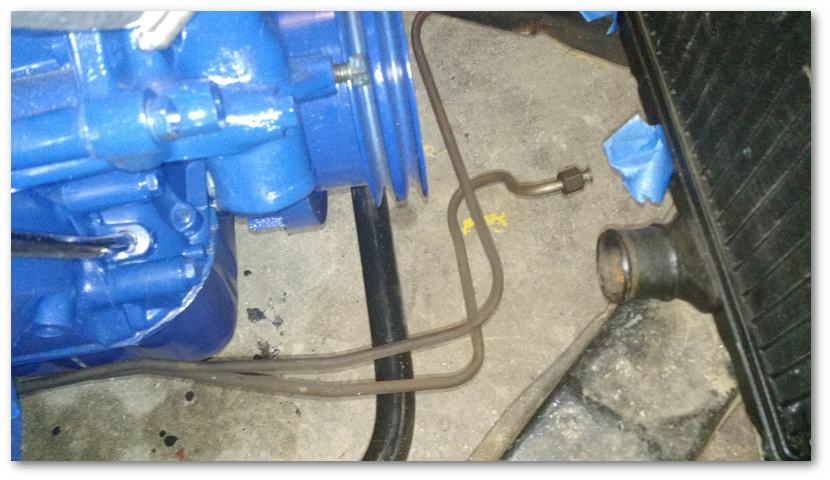
And the installation of the transmission cooling lines:
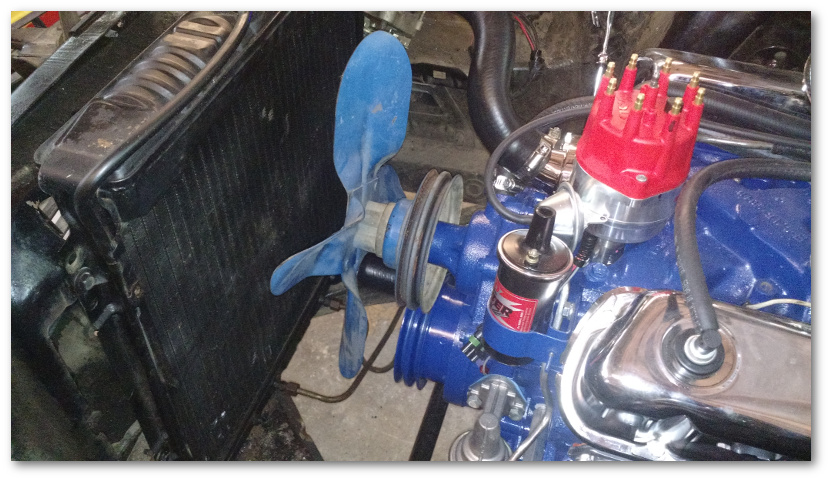
Last but not least was the installation of the engine cooling fan into one of the few remaining holes left in the engine bay:
Astute observers will notice that the color of the engine fan is not quite the same color as the engine block and that there’s still some dirt and gunk visible. This will be addressed in due time (perhaps with a new fan) but for now I’m all about getting the engine running and slightly different shades of blue are an acceptable price to pay towards that goal.
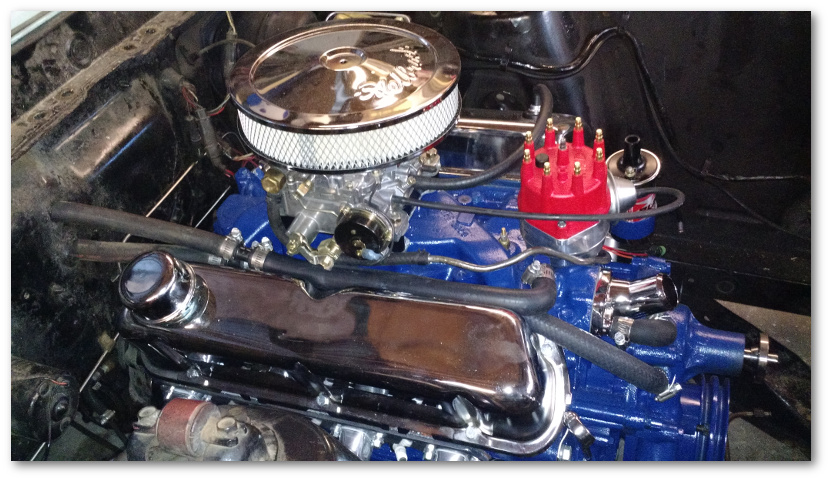
We’re almost done. Here’s what’s left as far as I know:
Starter
Alternator (with belt)
Shock tower braces
Power steering pump (with belt)
Battery & Wiring
Transmission dipstick
Fluids
That’s not a huge list – and most of those are fairly quick installs. I’m sure something will come up, but I’m starting to believe we’re perhaps only a couple of weeks away from the engine turning over for the first time.
Sometimes life has a funny way of reminding you who’s boss.
You may recall that I recently moved into a new home. Since the primary unpacking is done, the top of my “honey-do” list is fixing leaky faucets and toilets. I spent the majority of the day yesterday cursing the individual who invented compression fittings for toilet valves and complaining about how much I hate plumbing.
So, what do I do when I get to work on the Mustang today?
Plumbing… Very funny life. You win this round…
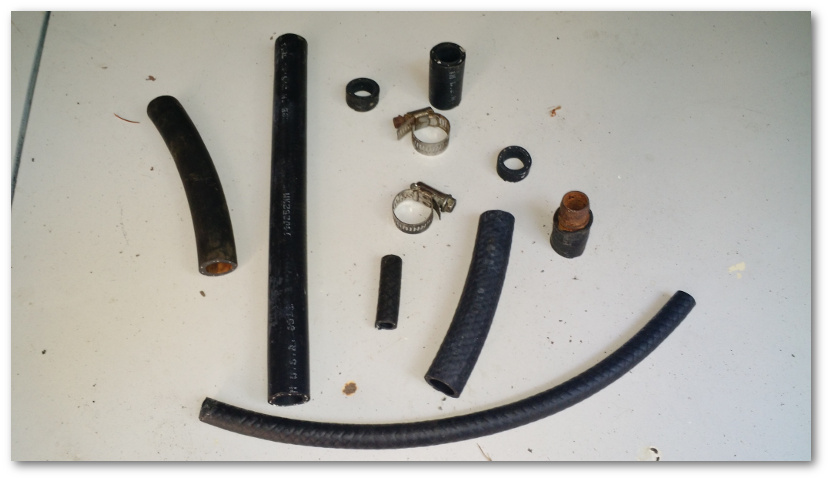
We started with running the fuel line from the fuel pump to the carburetor. The original line was a little grimy and had two or three different colors of paint on it:
A little sandpaper and wire brushing cleaned it right up:
It’s not perfect, but the original fuel line is smaller than I’d like to use for my new carburetor. I’ll eventually replace it with a larger one – but right now the goal is to get the car running and the line is good enough for that.
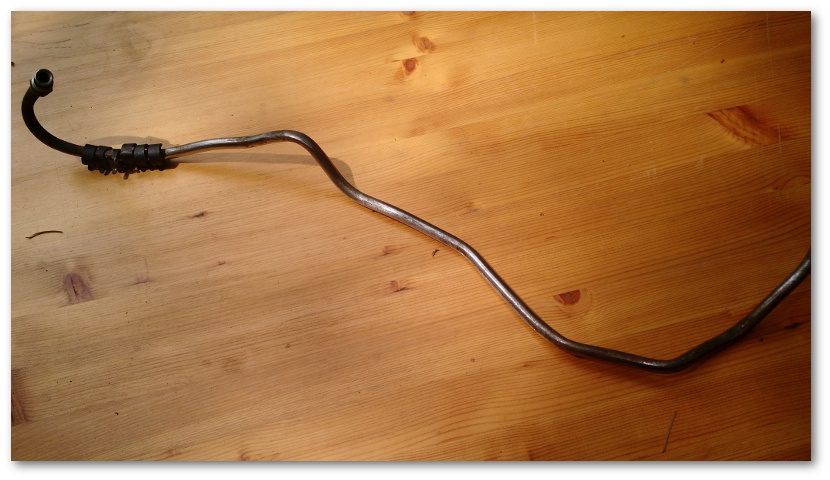
Installing the line was an interesting jigsaw process.
The line attaches to the fuel pump which is on the bottom right of the engine – beneath the distributor and electronic ignition and next to the oil pressure sending unit.
Somehow the line needs to wind its way through all of that to the top of the engine to provide gas to the carburetor.
And naturally, it didn’t want to do that.
After about 20 minutes, I decided to throw caution to the wind, thread the line onto the pump “persuade” it to fit with hard tug.
Viola!
After that, it was quick work to attach a rubber hose from the end of the line into the carburetor intake:
As far as I can tell, that makes the carburetor done, with the exception of the air filter stud which is too long and needs to be shortened.
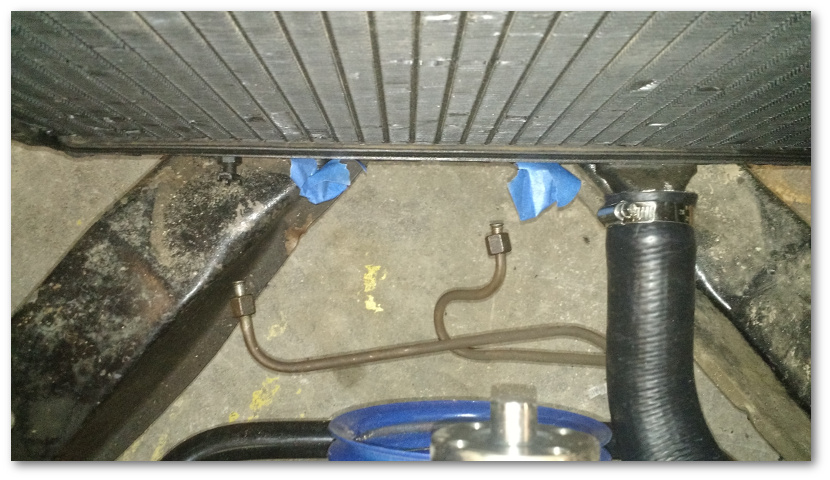
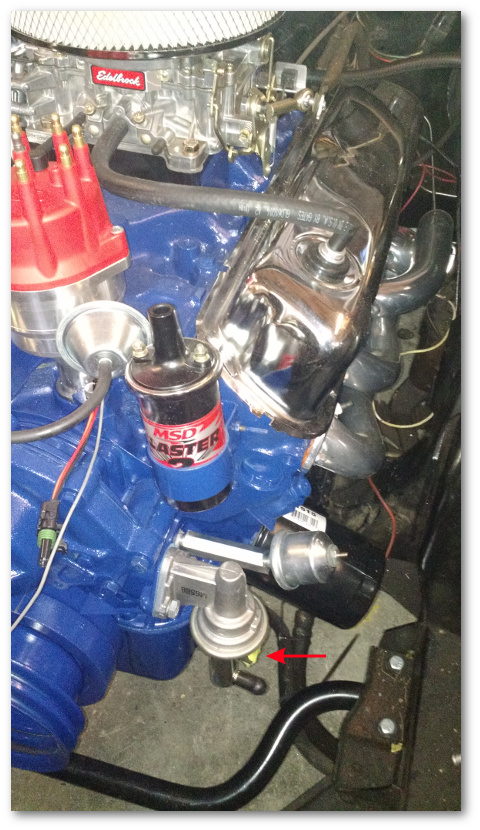
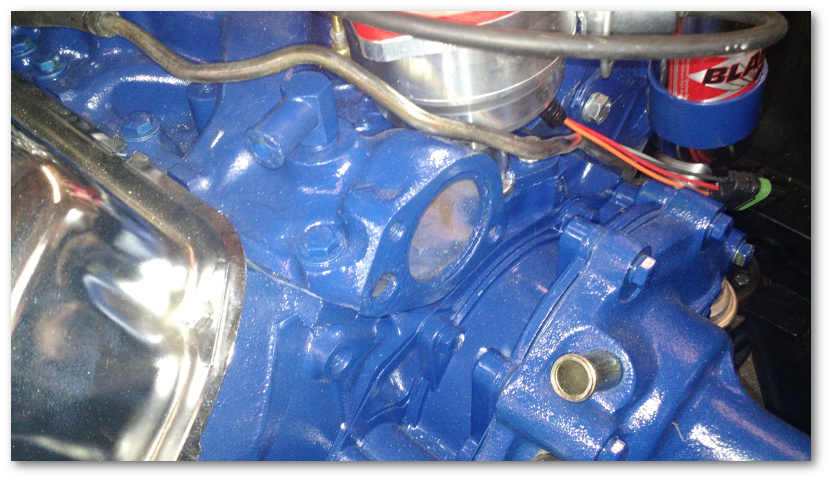
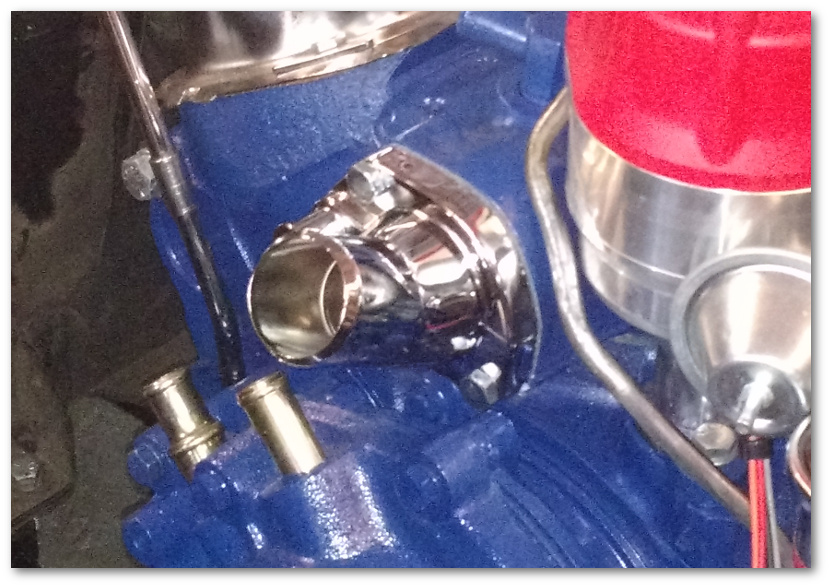
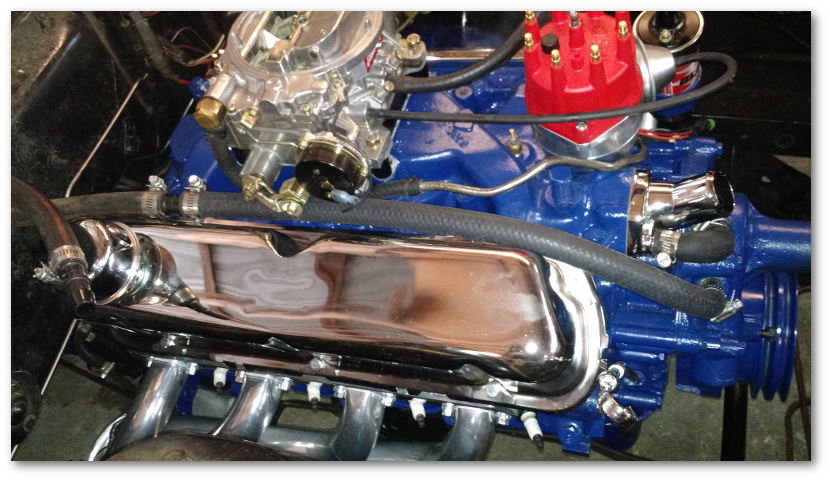
I then moved on to installing the thermostat and the thermostat housing. The thermostat is installed on the intake manifold on top of the big gaping hole in the image below:
On top of the thermostat is the housing which keeps it in place and provides the connection point for the radiator hose. Of course, me being me I went with shiny:
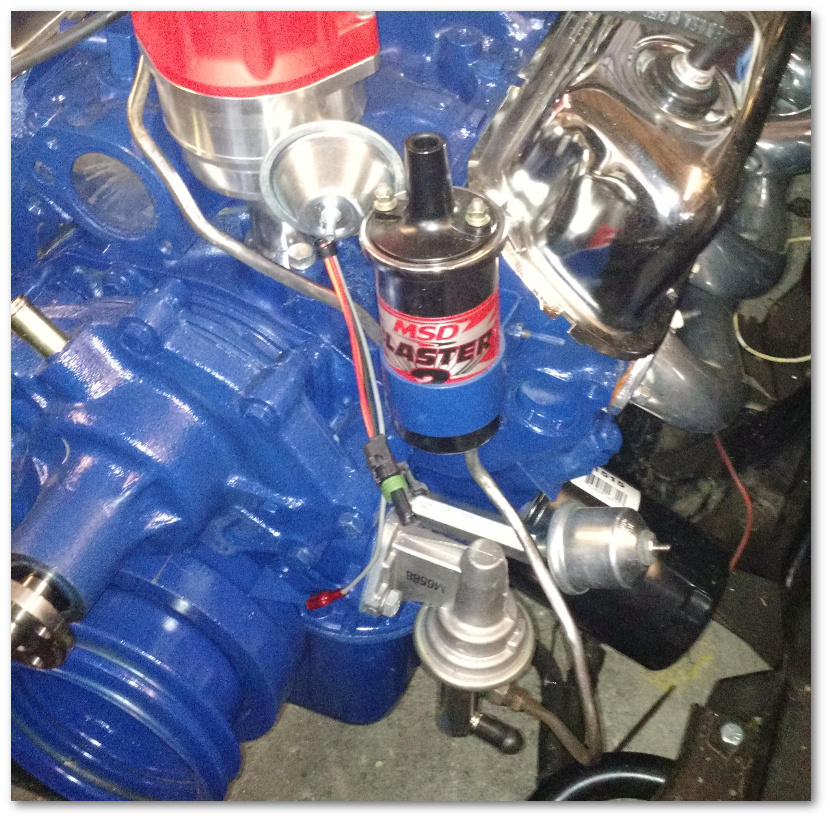
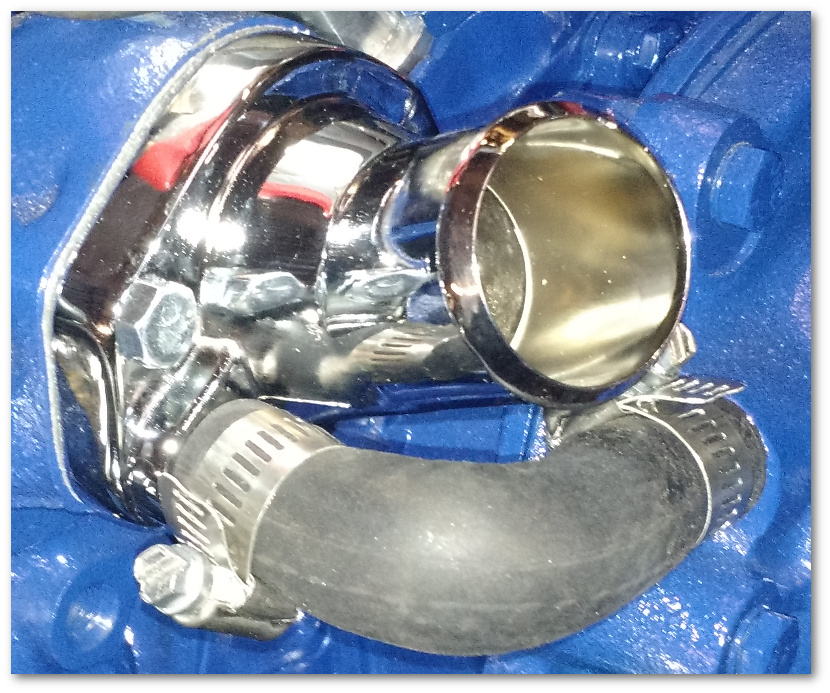
After that, it was time to connect up the water outlets you see at the bottom of the picture above.
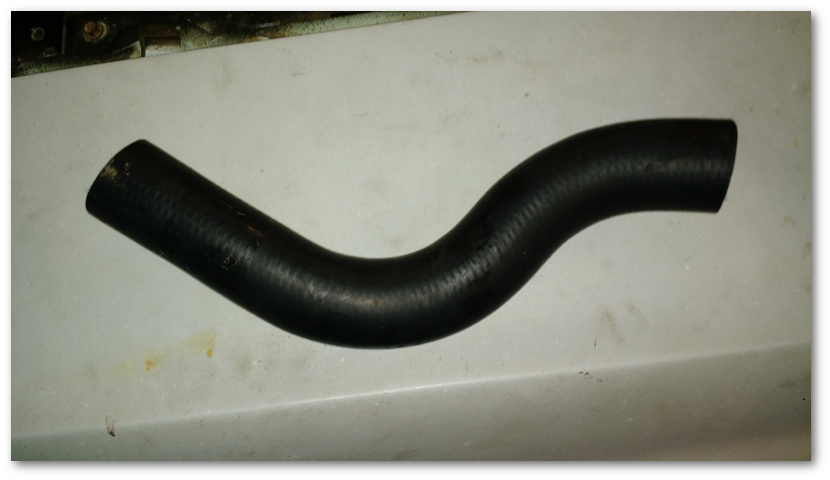
Step one was pretty easy: connect the diversion hose from the water pump to the thermostat housing. The diversion hose allows for some water to circulate in the coolant system even if the thermostat is closed. The line is a teeny-tiny pain in the neck, but with a little fiddling, it fell into place nicely:
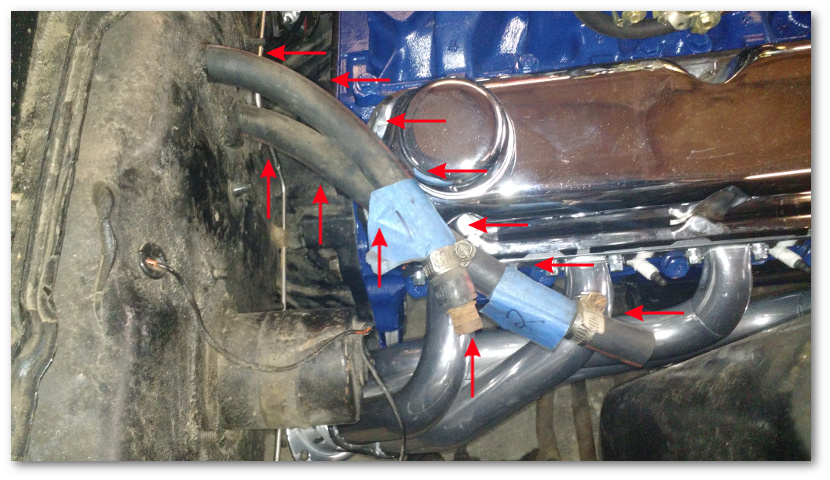
The second step was to connect the bottom water outlet to one of the heater core hoses coming out of the firewall:
I decided not to replace the lines coming out of the firewall due to the questions surrounding the heater core. If you recall, the heater core is not where its supposed to be and the hoses you see above actually go through the firewall – something they’re not supposed to do.
For the time being, I just decided to link into the existing hoses. Once I tear the interior apart to restore that, I’ll have access to the heater core and I can replace it correctly. Afterwards, I’ll re-do these lines so that they’re all one piece.
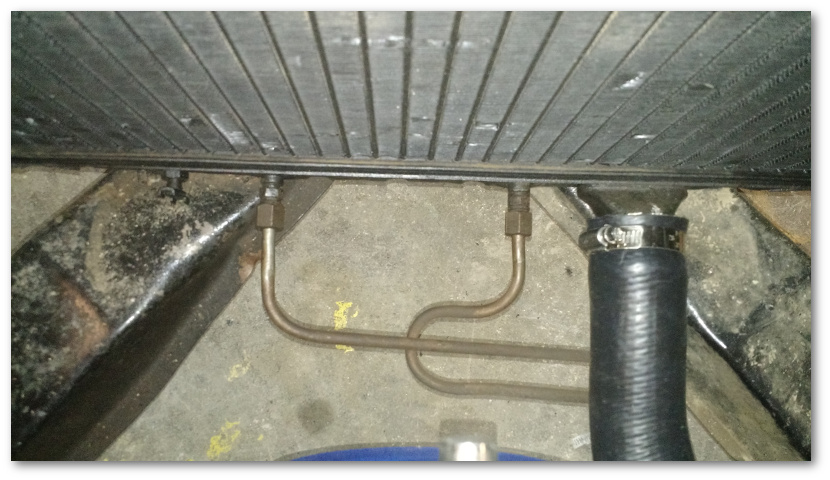
It was a fairly simple routing for the water line that runs from the water pump:
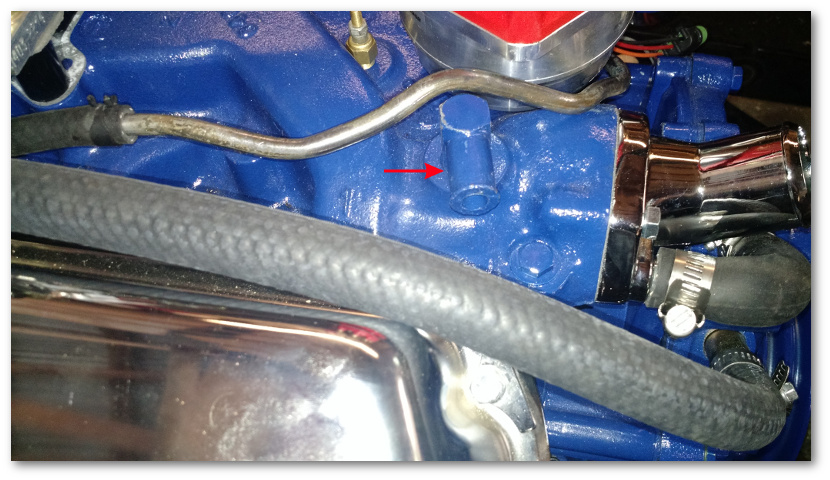
The second heater core hose posed much more of a challenge. This hose routes into the intake manifold. Specifically, it routes into this fitting:
You might notice that the fitting isn’t exactly pointing in the most convenient direction to route a water line to the back of the engine. However, with the fuel line and distributor in the way, I couldn’t get a good grasp on it in order to turn it. I did try using a box wrench to turn it, but I couldn’t get it to budge with the amount of force I was willing to apply – and I did NOT want to break the thing.
I hate plumbing.
Finally, I decided that if I couldn’t turn the fitting, I’d turn the hose instead. A not-so-quick trip to the auto parts store provided the Right Hose For The Job(tm):
and with a final turn of the hose clamp, the heater core plumbing was done:
We didn’t get to the radiator installation today because of the fuel line installation and the extra trip to the parts store. However, that’s first on the list for next week.
In order for an engine to start and provide power, it must burn fuel. The combustion of fuel has two requirements:
Fuel to combust
Air to combust it with
In order for combustion to happen inside an engine’s cylinder, the fuel and air must be mixed together in such a way that the ignition of the mixture is possible. This is much more complex than just pouring liquid fuel into the engine. In fact, if an engine gets too much fuel, it will actually stop working – a condition commonly referred to as “flooding” an engine.
A carburetor’s job is to provide the proper fuel/air mixture for the engine. It does this by using the Venturi Effect which states that a fluid or gas that flows through a constricted area will experience a decrease in pressure while experiencing an increase in velocity. Carburetors use this effect to pull fuel into an airflow in tiny particles – creating a combustible fuel/air mixture.
This effect is described well in the following video:
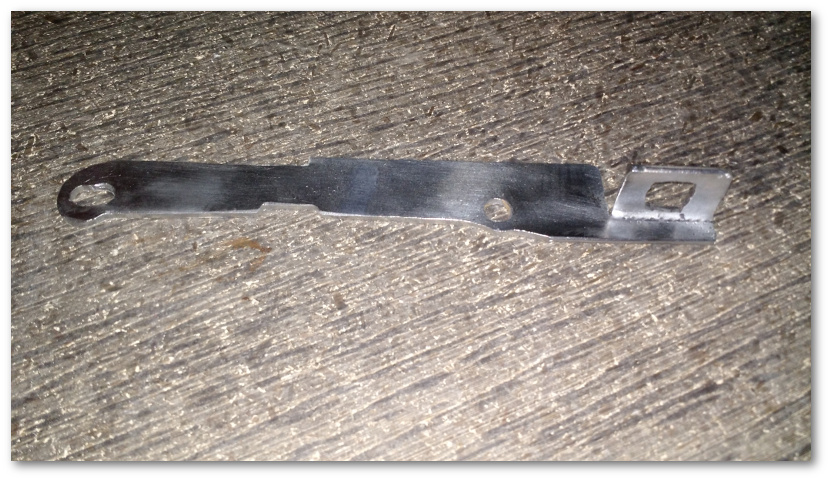
In order to get the carburetor to do its job properly, it needs to know how much fuel/air mixture the driver is requesting. This request from the driver is passed through the gas pedal to the carburetor by a wire linkage. Last week, we found out that the bracket for the linkage from the old carburetor wouldn’t work with the new carburetor. So we made a new one:
We also made a new adapter for the transmission kick down linkage. This linkage connects to the automatic transmission and tells it to downshift if the throttle is pushed in far enough.
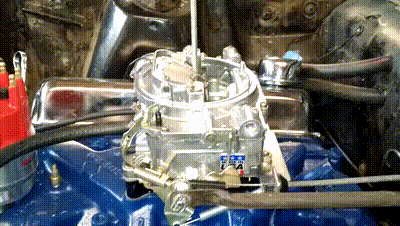
This week, we installed both of the parts we fabricated along with a throttle return spring that allows the engine to go back to idle when the gas pedal isn’t being pressed. After a small amount of futzing, we ended up with this:
We then pushed in the gas pedal and let it out to see what would happen. This is what happened:
Woohoo!
At this point, we think we have everything in place for a working carburetor. I still have a couple of concerns:
The flap on the top doesn’t seem to open as far as I would expect
The height of the carburetor makes the air cleaner get really close to where I think the hood is going to be
We’ll figure both of those two points out later. We plan to take the car back into the machine shop once we have the engine’s pieces all put back together. I’ll ask them to take a look at the carburetor and let me know if there’s anything that needs to be done.
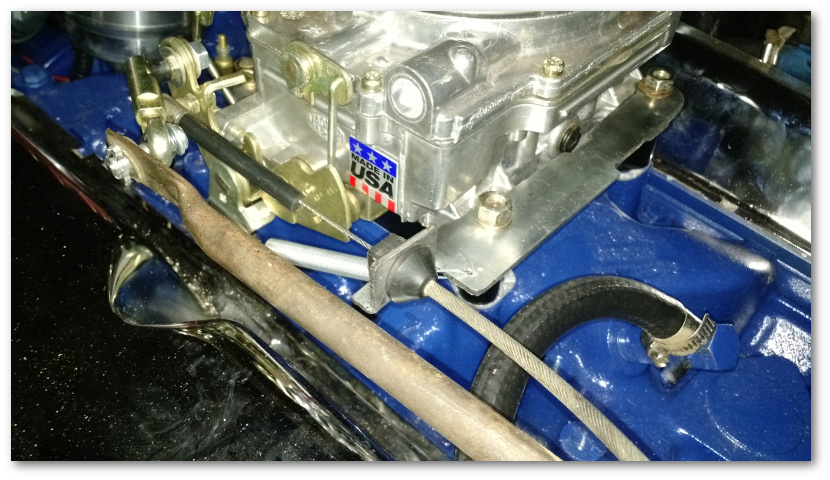
The carburetor futzing took all of about an hour resulting in a “cooperative” rating from the backyard mechanics working on it.
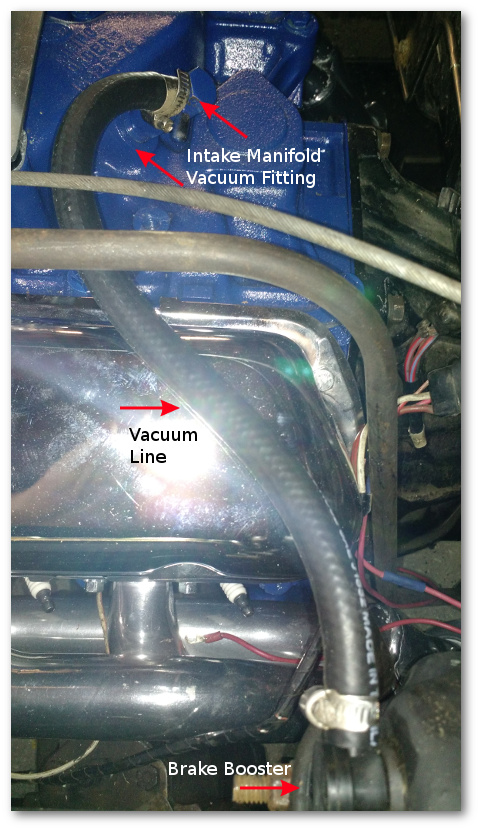
All that was involved here was buying some vacuum line and attaching the booster to the intake manifold’s vacuum fitting:
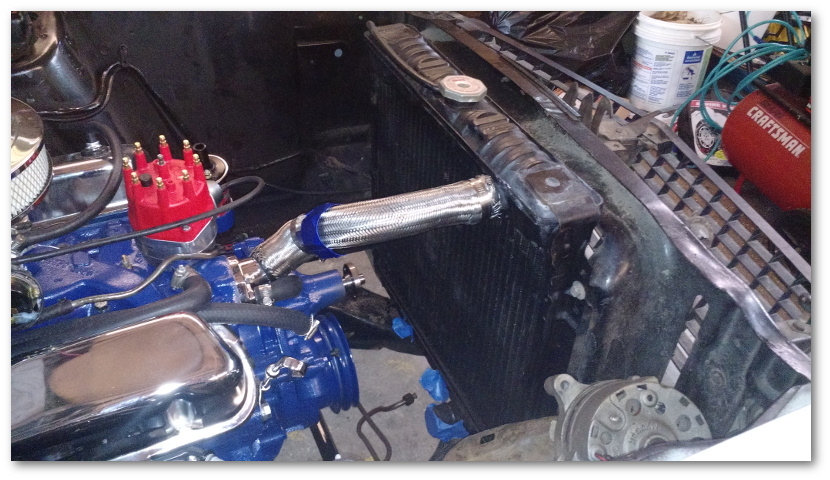
Things were going great and we decided to get a head start on next week’s radiator installation by installing some “jewelry” that’s going to go over my radiator hoses.
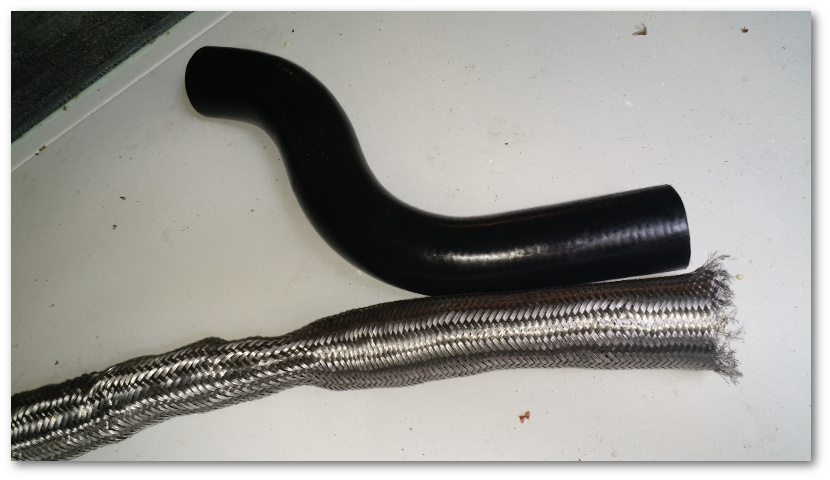
Normally, radiator hoses are boring black:
Since I’m a fan of shiny things, I wanted to install a metallic wrap around the hose to give it a bit more pizzazz:
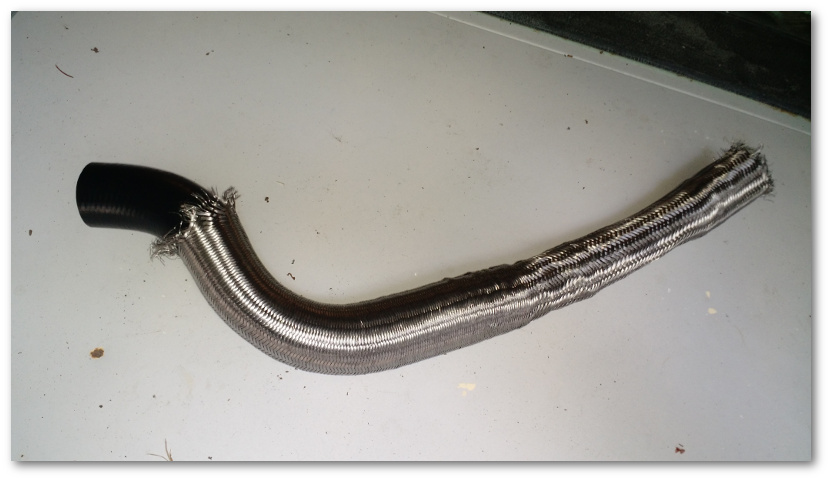
And that’s when the cooperation of the car ended. After about an hour, we’d gotten this far:
and could get no further. In fact, the picture above was intended to serve as a “we failed” image for the blog.
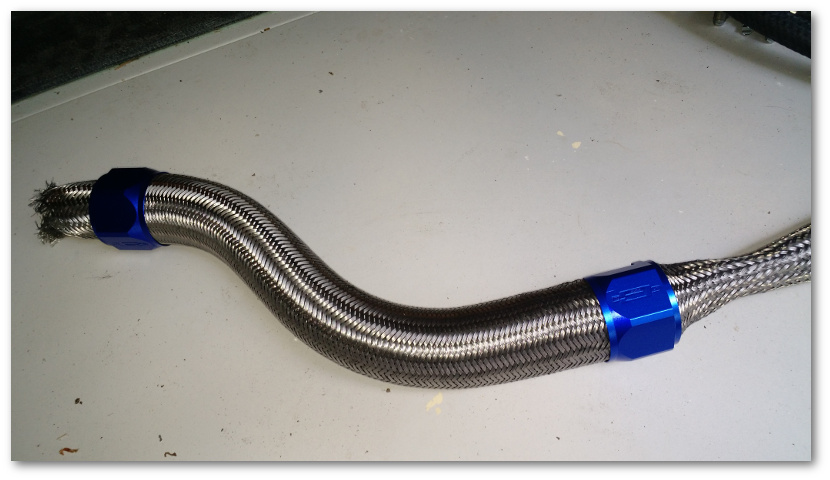
However, in the spirit of “failure is not an option” we tried again using a different approach. And viola!
Next week as part of the radiator installation, we’ll cut the ends off and install the hose-with-jewelry into the car. It will be a big step in getting the engine ready to start again…

 In researching how to get the pulley off, I learned that most pulleys on cars are not actually bolted on. They’re simply held on by compression forces. That means to get the pulley off, you have to pull it off with a special tool.
 And started wrenching on the bolt:
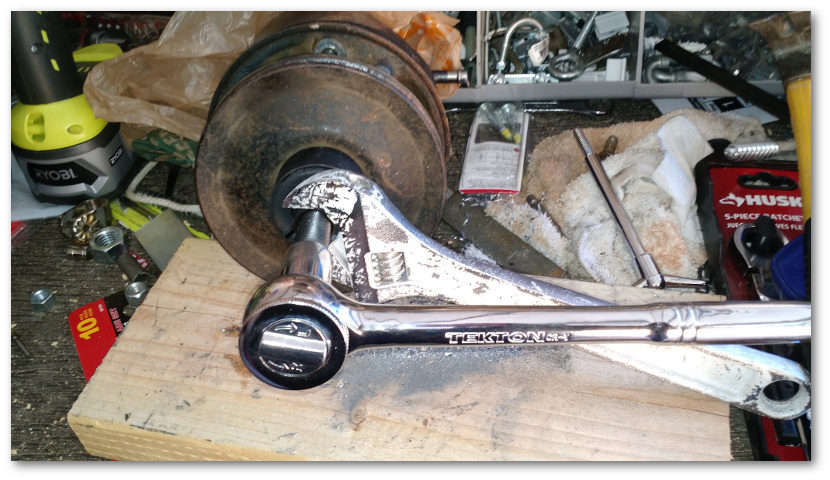 The lack of a fancy impact driver meant I had to whack the end of the socket with a hammer to break the pulley free. Once it was free though, it came right off:
 Considering new pulleys cost almost twice what I paid for the pump, I decided I had some cleaning to do:
 A little wire brush work and most of the gunk was off:
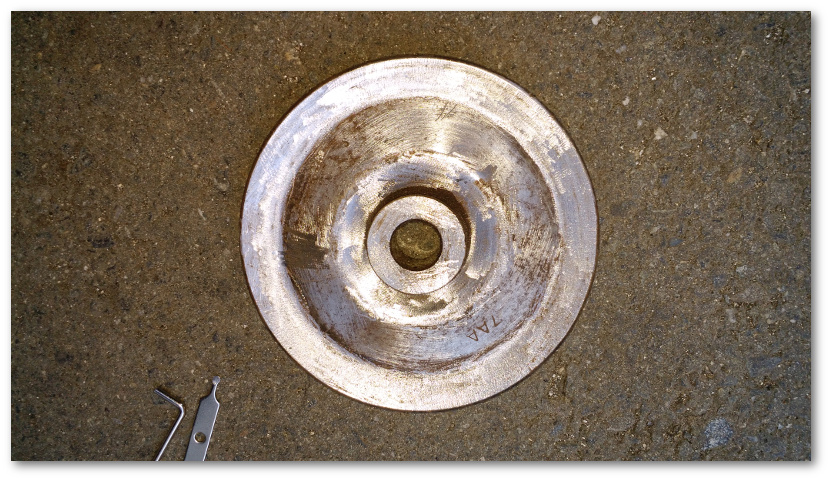 I then made a little jig so I could hang the pulley and the power steering dipstick and prime them for painting:
 I put a couple of light coats of primer on tonight. Tomorrow I’ll sand both and apply the first coat of paint. Time permitting, I’ll also make another jig and start the priming/painting process for the bracket as well.