
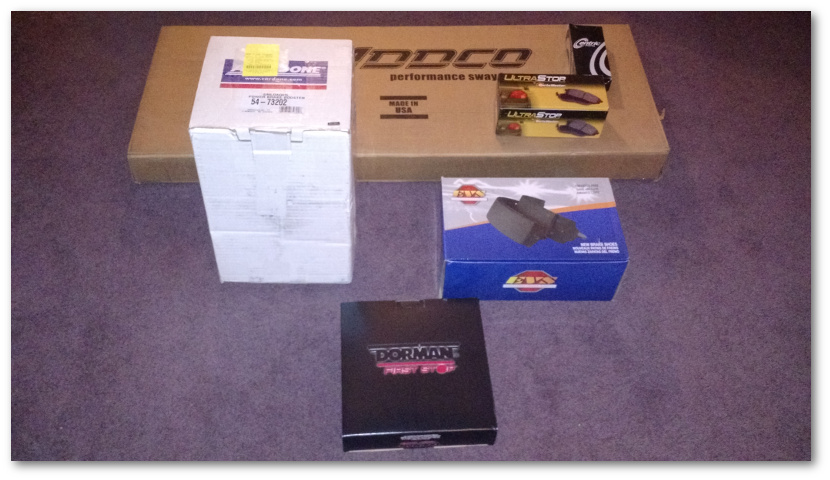
Today’s plan was the simple:
- Take the old power brake booster out

- Put the new power brake booster in (white box)

- Attach the new brake master cylinder
- Disassemble the front brakes in order to get the rotors ready for resurfacing

Today’s inspirational result:
- Take the old power brake booster out
Put the new power brake booster inAttach the new brake master cylinderDisassemble the front brakes in order to get the rotors ready for resurfacing
So, yeah. I’ve got a lot of work to do in order to set realistic expectations. But hey, 25% is still better than 0% – and the bloody thing is finally out:
When I say “bloody” I do mean that literally. Today, the Mustang drew first blood:
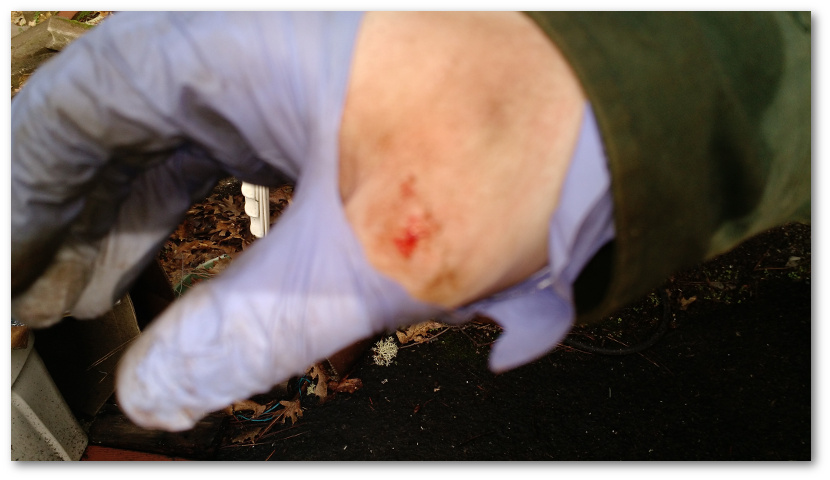
Yeah, it’s not much but it does help to demonstrate part of the reason why it took us four hours to remove four nuts. There’s, uh… not much room up under the dash – and the bloody nuts did not want to move.

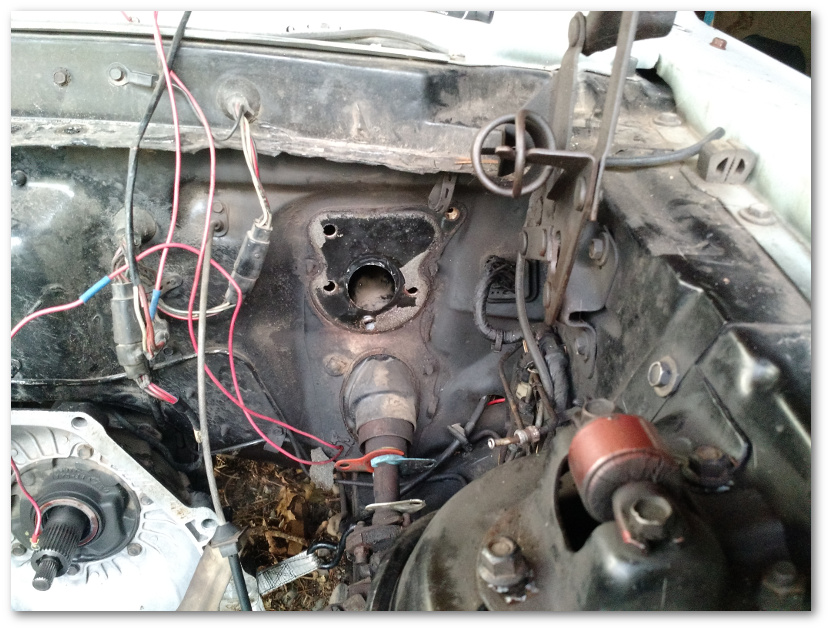
Here’s a shot from under the dash. The black thing on the right is the steering column. The one hole to the left of it is the one nut that came out pretty easily. The other three? They were totally behind/under/blocked by other stuff. And by “other stuff” I mean sharp, painful, engineers-laughing-at-the-mechanics-as-they-designed-this sharp.
So, four hours and four nuts yielded us this (cat for scale):
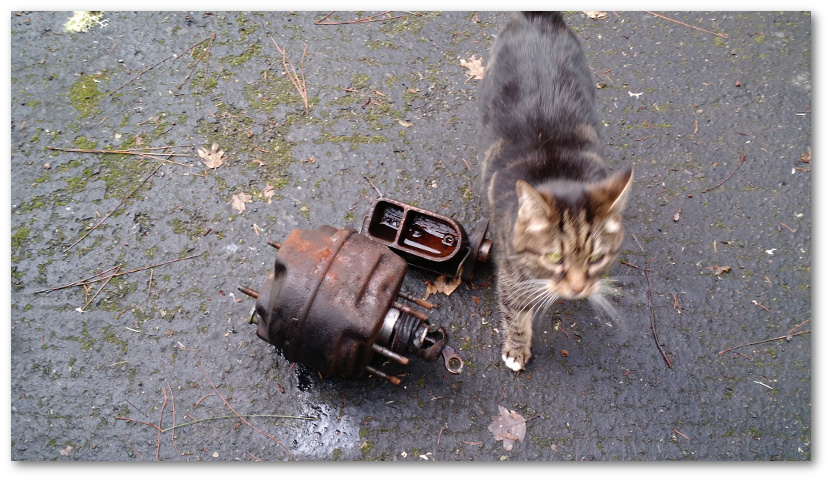
Notice the broken rubber piece to the left of the cat’s right front paw? Yeah, that brake power booster was toast. I’m glad it’s gone.
With the brake power booster out, we decided to make a small change in plans. Instead of putting the new piece back in, we’ve decided to take advantage of its absence to more easily reach the brake line distribution block.
All of the brake lines that go into this valve are going to be replaced with parts that (hopefully) arrive this week. With the power booster out of the way, we’ll be able to do this slightly less encumbered by things in the way.
Oh, by the way…
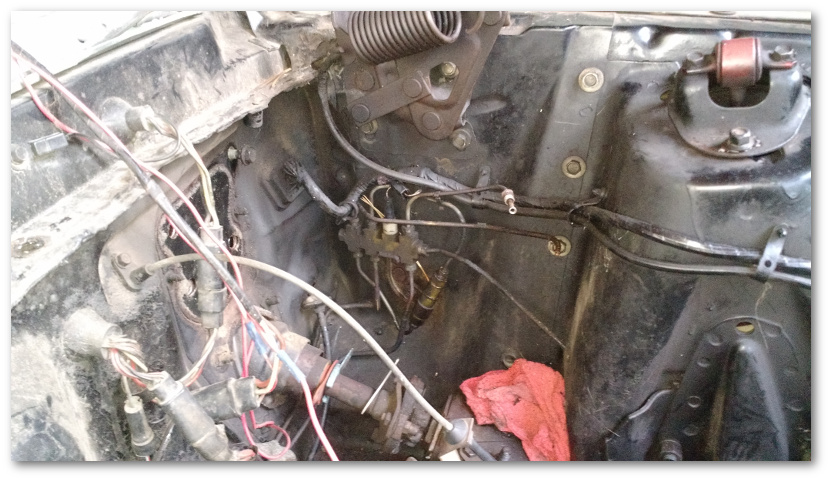
If you’re ever replacing a 69 Mustang’s power brake booster and you want to avoid playing a 30 minute game of “what’d we do with the brake light switch” you might want to read on. Instead of where you think the brake light switch is going to be (on or attached somewhere to the brake pedal) the 69 Mustang has the switch actually attached directly to the hydraulic system.
Smack in the middle of the picture above (on the top of the mutant-spider-looking thing with all the hose lines attached – otherwise known as the distribution block) you’ll see a white attachment. That attachment is actually the brake light switch. When you press down on the brake pedal, you pressurize the hydraulic fluid. This pressurization is what actually triggers the switch to send the please-turn-the-brake-lights-on-now signal to the rear of the car.
UPDATE:
As it turns out, the switch that’s attached to the hydraulic system is not for the brake lights. It is for an “idiot light” in the dash. There actually is a brake light switch and it goes exactly where we thought it should when we were looking for it. The reason we couldn’t find it is because the previous owner had taken it off and thrown it in a box in the back. Why? Who knows.
UPDATE 2:
Here’s how that “idiot light” switch works.
The more you know…

The car is getting there… But so far, can I tell you that the cat picture is awesome?
LikeLike