Enginesis Piston 1: Cylinder 1

Sunday was a good day.

Today was better.

Today, the sun was out, the fog was gone…and oh, I got to watch my engine be born:with-camshaft

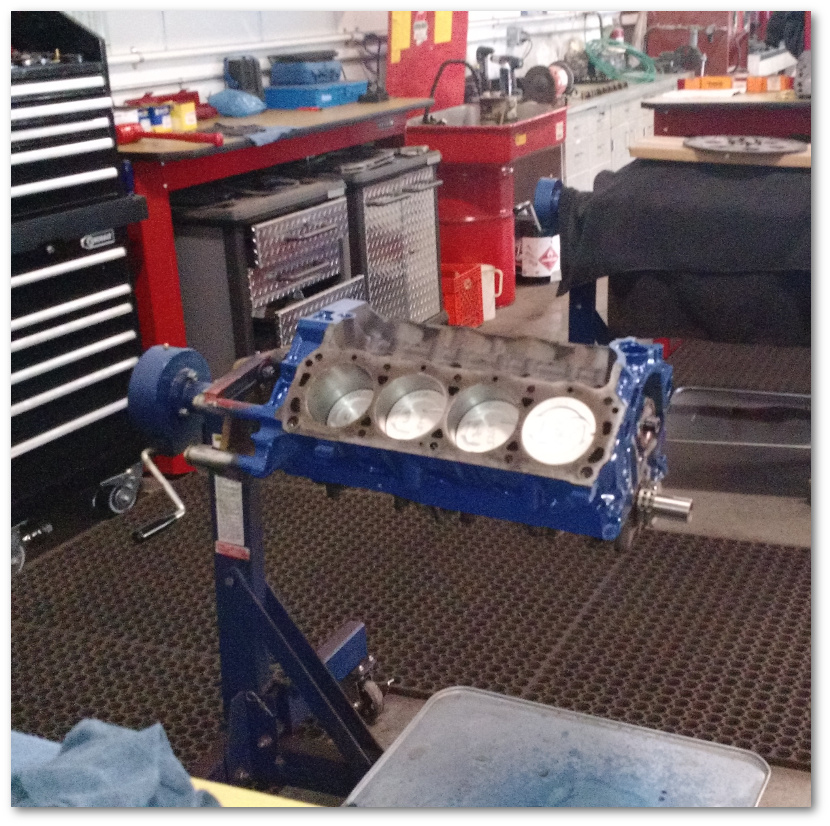
Gary at Speedy Automotive was especially awesome, spending the time to talk about what he was doing and why. We talked shop about cars and planes (he’s a pilot like my brother in law) and I had an awesome afternoon.

I found out the expected horsepower of the engine will be somewhere around 270-280 horsepower. This is up around 70 from the stock engine which is cool. I wasn’t looking for a racer so this is a nice bump without having the expense and maintenance of a super high output engine.

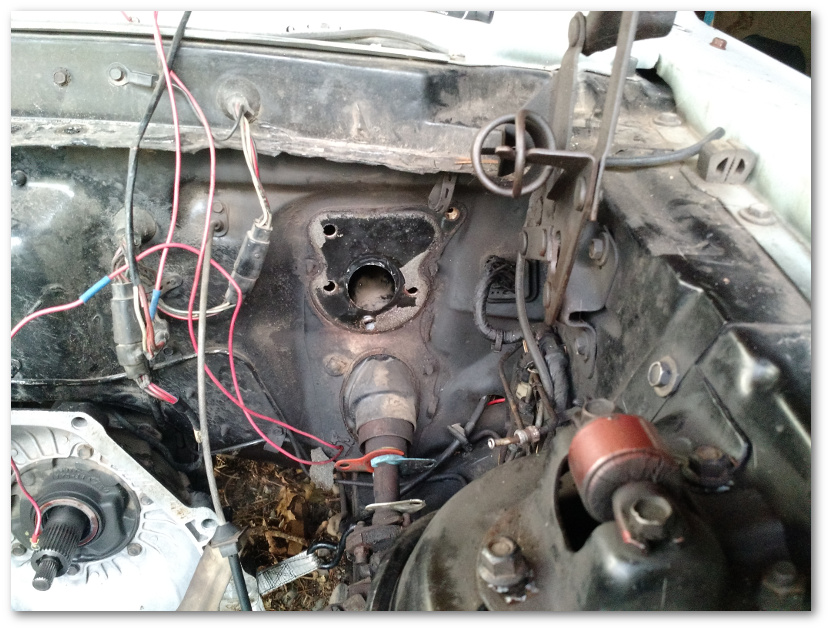
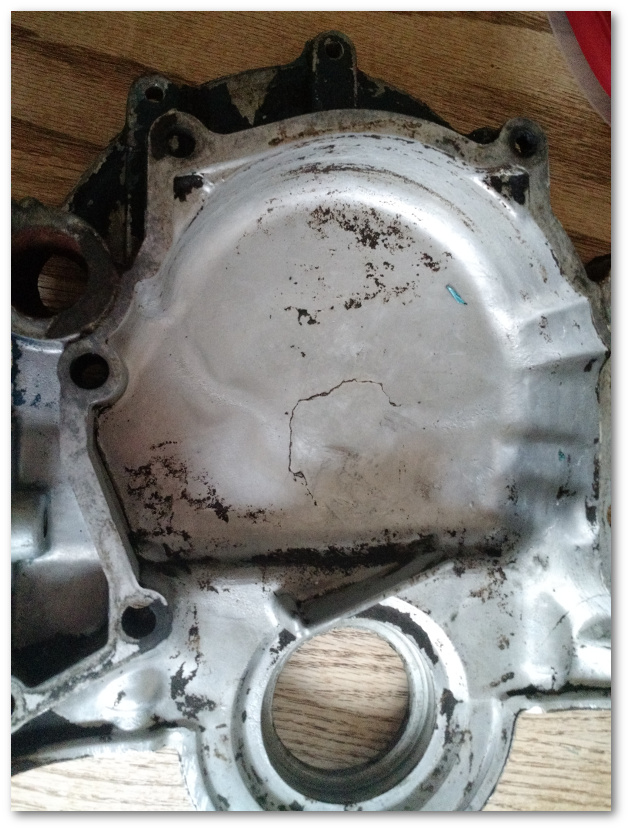
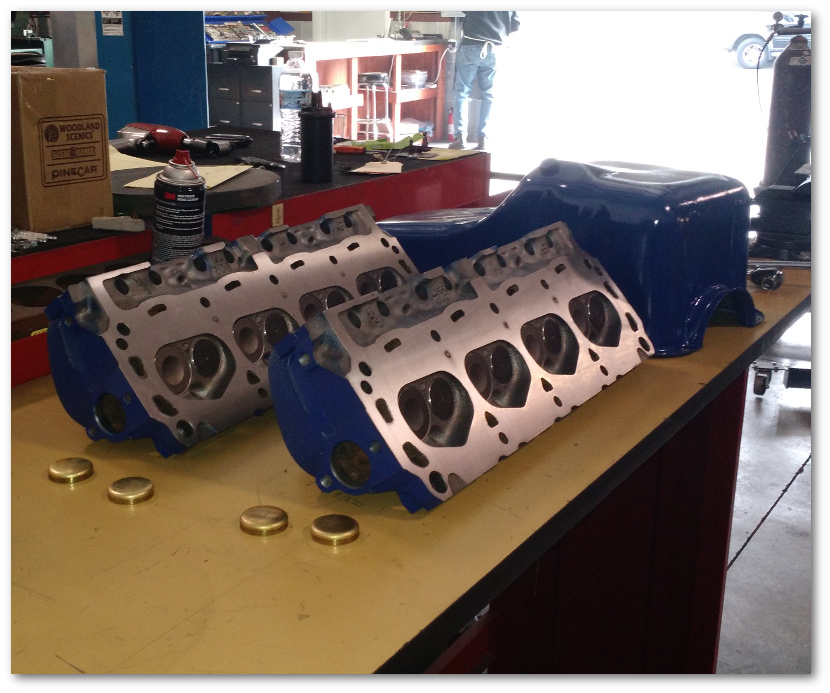
Here’s a shot of my newly machined heads with my freshly painted oil pan in the background:

heads

I’m absolutely amazed at the level of detail that these guys have gone to as they’ve prepped the engine just to get to this stage. Here’s just a small summary of the things they’ve done:

  • Measured each and every piston to a precision of ten-thousands of an inch.
  • Bored and honed each and every cylinder to the exact size needed for the piston going into it. Each cylinder is fractionally different than the others to compensate for the manufacturing differences in the pistons.
  • Custom bored each cylinder to correct for a previous seven degree difference between their angles to the crank shaft. All of the cylinders are now directly over the shaft.

And the list goes on. These guys are great.

Gary and team will continue working on the engine tomorrow and into early next week. It will be home soon.

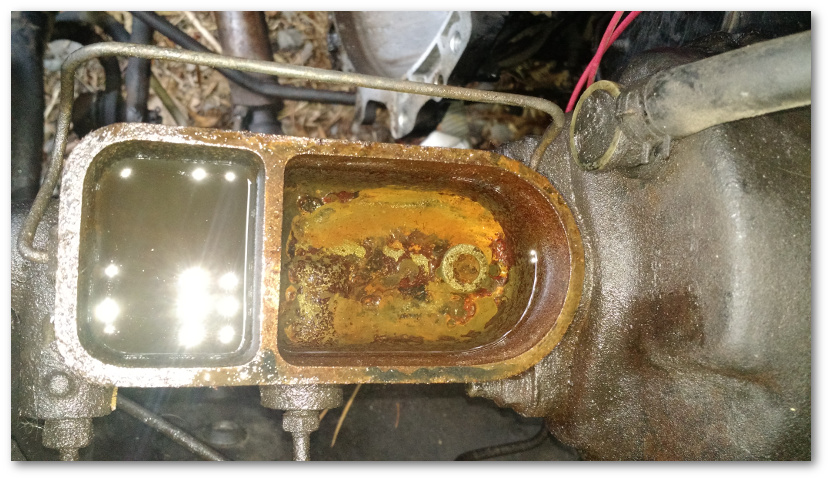
In the mean time, I’ll keep looking at this carburative work of art:

carburetor

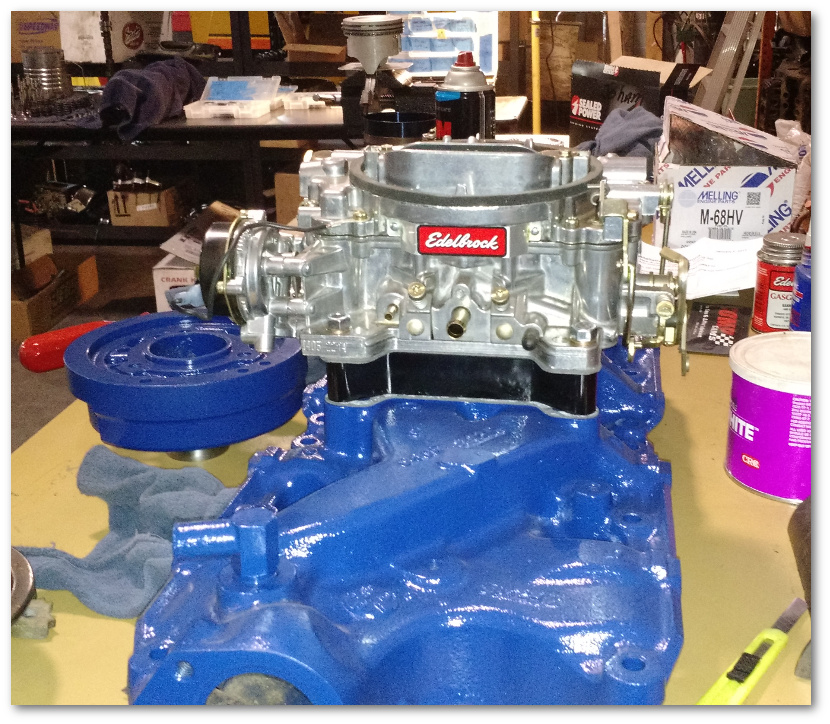
and dreaming of the sound this engine will someday make when it’s home and installed.

Today was a good day indeed.

Momentum Sways To Our Favor….

Today was a good day.

Remember last week when it took us roughly four hours to get four nuts off the old power brake booster? Yeah, that kinda sucked. Today though…today was a totally different experience.

We had originally planned on changing out (or at least starting to change out) the brake lines today. Unfortunately, even though 213,244 boxes of brake parts were delivered to my house this week, the brake lines decided not to be in any of them. UPS says I should (naturally) have them tomorrow.

So, we went with Plan “B”:

NewAntiSwayBar

That is a 1 1/8 inch diameter front anti-sway bar – and its associated installation accessories. Anti-sway bars (or stability bars) are used to help keep the car from swaying from side to side during turns. Here’s an example of the difference anti-sway bars can have in a car’s cornering:

I vividly remember my old Mustang’s inability to corner. I want my new Mustang’s handling to be better, so I decided to purchase a much stiffer anti-sway bar and install it to see how much difference it makes. Here’s a shot at the difference between the two bars. The stock anti-sway bar is on the top and the new (and much thicker) one is on the bottom:

NewSwayVsOldSwayCloseup

Here’s a wider-angle shot:

NewSwayVsOldSway

An anti-sway bar is held in by four bolts that attach to the chassis and one bolt on each side of the car that affix the bar to the suspension.

Six bolts in total. We’re doomed, right?

Not Today!

The following was accomplished in about an hour and a half:

NewSwayInstalled

Everything went disturbingly smooth. I’m sure we did something wrong, but as far as we can tell, the old bolts came right off and the new stuff easily bolted right back on.

At one point, we stopped for a moment and contemplated something really cool. The only thing we’ve really done so far on the Mustang is take stuff off. Today we changed that. Today we were putting something on. Something that was going to stay on.

That was a hell of a nice realization.

The More I Learn, The More I Know How Little I Know

Call from the machine shop today:

Hi David, it’s Gary. Hey, we’re about ready to balance the engine and I was hoping you could bring your flex plate down.

Now, I generally try to avoid looking like a total idiot – but it was hard in this case to hide the fact that I was emergency-googling(tm) what a flex plate was while trying to make small talk over the phone.

As it turns out, what I was calling a flywheel in the following picture:

bottom of engine

The flywheel is on the left and the crankshaft is in the middle

Isn’t actually a flywheel. My Mustang has an automatic transmission. In cars with automatic transmissions, the flywheel is replaced by what’s called a flex plate. The use of this part is explained well in the first few minutes of the following video (before it devolves into an advertisement):

My car has now been introduced to how bad I am with names. I’ve been calling Mr. FlexPlate Mr. FlyWheel for upwards of a month and I had no idea. As it turns out, Mr. FlexPlate was actually at the machine shop. He was hiding under a box of parts, probably due to being depressed from my constant misidentification.

I also learned the other day how big my rear end actually is. OK, you can stop your immature laughing now, this is serious.

A car’s rear-end is also known as its differential. A differential is the part of the power train that (in a simplified sense) sits between the transmission and the wheels. The best explanation ever of the wizardry behind how a differential works is found in the following video:

As it turns out – as it always turns out – there’s more than one type of differential that can be installed in my year of Mustang. When I ordered my brake lines, one of the questions the ordering site asked was the size of my rear end. I believe my exact words were:

You’ve &*(%* got to be kidding me. What the &*($# does it matter to the brake lines what size my differential is?

Sadly, no amount of yelling at Firefox could change the fact that I needed to learn how to identify the type/size of differential my Mustang has.

Thank Flying Spaghetti Monster for YouTube:

I also relied heavily on the virtual masters thesis written about Ford rear ends on this blog.

After all that, I took a picture and went down to my local repair shop and asked :). I had what I thought was an answer, but I wanted someone actually qualified to give an opinion. Turns out, my guess was right – yea me…

So, for the curious if your 69 Mustang’s rear end looks like this:differential

You have an eight-inch rear end. If only I could say that about…. nah, not going there.

So, I’m learning a ton during this process. But it’s amazing that the more I learn, the more I know how little I know. But I’ll keep learning and someday I’ll know enough to not have to pretend I know what I’m talking about when I’m on the phone with my machine shop.

Blood, Sweat And Gears…

Today’s plan was the simple:

  • Take the old power brake booster out
    power brake booster
  • Put the new power brake booster in (white box)
    Brake and suspension parts
  • Attach the new brake master cylinder
  • Disassemble the front brakes in order to get the rotors ready for resurfacing

Today’s inspirational result:

  • Take the old power brake booster out
  • Put the new power brake booster in
  • Attach the new brake master cylinder
  • Disassemble the front brakes in order to get the rotors ready for resurfacing

So, yeah. I’ve got a lot of work to do in order to set realistic expectations. But hey, 25% is still better than 0% – and the bloody thing is finally out:

PowerBoosterOut

When I say “bloody” I do mean that literally. Today, the Mustang drew first blood:

mywittleowie

Yeah, it’s not much but it does help to demonstrate part of the reason why it took us four hours to remove four nuts. There’s, uh… not much room up under the dash – and the bloody nuts did not want to move.

powerbrakeboosterfrominside

Here’s a shot from under the dash. The black thing on the right is the steering column. The one hole to the left of it is the one nut that came out pretty easily. The other three? They were totally behind/under/blocked by other stuff. And by “other stuff” I mean sharp, painful, engineers-laughing-at-the-mechanics-as-they-designed-this sharp.

So, four hours and four nuts yielded us this (cat for scale):

oldbrokenpowerbooster

Notice the broken rubber piece to the left of the cat’s right front paw? Yeah, that brake power booster was toast. I’m glad it’s gone.

With the brake power booster out, we decided to make a small change in plans. Instead of putting the new piece back in, we’ve decided to take advantage of its absence to more easily reach the brake line distribution block.

proportionvalve

All of the brake lines that go into this valve are going to be replaced with parts that (hopefully) arrive this week. With the power booster out of the way, we’ll be able to do this slightly less encumbered by things in the way.

Oh, by the way…

If you’re ever replacing a 69 Mustang’s power brake booster and you want to avoid playing a 30 minute game of “what’d we do with the brake light switch” you might want to read on. Instead of where you think the brake light switch is going to be (on or attached somewhere to the brake pedal) the 69 Mustang has the switch actually attached directly to the hydraulic system.

Smack in the middle of the picture above (on the top of the mutant-spider-looking thing with all the hose lines attached – otherwise known as the distribution block) you’ll see a white attachment. That attachment is actually the brake light switch. When you press down on the brake pedal, you pressurize the hydraulic fluid. This pressurization is what actually triggers the switch to send the please-turn-the-brake-lights-on-now signal to the rear of the car.

UPDATE:

As it turns out, the switch that’s attached to the hydraulic system is not for the brake lights. It is for an “idiot light” in the dash. There actually is a brake light switch and it goes exactly where we thought it should when we were looking for it. The reason we couldn’t find it is because the previous owner had taken it off and thrown it in a box in the back. Why? Who knows.

UPDATE 2:

Here’s how that “idiot light” switch works.

The more you know…

99 Boxes Of Parts On The Floor…

This project has officially become “real” with the arrival this week of boxes and boxes of parts.

Boxes of parts for the engine:

Engine parts

And boxes of parts for the brakes and suspension:Brake and suspension parts

The engine part boxes I’ll only get to look at but (likely) not touch as the machine shop will get all the fun.

The brake and suspension parts we get to do :). Included in the picture are:

  • A big new anti-sway bar (brown box) to replace the itty-bitty little one that came stock with the car.
  • A drum brake hardware kit (little black box containing a bunch of things I cannot yet identify)
  • Four disk brake pads (yellow box)
  • Two drum brake shoes (blue box)
  • A Power brake booster (big white box)
  • A disk brake hardware kit (big black box – also containing a bunch of things I cannot yet identify)

The “things I cannot yet identify” part is a wee bit frustrating. The big black box in the front contains a Dorman HW5504 Disc Brake Hardware Kit. You would think that by going to Dorman’s website you’d find out what was actually in the kit.

Nope.

What about Google?

Nada.

I think I’ve discovered the mechanic’s first rule:

The first rule of auto parts is that you don’t talk about auto parts

Or share information of any kind….Or include instructions with your packaging…

Thankfully, we have the University of YouTube that obeys no such rules. Watching this video was very helpful.

There’s still pieces in the box I can’t identify, but there’s a lot fewer of them now.

The plan for this weekend is to install the brake power booster and disassemble the front discs in order to remove the brake rotors so we can get them resurfaced. We’ll still have more parts than time, but we’ll be making a dent in the part pile.

Until the parts that are on their way already start to show up next week…

Oh Well, Them’s The Brakes…

With the engine off gallivanting around the machine shop, we decided today to find something new to blow money on fix.

Remember the Craigslist ad for the Mustang? The one that said something along the lines of

New brakes all around…

We figured “hey, it has new brakes. Sure, the car has sat but we’ll just put some brake fluid in and we’ll be all set, right?”

Right?

So…. not so much.

bad master cylinder

Our first indication something was wrong was the brake master cylinder above. What looks like rust on the bottom of the right chamber was actually a non-trivial layer of sludge – not something you’d like to see inside a hydraulic system.

Our second indication something was wrong was looking taking off the front passenger wheel to look at the disk brakes underneath. The pad looked….bad.. and wasn’t allowing the rotor to spin freely.

The third indication something was wrong came after ordering a brake rebuild kit from the auto parts store and coming home with a new master cylinder. The old master cylinder’s lines to the brake distribution block were quite happy where they were thank you and refused to move. We convinced one to turn with a vice grip and the other with a reciprocating saw.

And the last indication of the day something was wrong with the brake system was brake fluid inside the power brake booster. That’s, uh… not supposed to happen.

power brake booster

So, adding brake fluid has turned into:

Strictly speaking, the set of new brake lines (just to replace the one we had to cut) wasn’t necessary, but as it turns out it’s cheaper to buy the kit of all of them than to buy the tools and materials needed to make a new one. It might have been cheaper to have it made custom, but probably not by a lot and at that point we’d still have 50 year old brake lines everywhere else in the car.

Considering the money we’re spending to make the car go, I decided it was worth spending some to make it stop too.

Knowing My Limits

Well, as it turns out, there’s not much of the engine that’s salvageable. The cam is worn, the valve seats are shot and the valve springs are there in name only. My “change the head gasket” rebuild is now a “how many new parts do I need?!!” rebuild.

To clear up any confusion – the answer to “how many new parts do I need” is “pretty much all of them.” We’re re-using the block (after much machining), the headers (also after machining) and using a 4 barrel intake manifold that was sitting on the ground next to the car and was thrown in when I purchased it. Everything else is going to be new.

I also learned that I’m lucky we found that pitting in the cylinder. I was originally wanting to leave the bottom of the engine alone. Had we not found the pitting and left it alone, we wouldn’t have found this:

timing cover

That’s the inside of the timing cover and the big crack you see in the middle is what the machine shop says caused the coolant to leak into the crankcase. That crack is all but invisible on the outside.

The head gaskets, after weeks of accusations and finger pointing have finally been cleared of all charges by the expert testimony of Gary at Speedy Automotive.

As you might have guessed, this rebuild is now approaching the “sleep on the couch for a year” cost category. Since the machine shop shared the news, I’ve had a loud and obnoxious internal argument with myself.

On one hand, I want to rebuild this engine. On the other, I cannot afford to screw something up, blow the engine, pay to get it fixed and still finish the rest of the restoration. I also don’t like sleeping on the couch.

In the end, I’ve decided that I know my limits and rebuilding the engine from this state with this cost exceeds them. I told the machine shop today that I wanted them to do the assembly.

I then asked (fully expecting “no” for an answer) if we could participate in the assembly. Without hesitating the guy said “sure”.

blink blink… really?

Yeah no problem. We’ll let you know and you can come on down

They even offered to deliver the engine to our shop once they’re done with it. I love these guys.

So, I’m truly bummed that I won’t be rebuilding the engine myself. But, this way I know it will be done right and I won’t run the very real risk of making a very expensive mistake. At the same time, I still get to say in the future that I was there at the engine birthing.

I’m entirely fine with this.

Hitting Block Bottom

Ever wonder what the bottom of an engine looks like under the oil pan?

This:

bottom of engine

That there is the engine for the Mustang turned upside-down on the stand. The flywheel flex plate is on the left and the crankshaft is in the middle. At this point, we’ve pulled the pistons and piston accessories off. The crank and cam shafts are all that’s left of note attached to the block.

We then unceremoniously loaded everything on an old tire in the back of my truck for the short trip to the machine shop:

on truck going to machine shop

We ended up taking it to Speedy Automotive in Grants Pass after repeated glowing recommendations. Before we even dropped the engine off, they were living up to their reputation. We’d stopped in the day before New Years to talk to them about the engine. We were told to bring it in, but that they closed at noon that day. We did our best to get home, get the pistons pulled and the block loaded but we’d run out of time. I called them to let them know we wouldn’t be making it.

No worries, come on down. We’ll stay open for you.

Turns out they stayed open an extra half hour just to wait for us to get there, unload the engine and shoot the breeze about what we wanted. Sweet!

The plan is to have them machine the block and heads and have a look at all the engine-y bits to see what makes sense to keep and what needs replacing. After that, they’ll send us home with all the major parts needed to put the engine back together.

We’ll get their recommendations on Tuesday or Wednesday. After that, we’ll see how long it takes to get all the pieces back.

I can’t wait.